Hello Friends, Lets learn beautiful Monarch Butterfly Drawing with easy step on paper. in this article you will learn step by step guidance to draw Saffron Monarch Butterfly. by simply following below step you can easily start to draw the Monarch butterfly.
Facts About Monarch Butterfly
According to National Geographic channel Monarch Butterfly is king of Butterfly. and also this species are more old species from planet earth. following are some interesting fact about Monarch Butterfly.
- Super Traveler: Monarch Butterflies are amazing traveller. they travel thousands of mile from North America to Mexico or California.
- Heavy Changes: They start their journey from small egg on special plants called milkweed. then they eats lots of food and becomes caterpillar. After self developing long time, they turn into chrysalises and finally transform into beautiful butterflies!
- Iconic Beauty: Due to vibrant saffron colour and dark black outline and white dots on wings Monarch butterfly look unique and beautiful in nature.
- Sense of Direction: for travelling purpose butterflies use sun and earth magnetic field, according to scientist.
Stationery List:
- White colour Sketchbook
- Colour Pencil (I use Faber-Castell colour pencil)
- White Glass Pencil
- Drawing 0.2mm Technical Pointer Pen
- 4HB Pencil
Check our post Butterfly Drawing for Kids here..
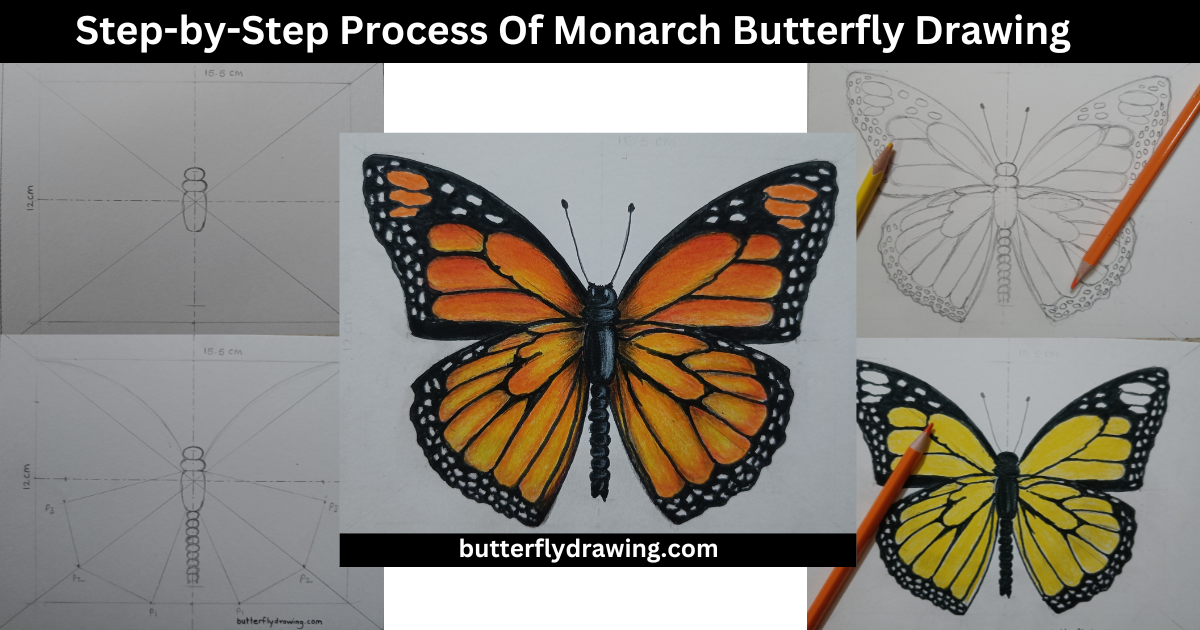
Quick Recap of Monarch Butterfly Drawing
Step-by-Step Guidance for a Monarch Butterfly Drawing
Follow the following step then you will become expert in Monarch Butterfly Drawing. Notice all tips and tricks provided below.

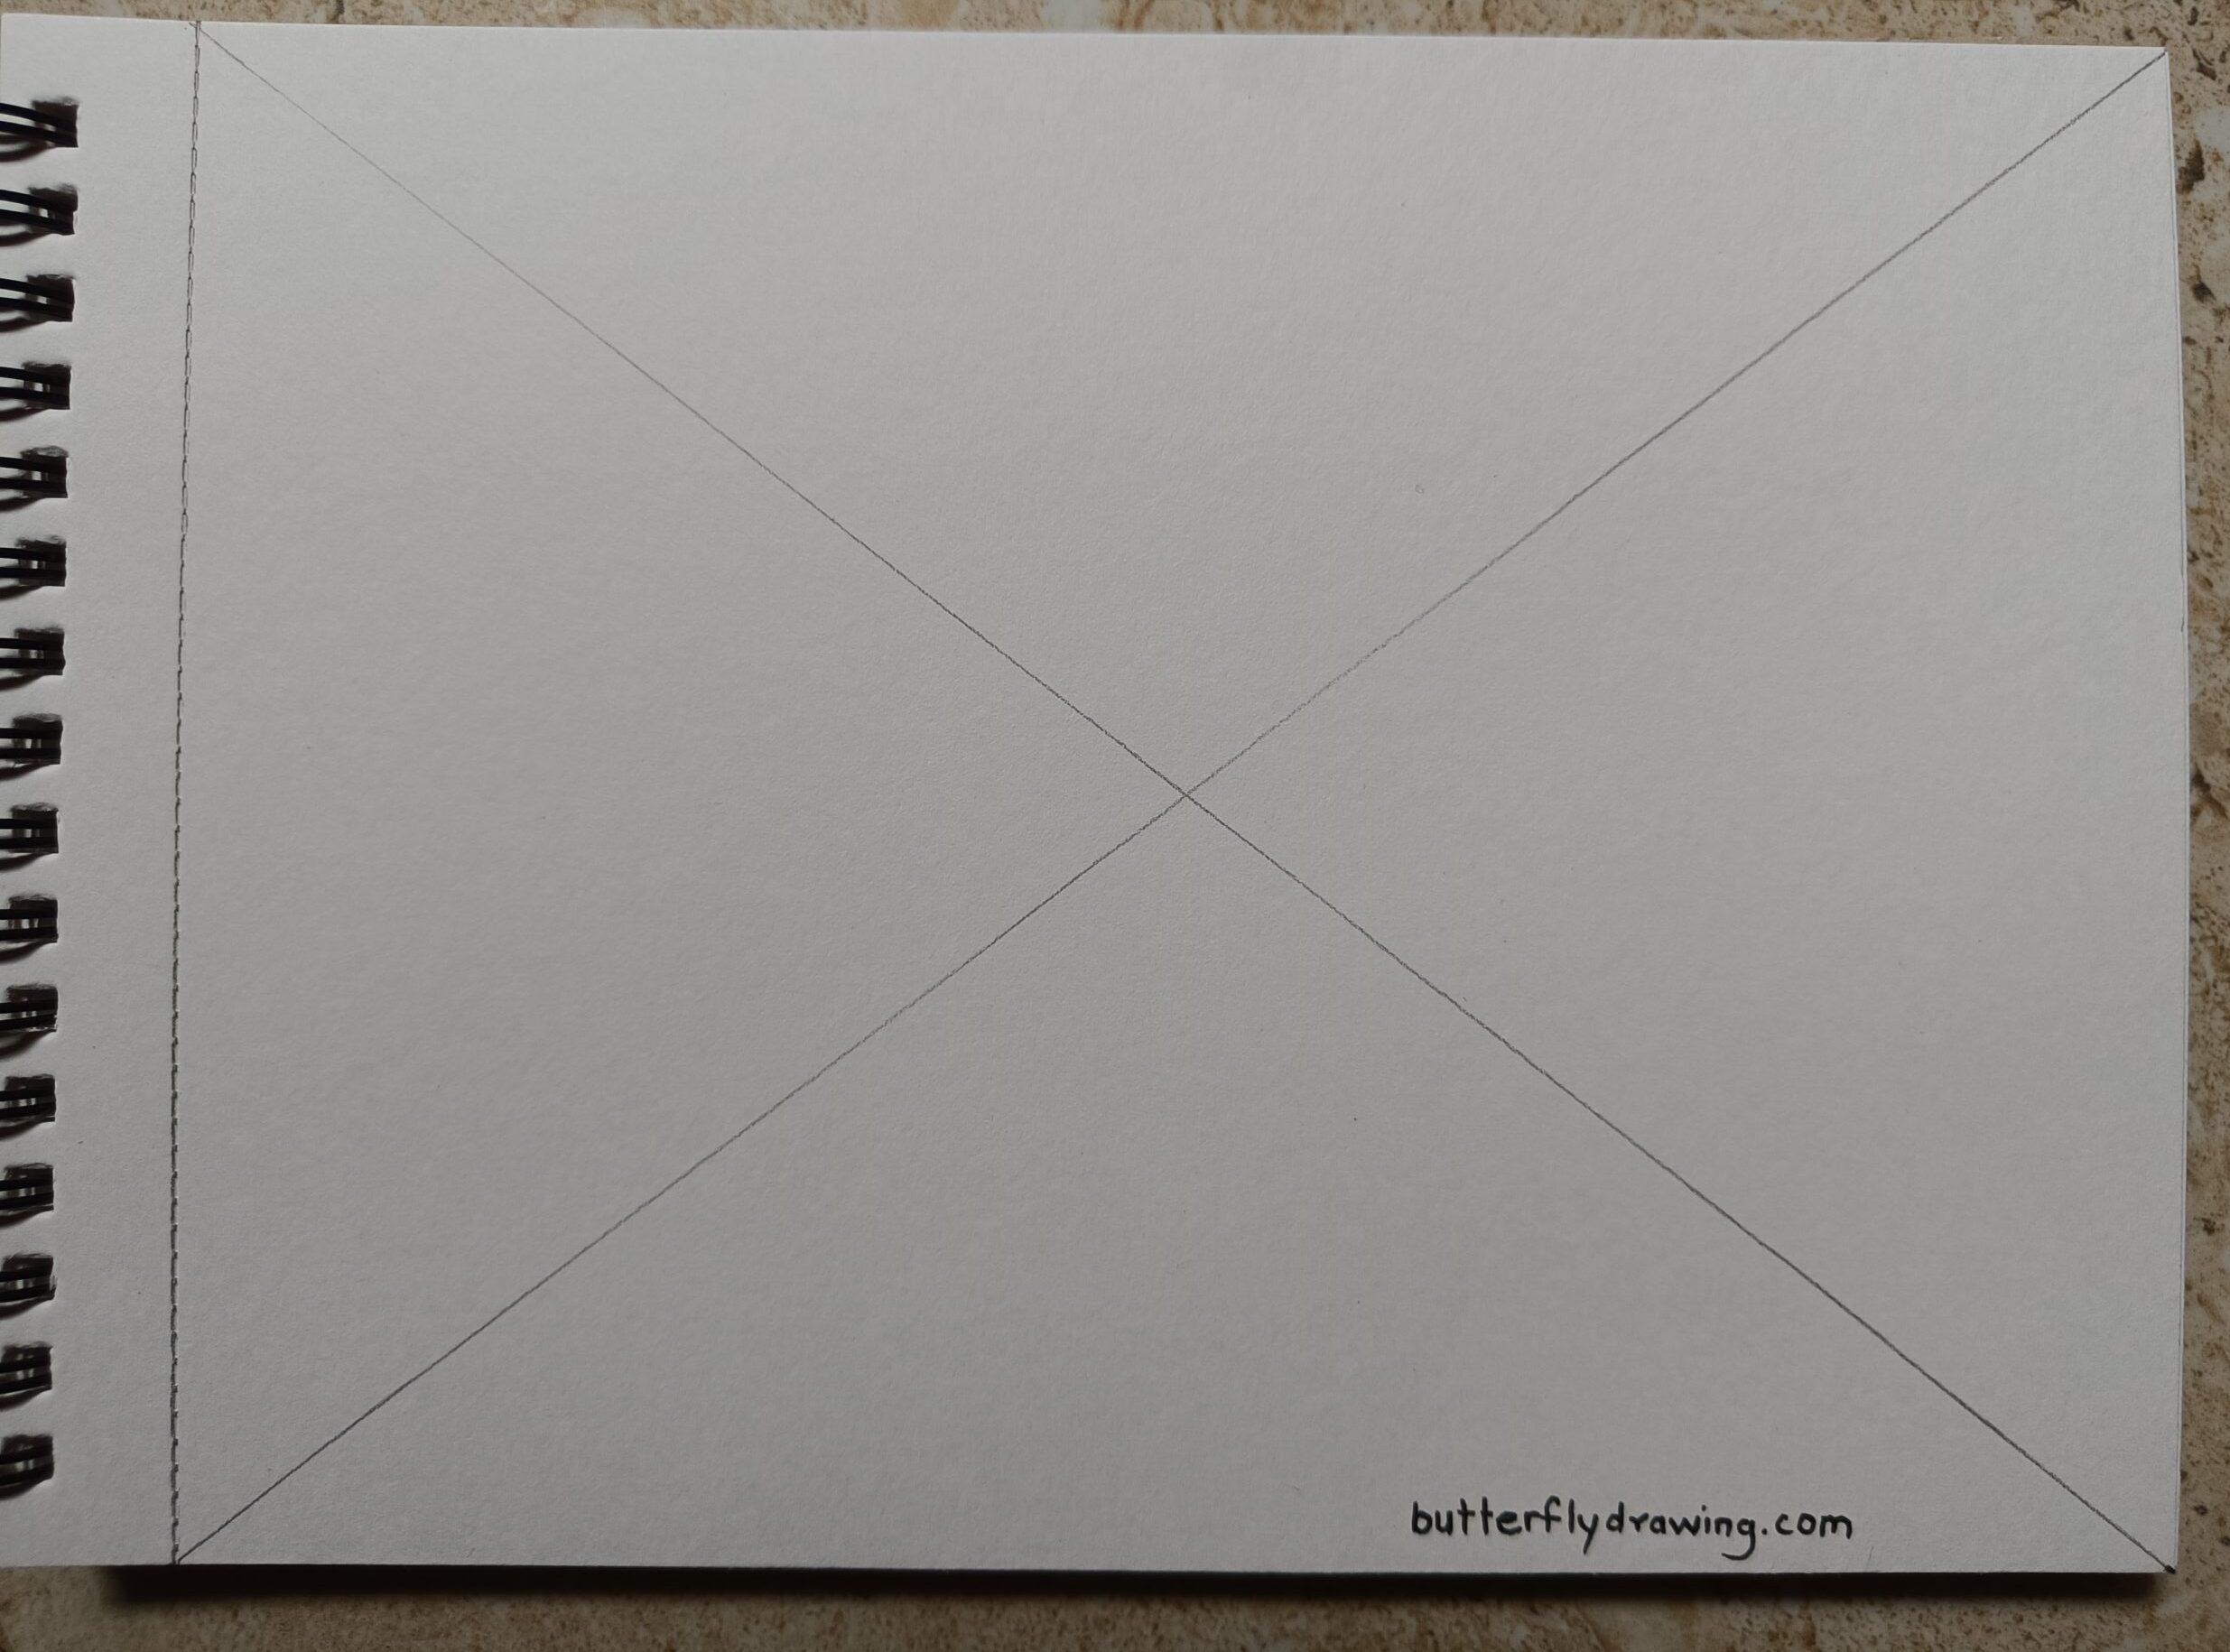
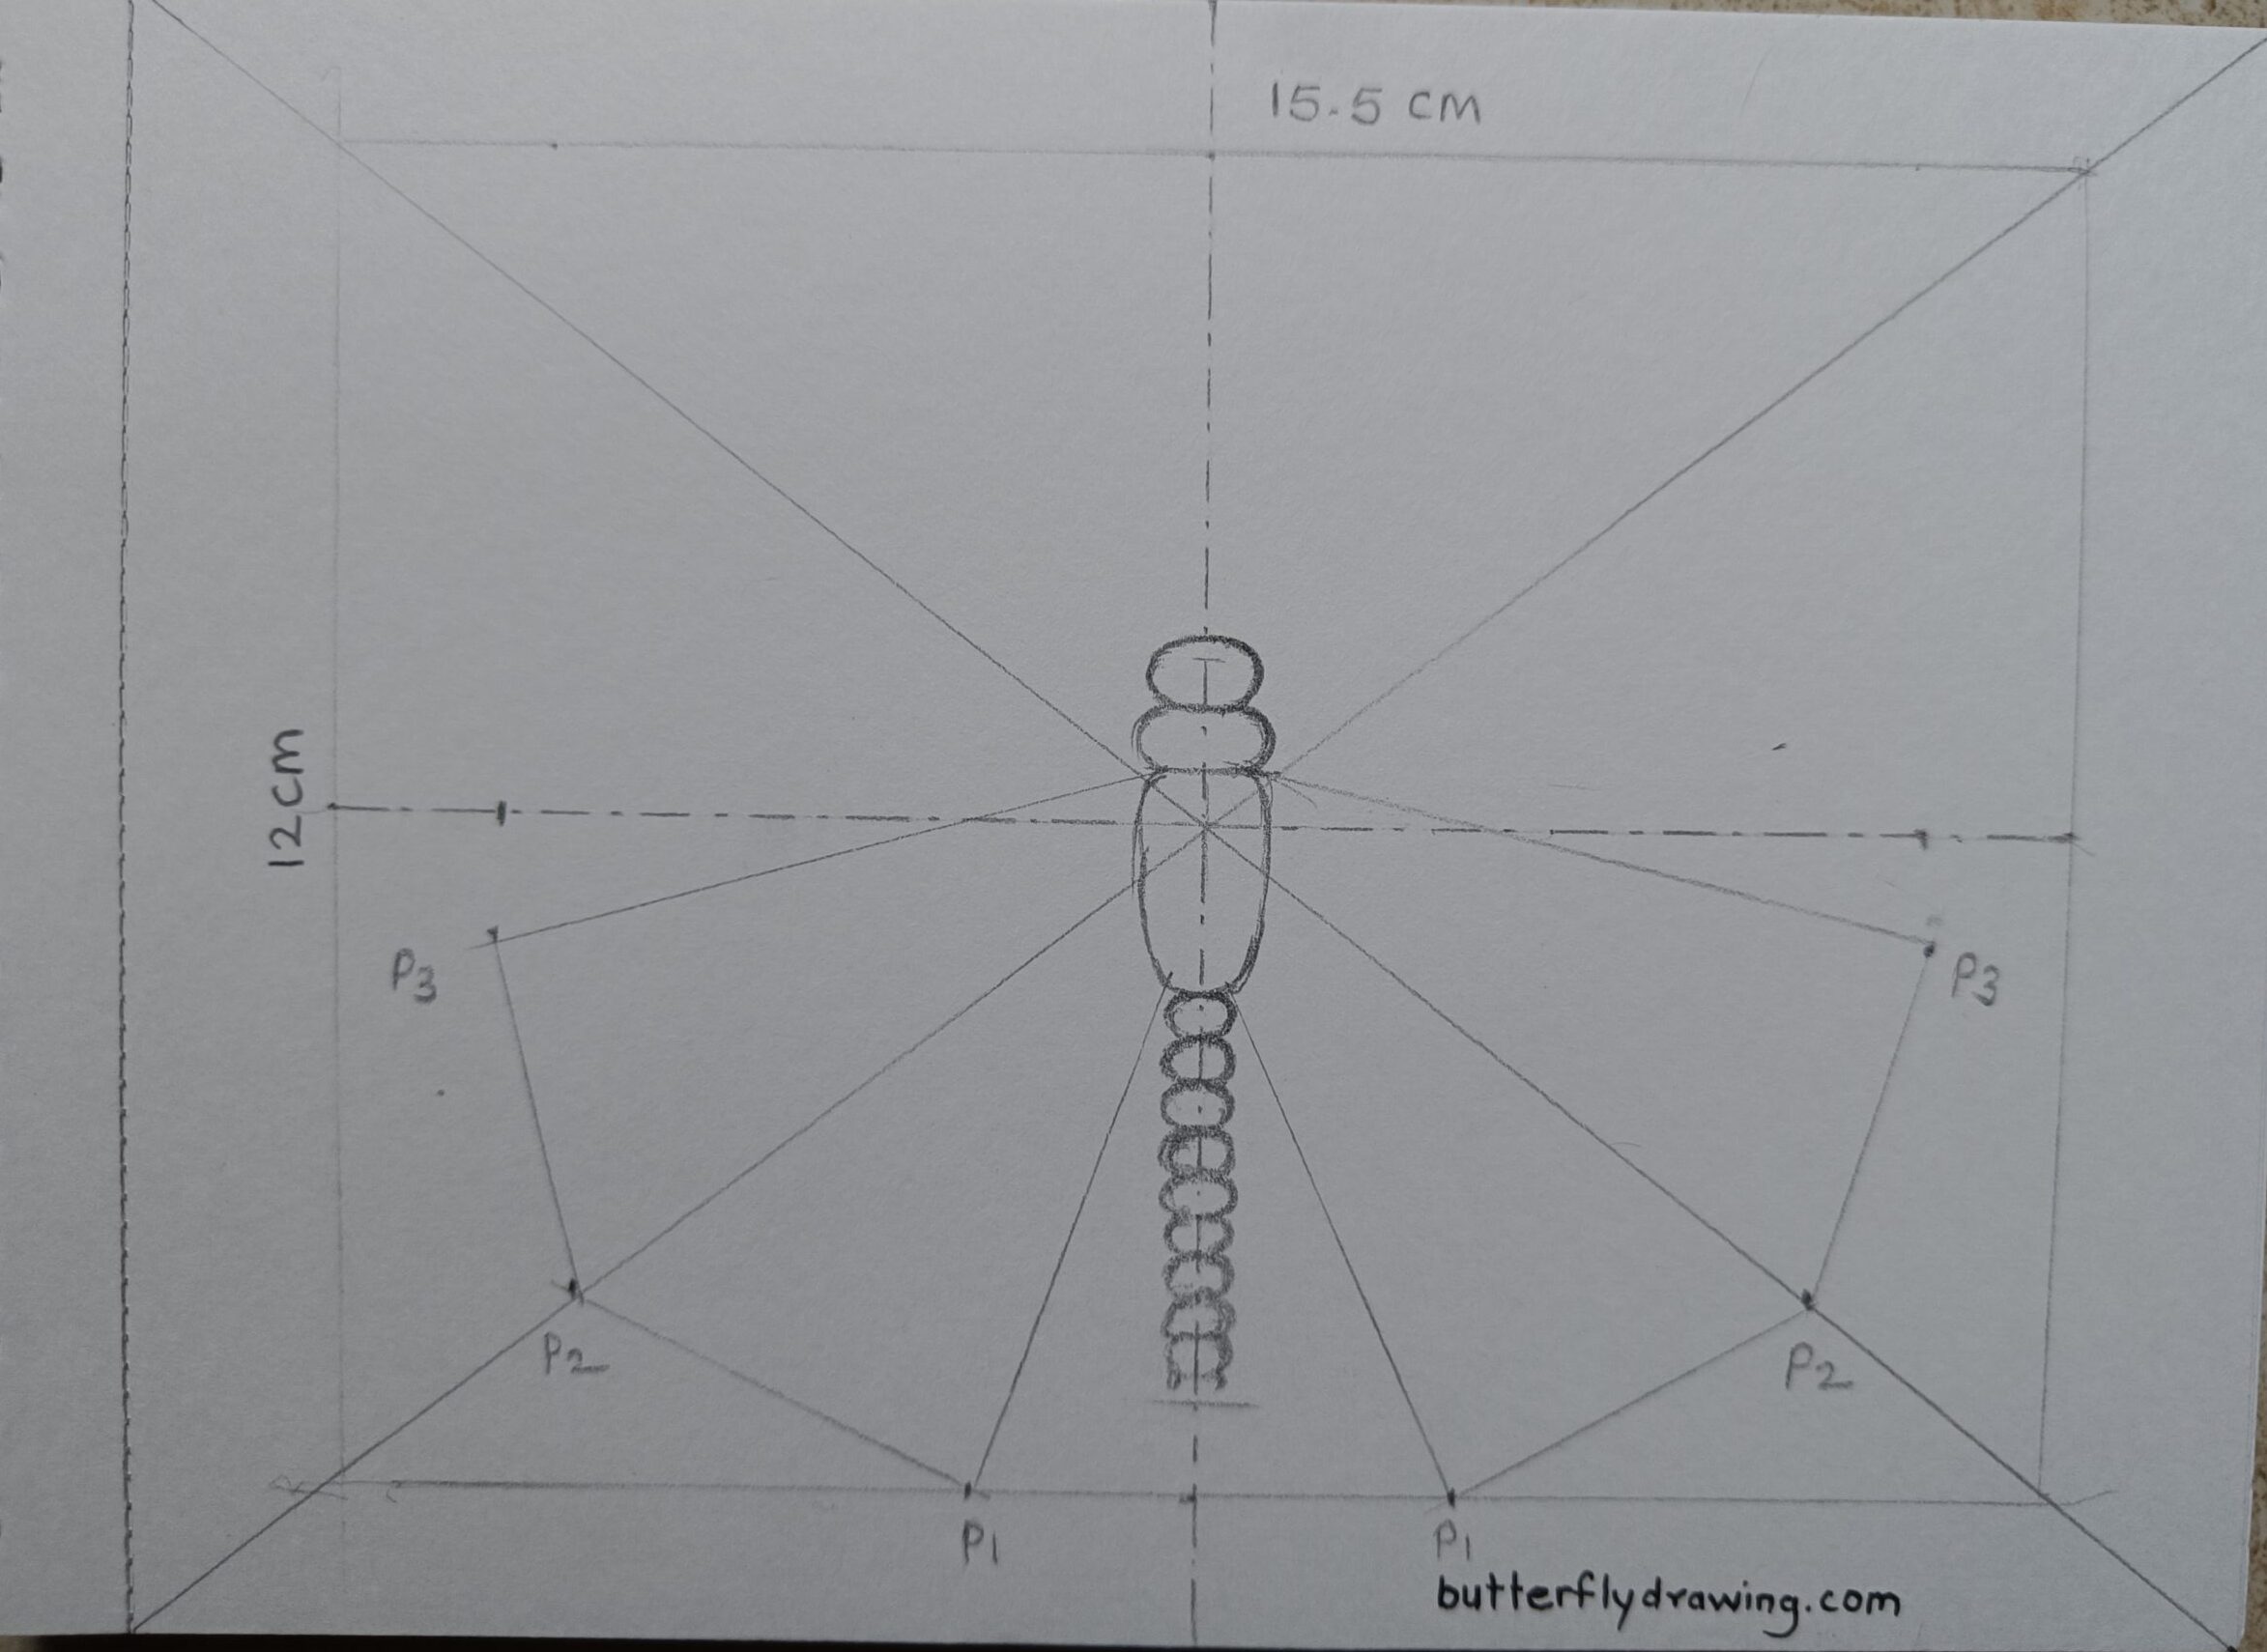
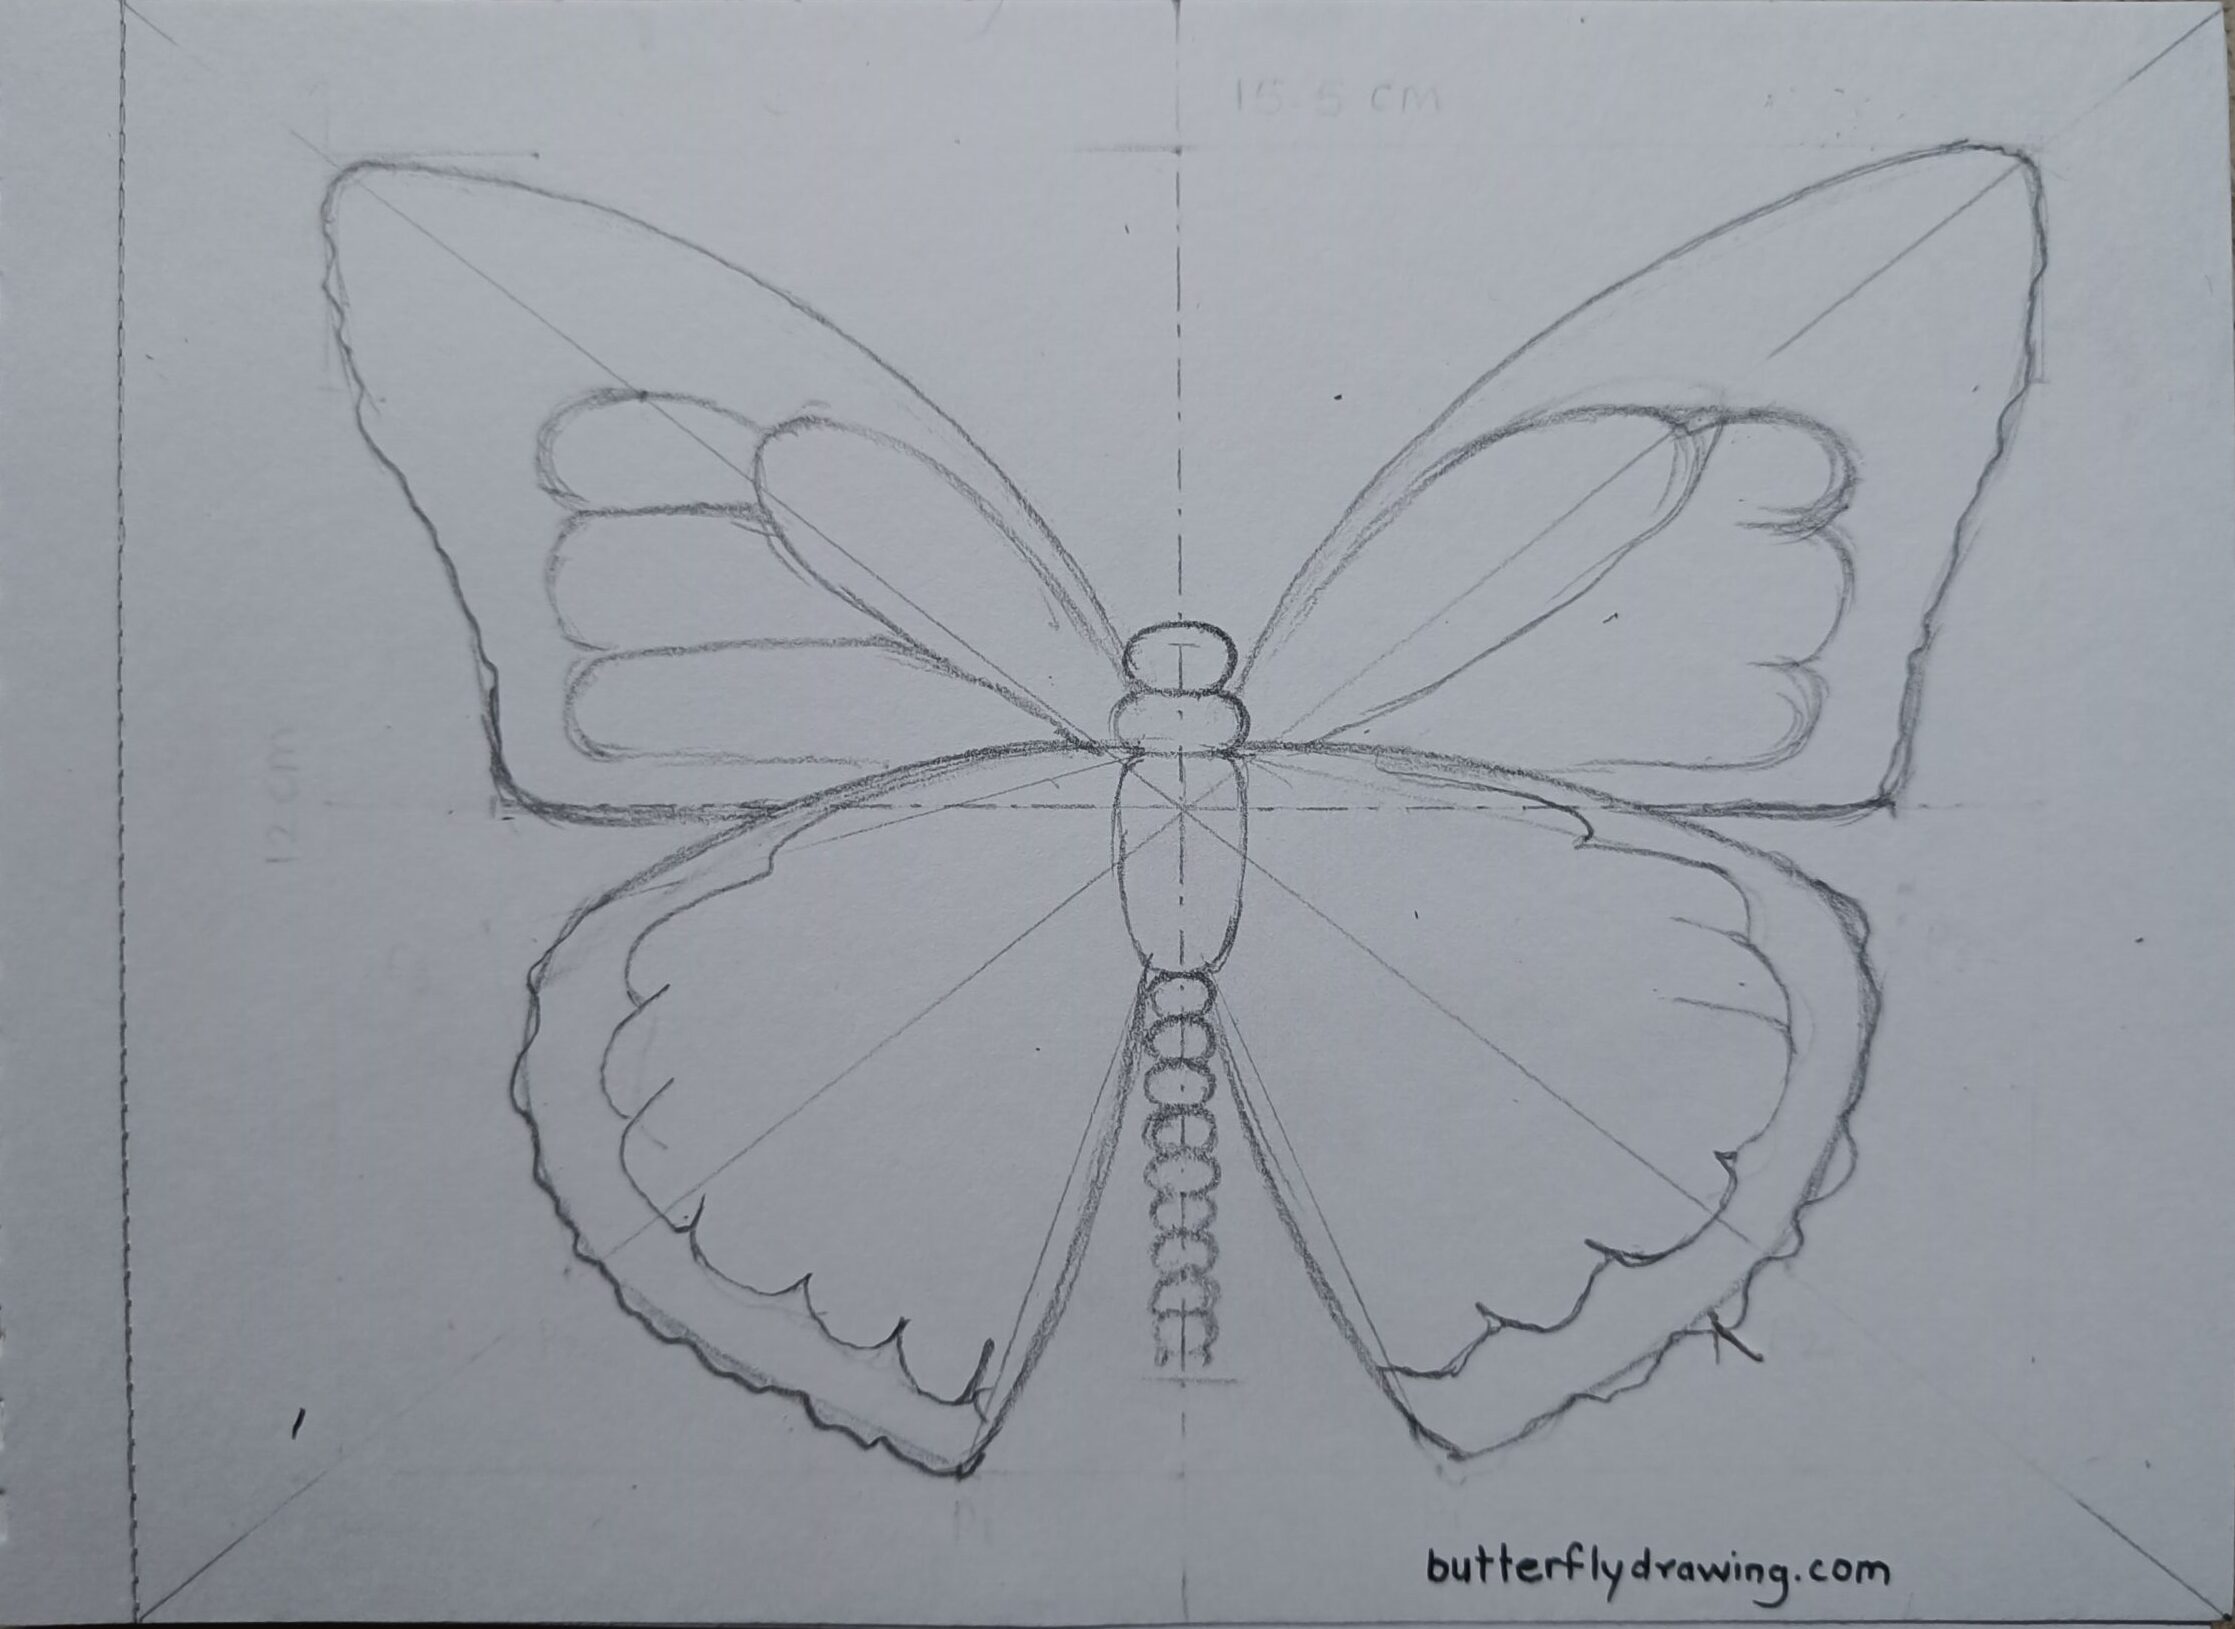
Step 1: Draw Geometrical Construction
Butterflies have same body construction on left and right side. to keep symmetric shape you should use geometrical method to draw complete basic shape.
- On your Drawing Notebook Intersect to line from edge of corner.
- Create point of intersection which is actually centre point of Notebook.
- Draw rectangle with help of intersecting line as shown in figure. I draw 15.5 cm x 12 cm rectangle. it may be different according to page size. but you can manage size by moving scale on interacting line. try to drawing 15.5 cm x 12 cm which is standard for Monarch Butterfly Drawing
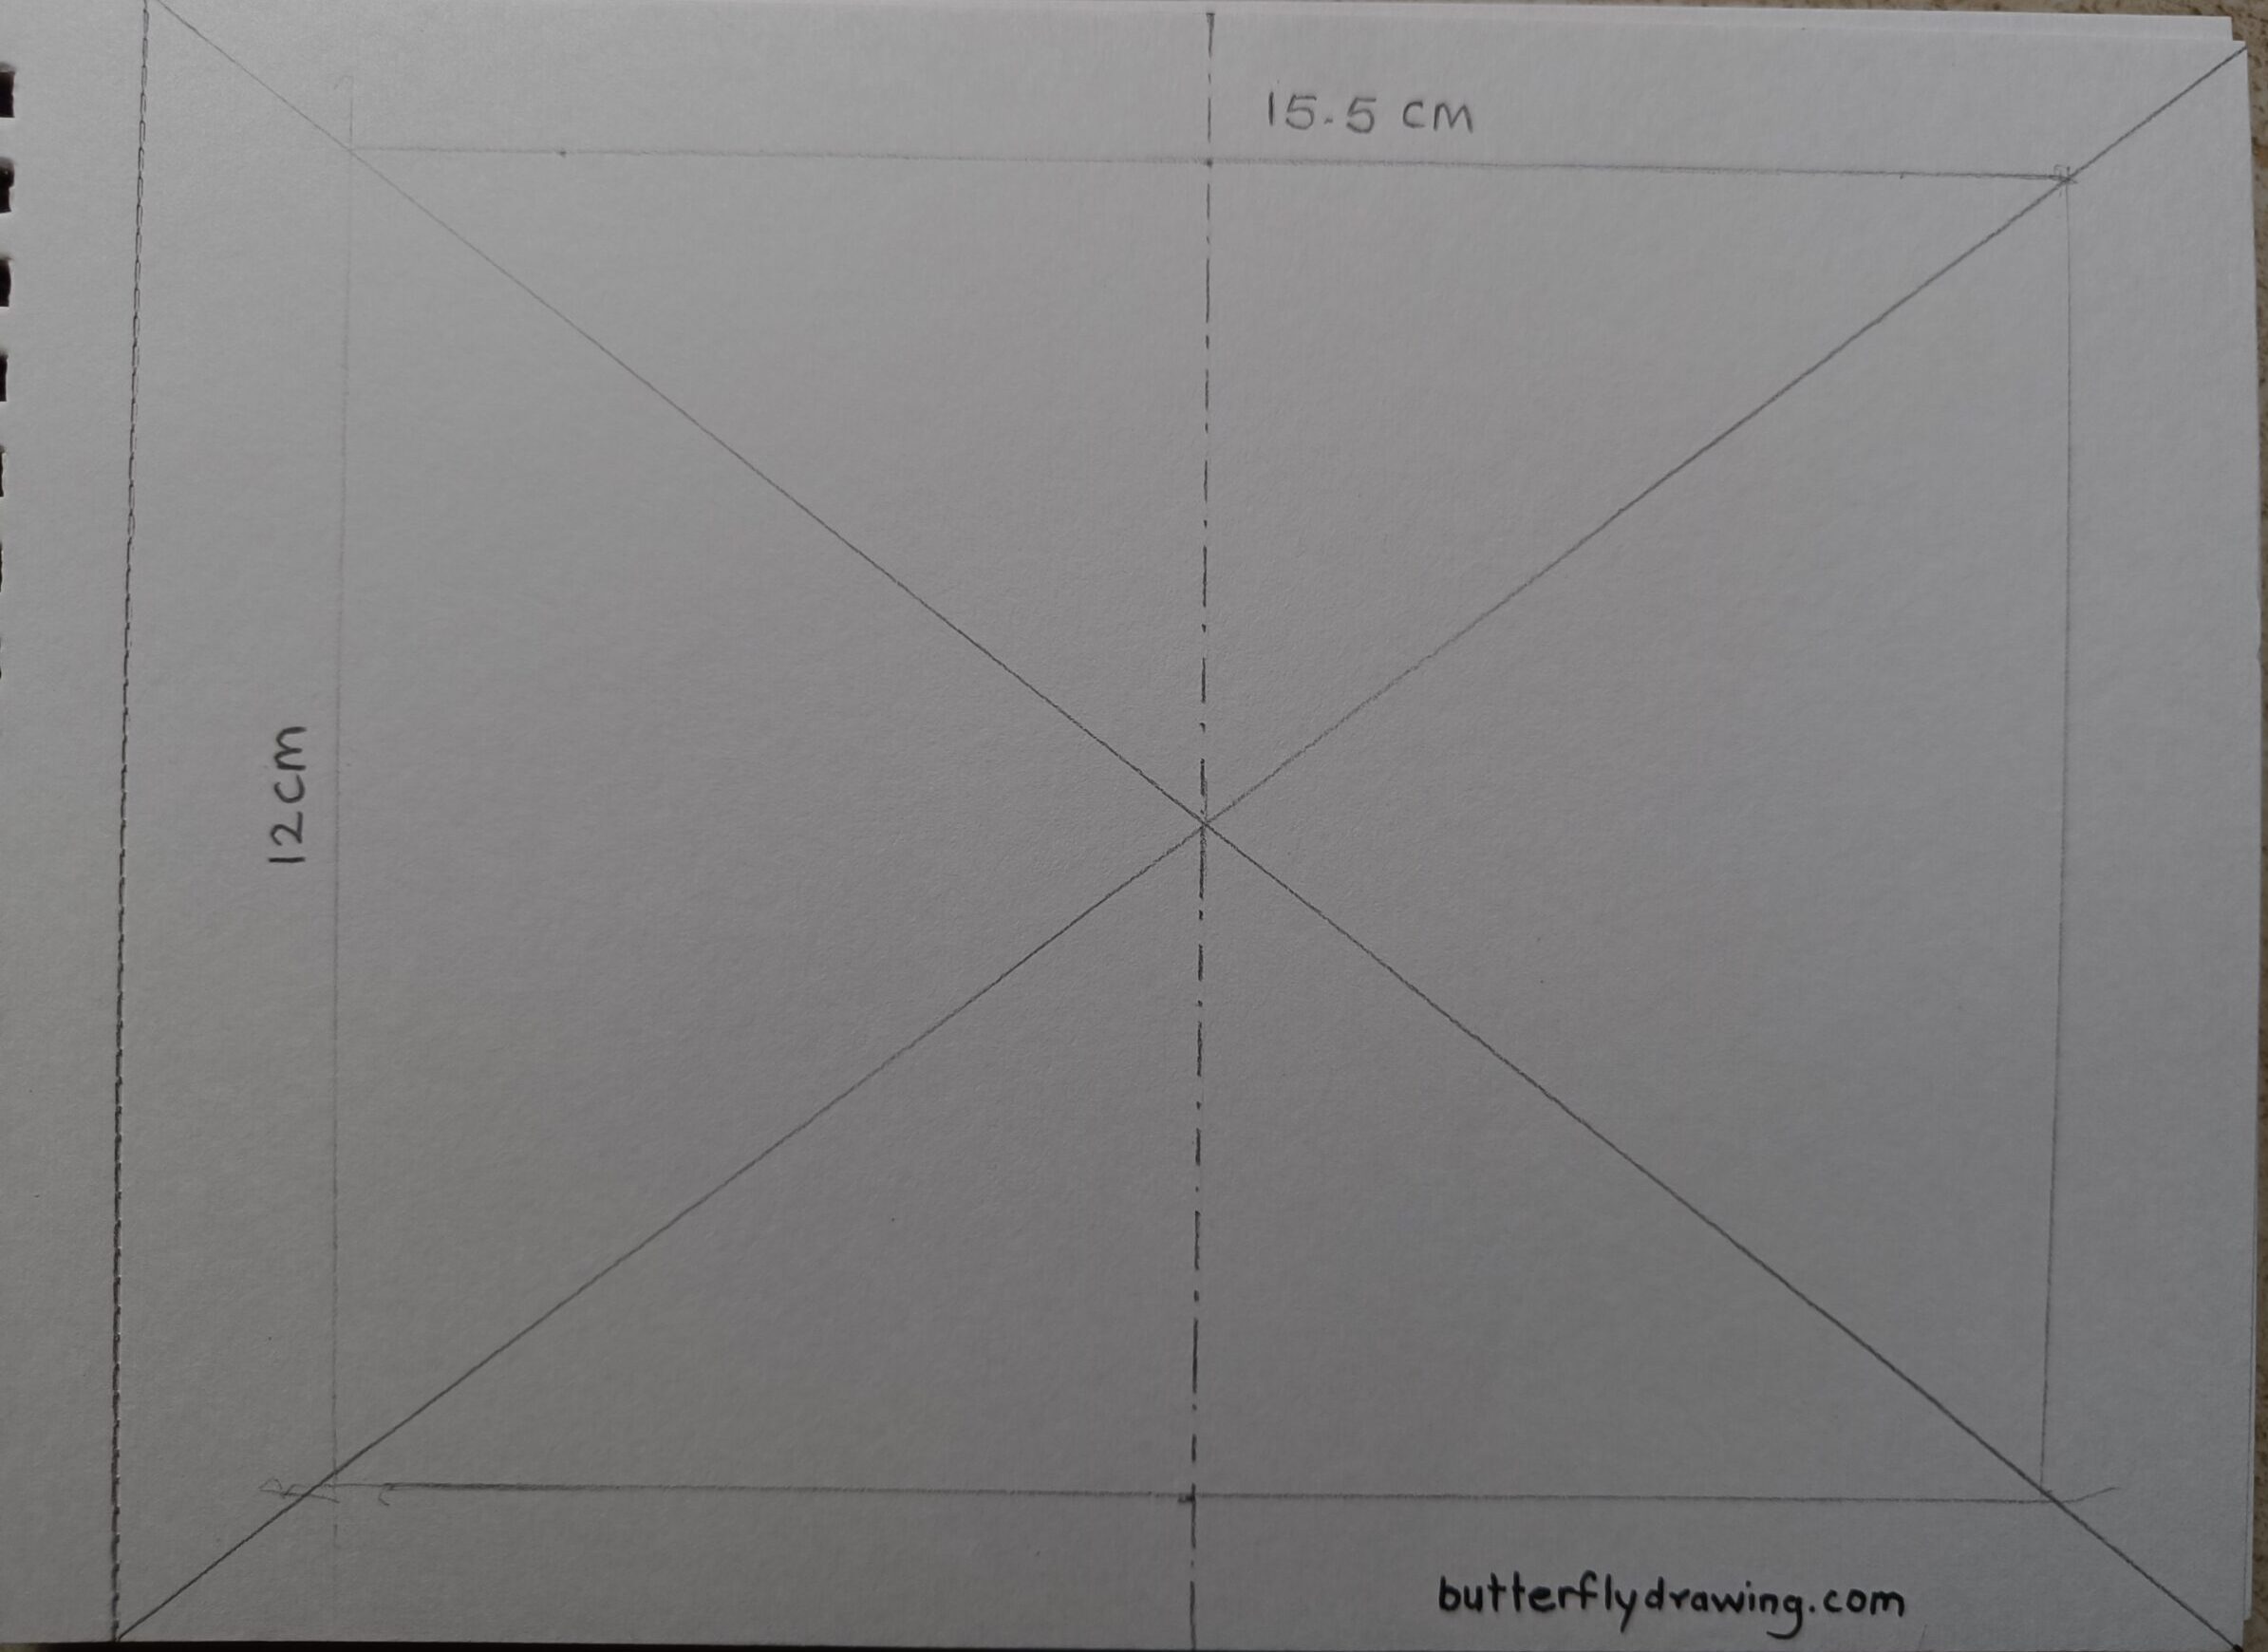
- Draw thin chain line vertical and horizontal and create 90 degree angle at centre point. this centre point will help you to draw symmetric butterfly.
- Now you have 4 rectangle. right side two and left side two on up and down position.

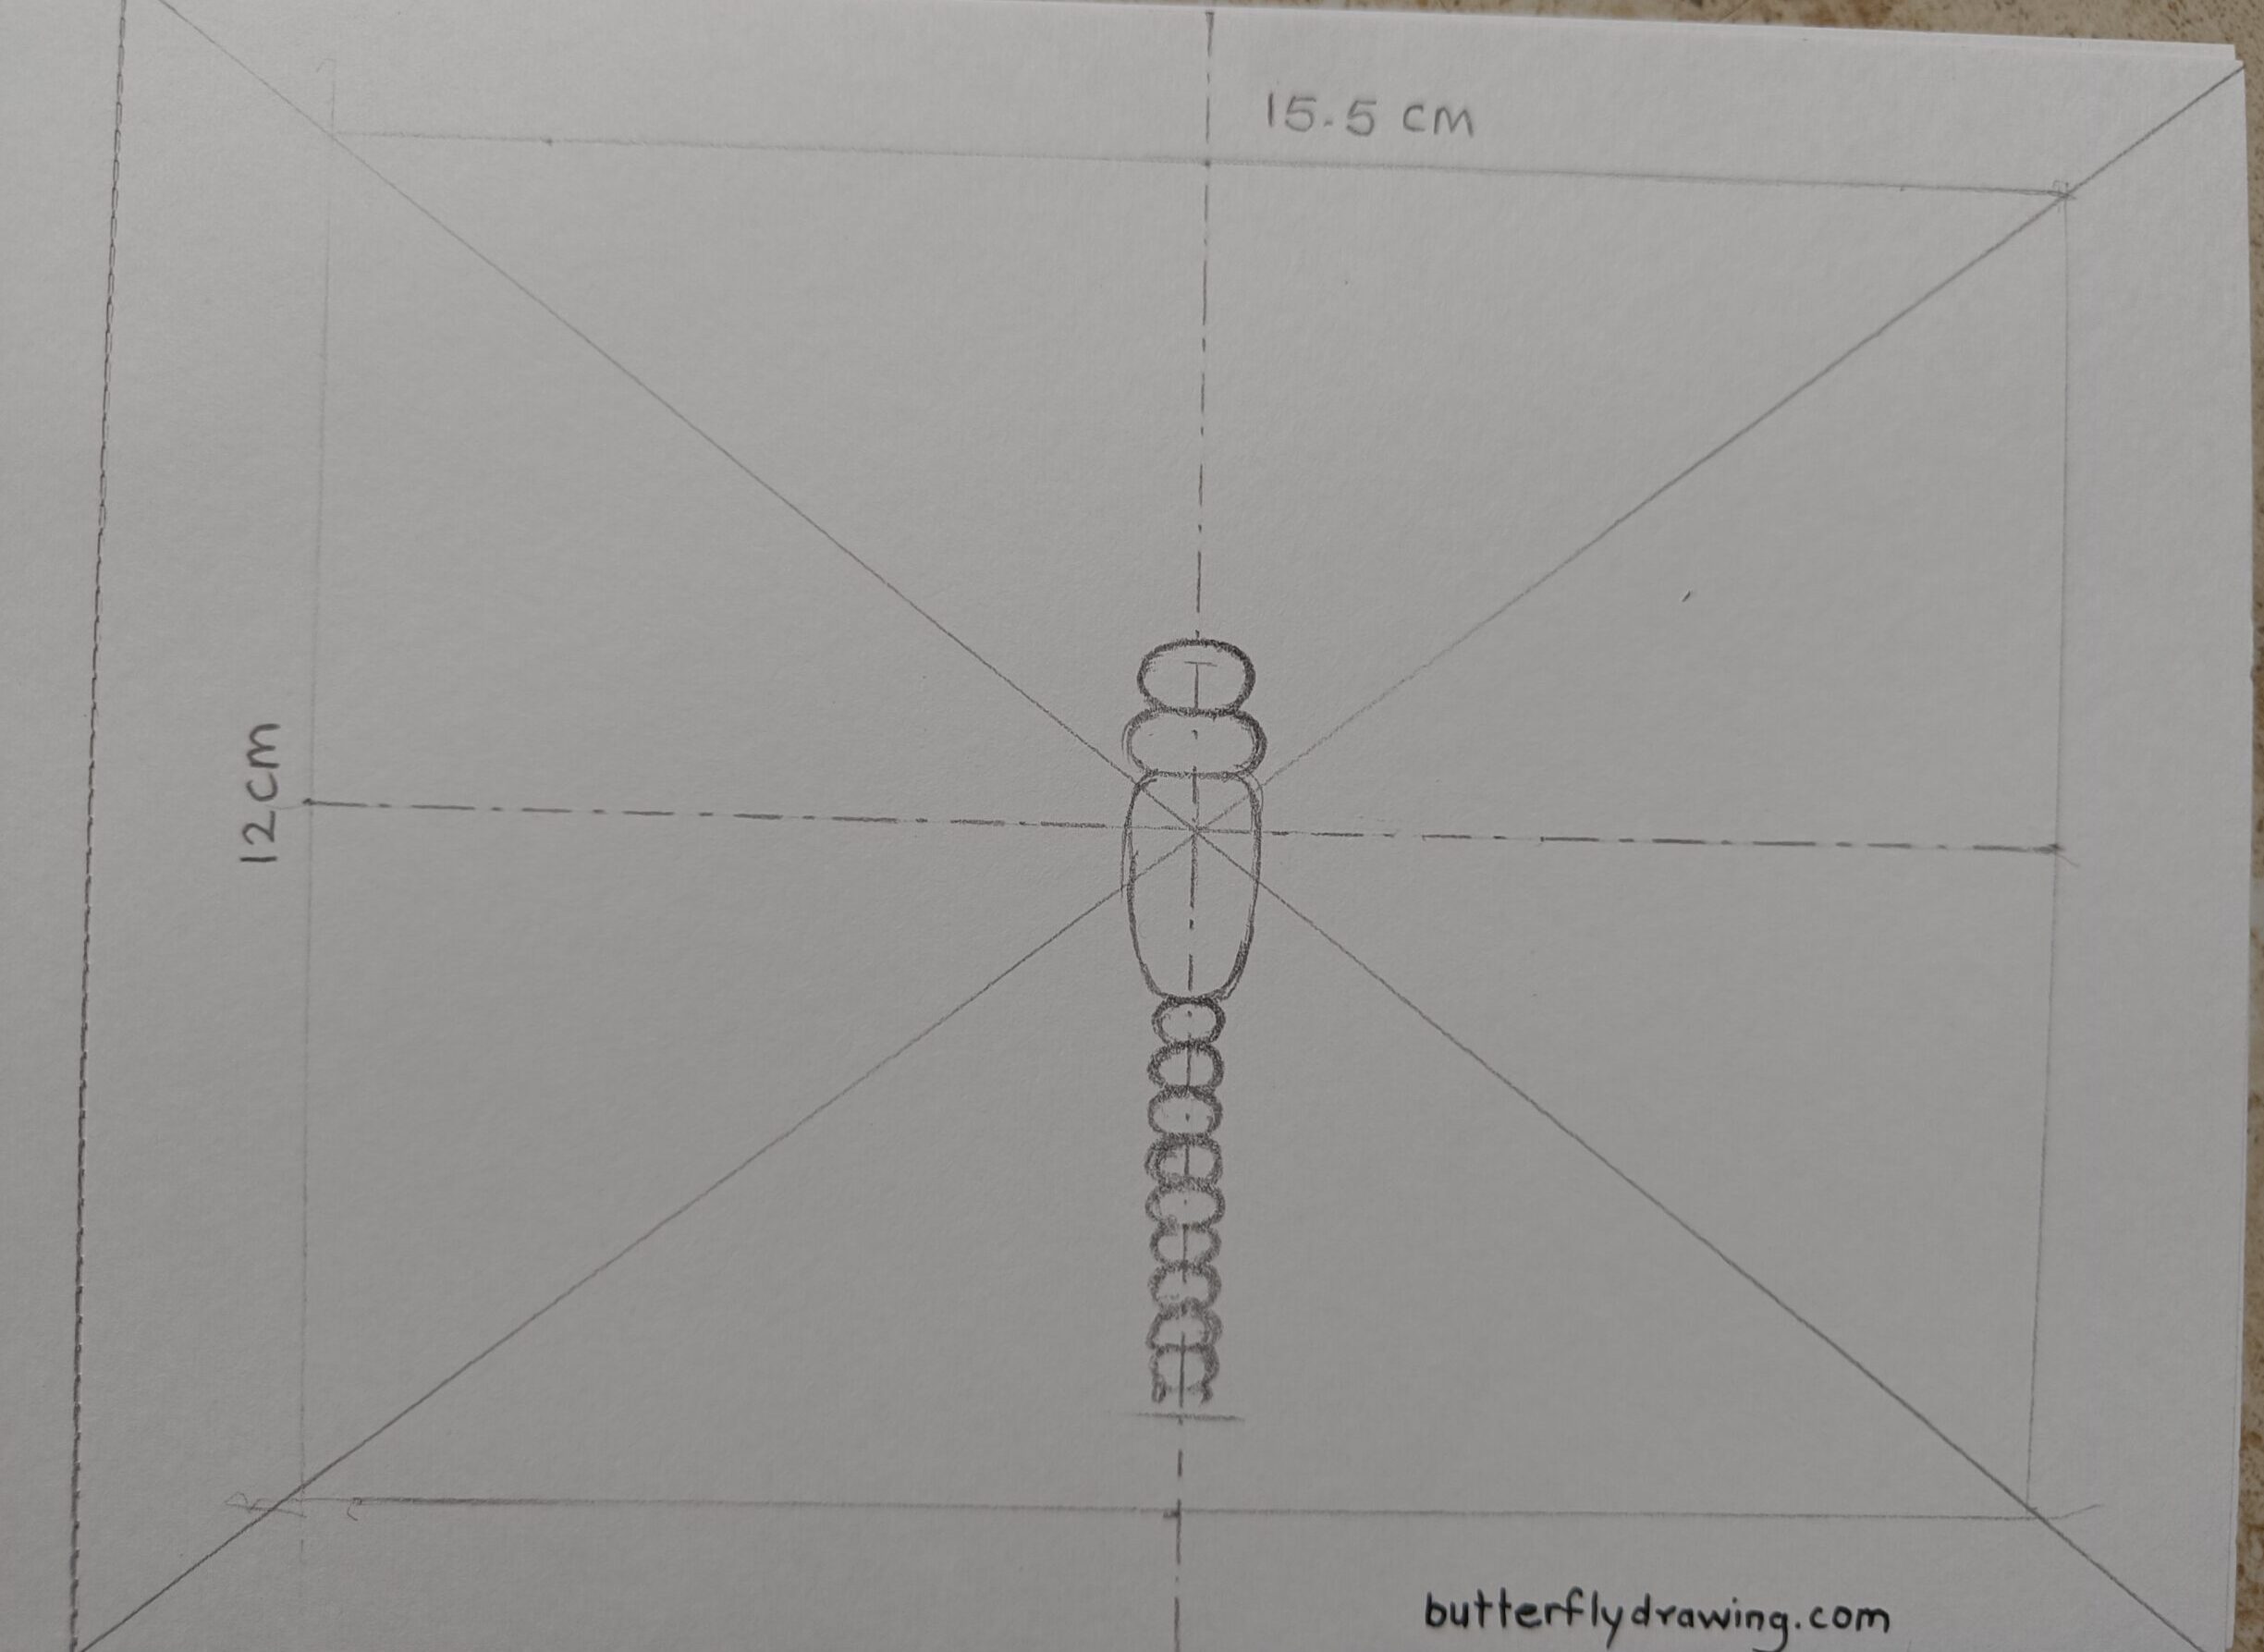
Step 2: Draw Head, Thorax & Abdomen
- Draw small elliptical circle shape as head and little big elliptical circle shape as middle thorax upside from centre point.
- as well as draw stadium circle shape at centre point as Thorax .
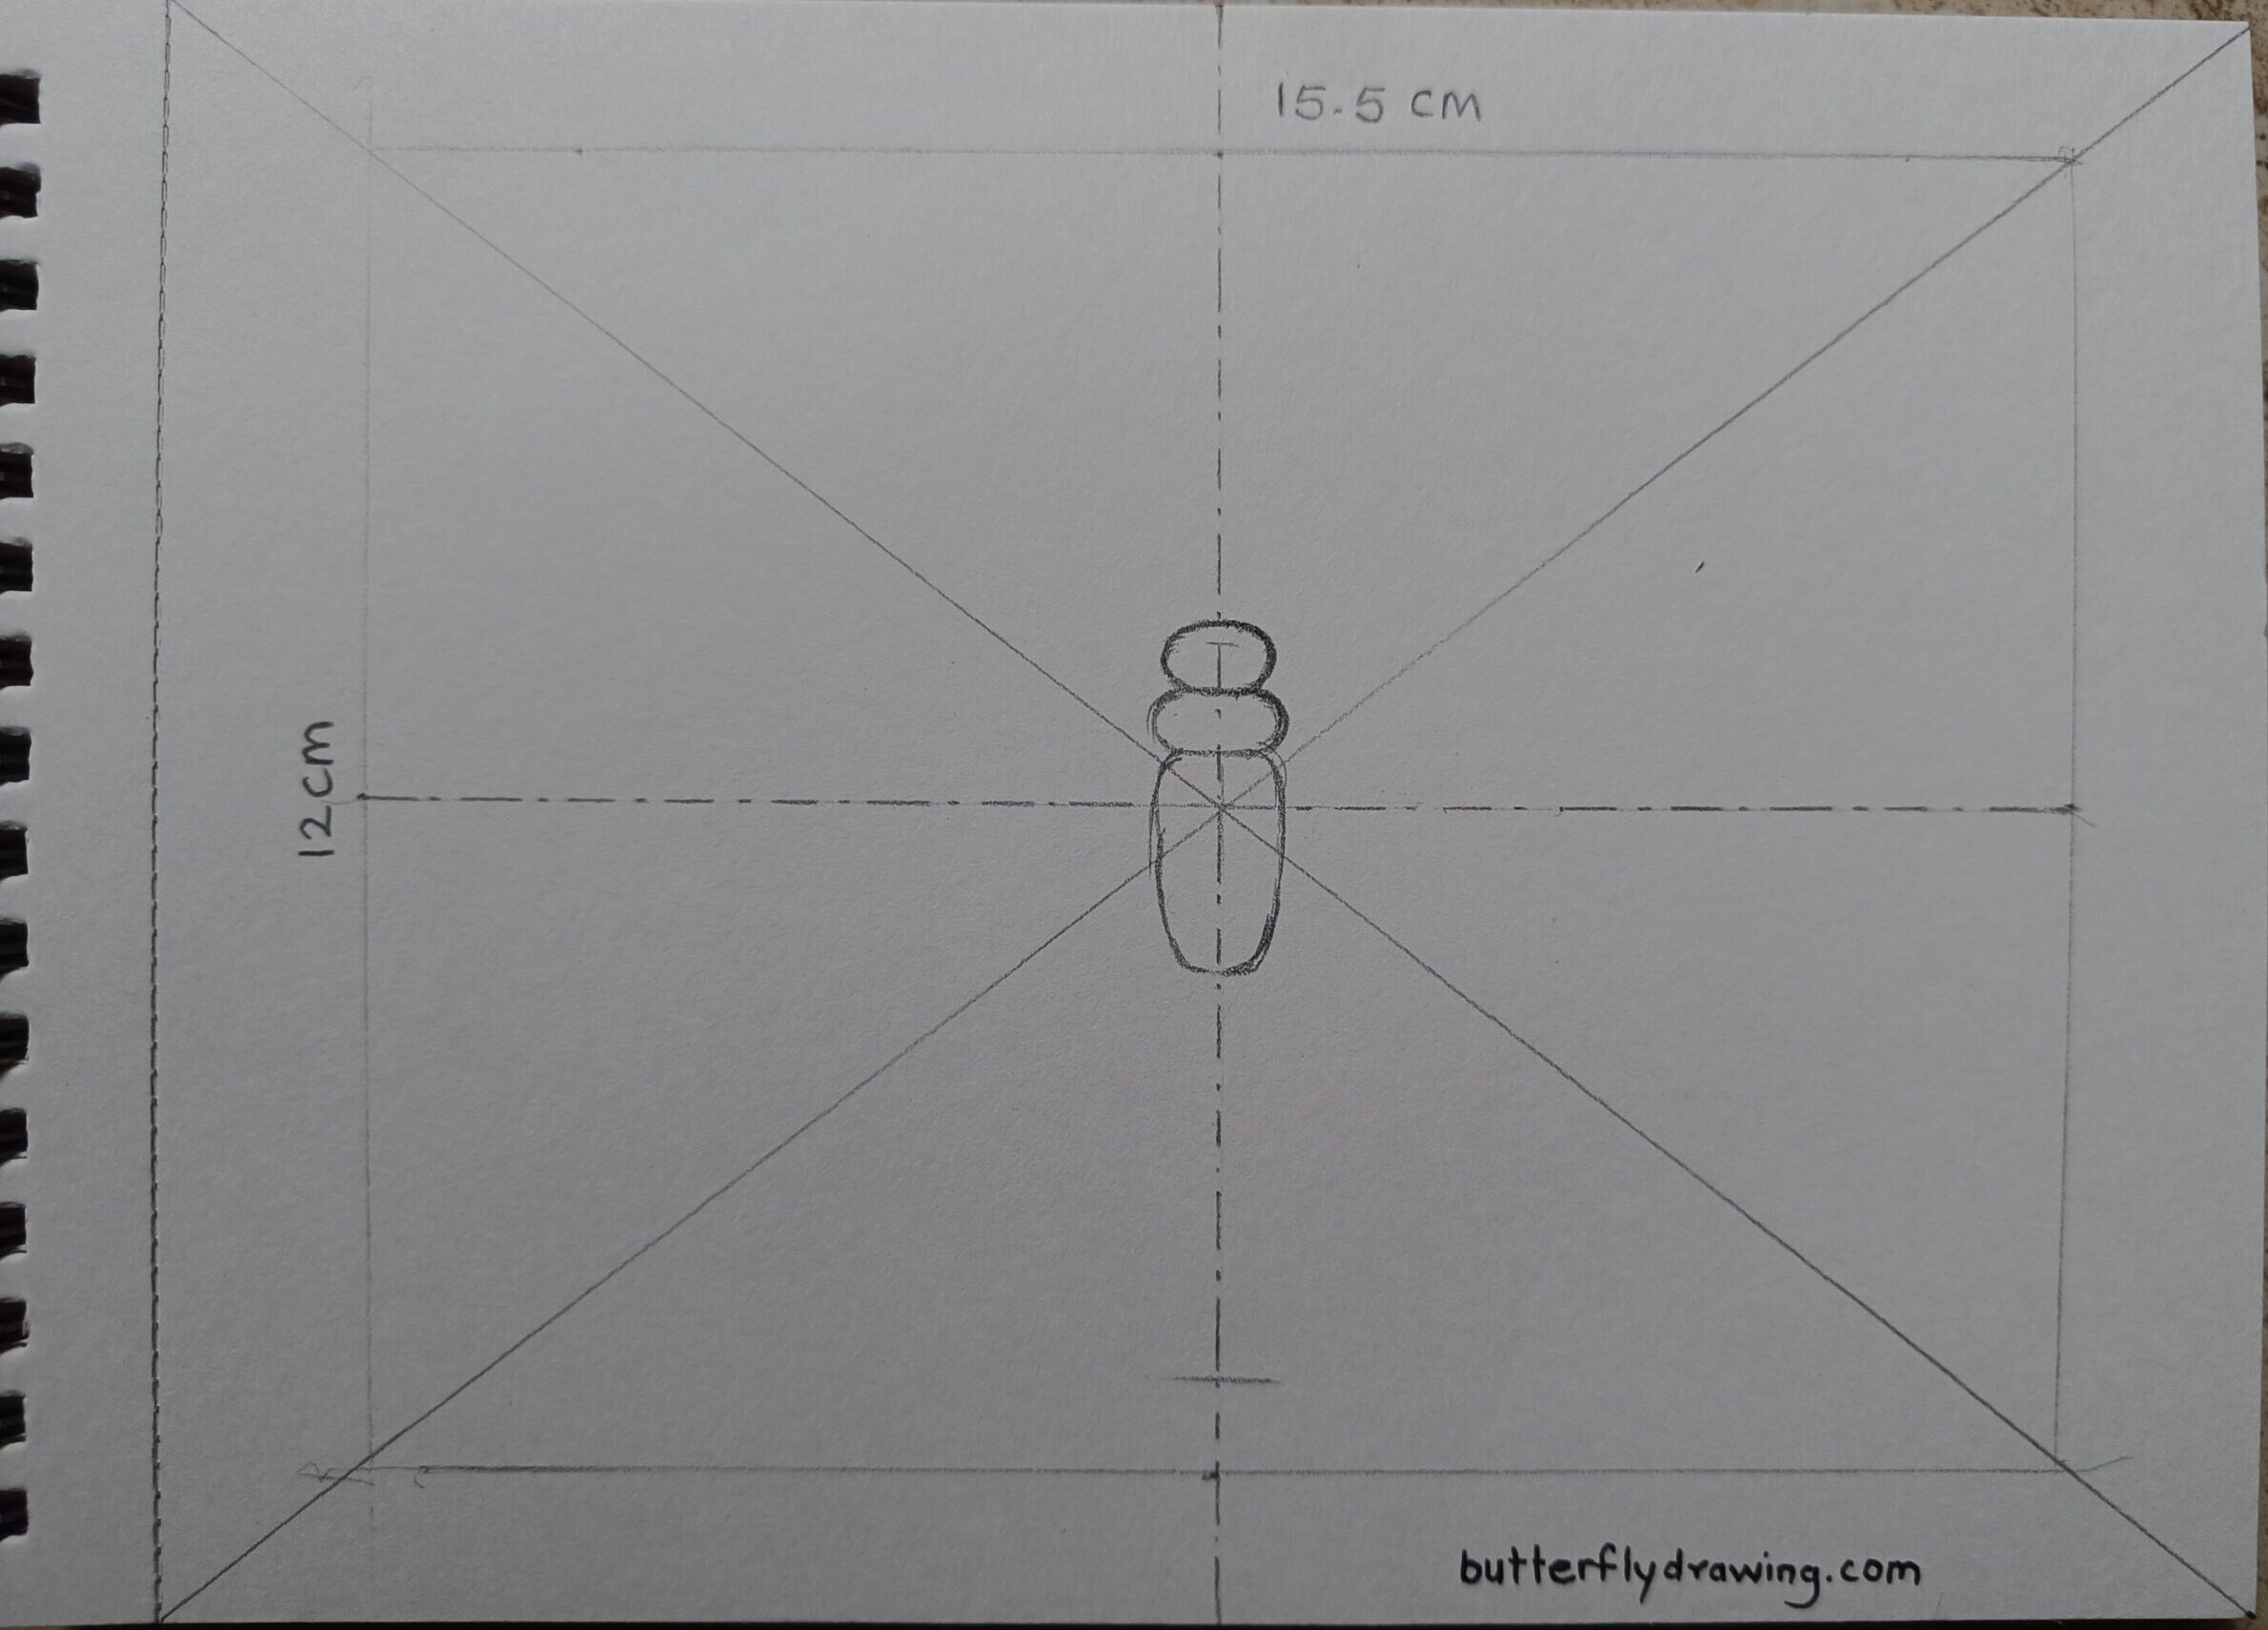
- start making shape of abdomen down side of thorax draw small shape of ellipticals like neckless.
Step 3: Draw Geometrical Construction for Wings
- To draw hindwing you should find points which are shown in two down side of rectangles.
- Mark that point on horizontal thin chain line, intersecting line and extra marked line from thorax to main rectangle bottom horizontal side.
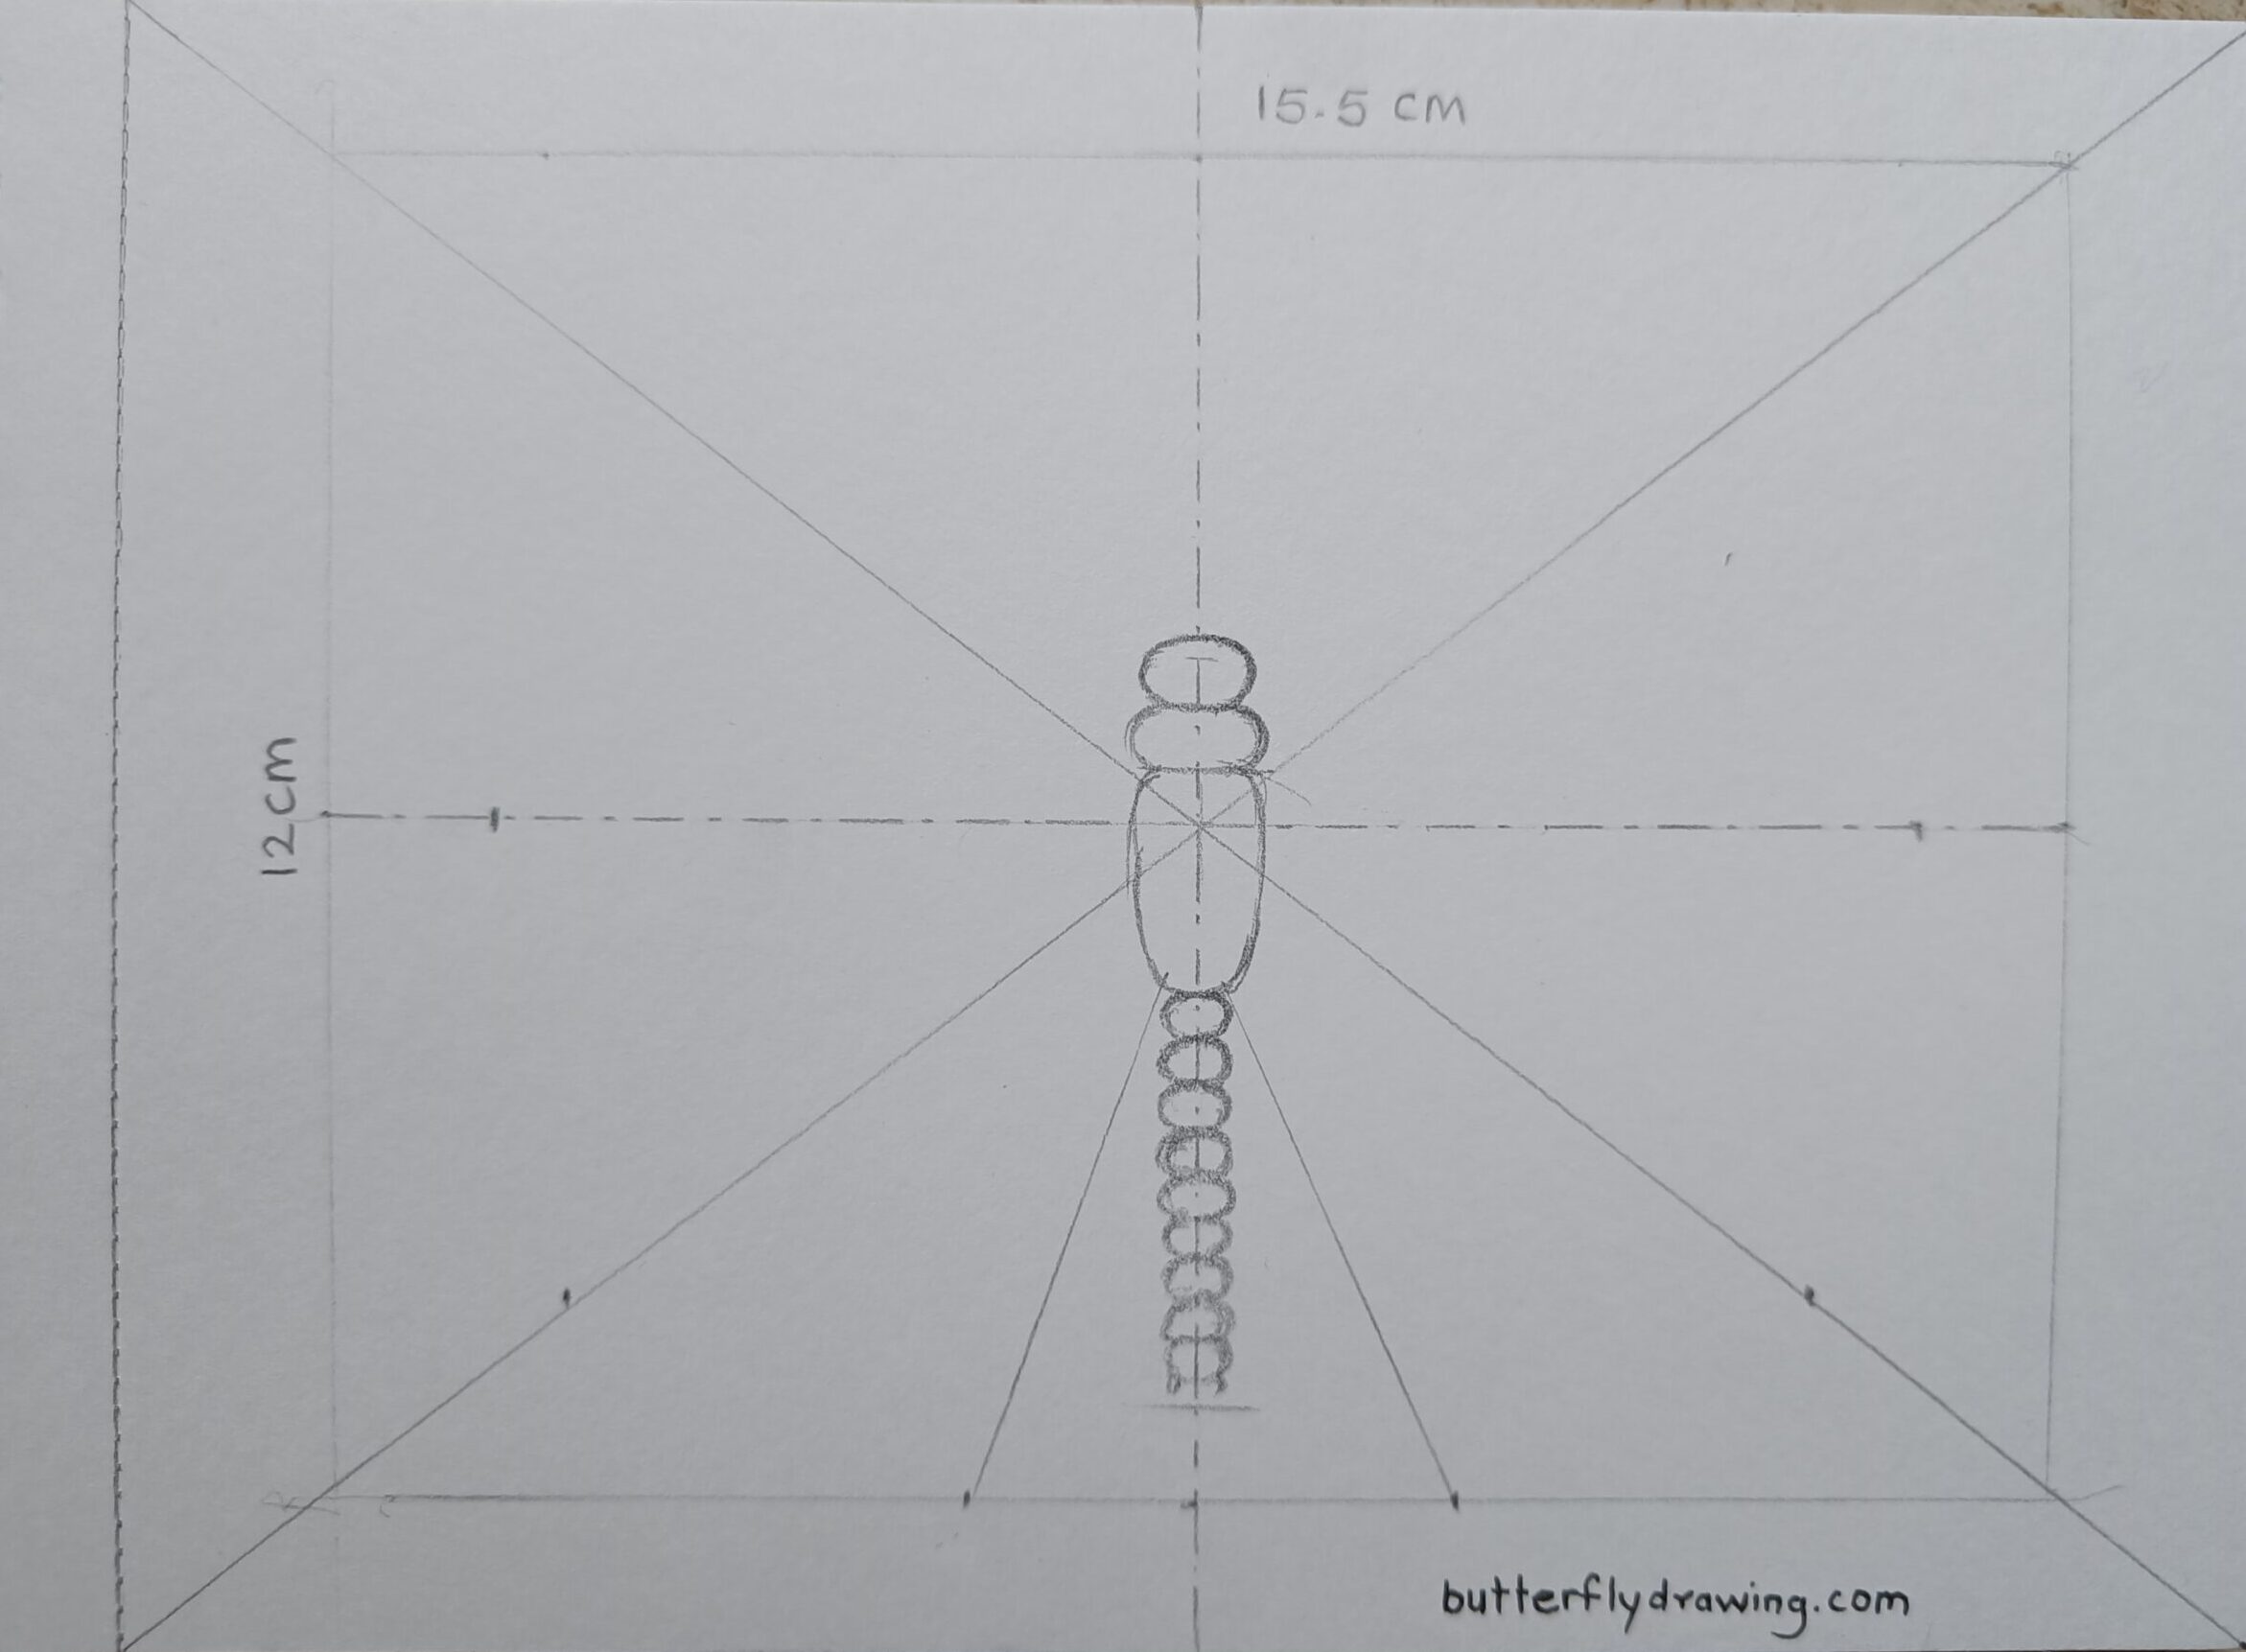
- join all point and create straight line path which look like a wings base.
- Mark that point as P1, P2 & P3 respectively.
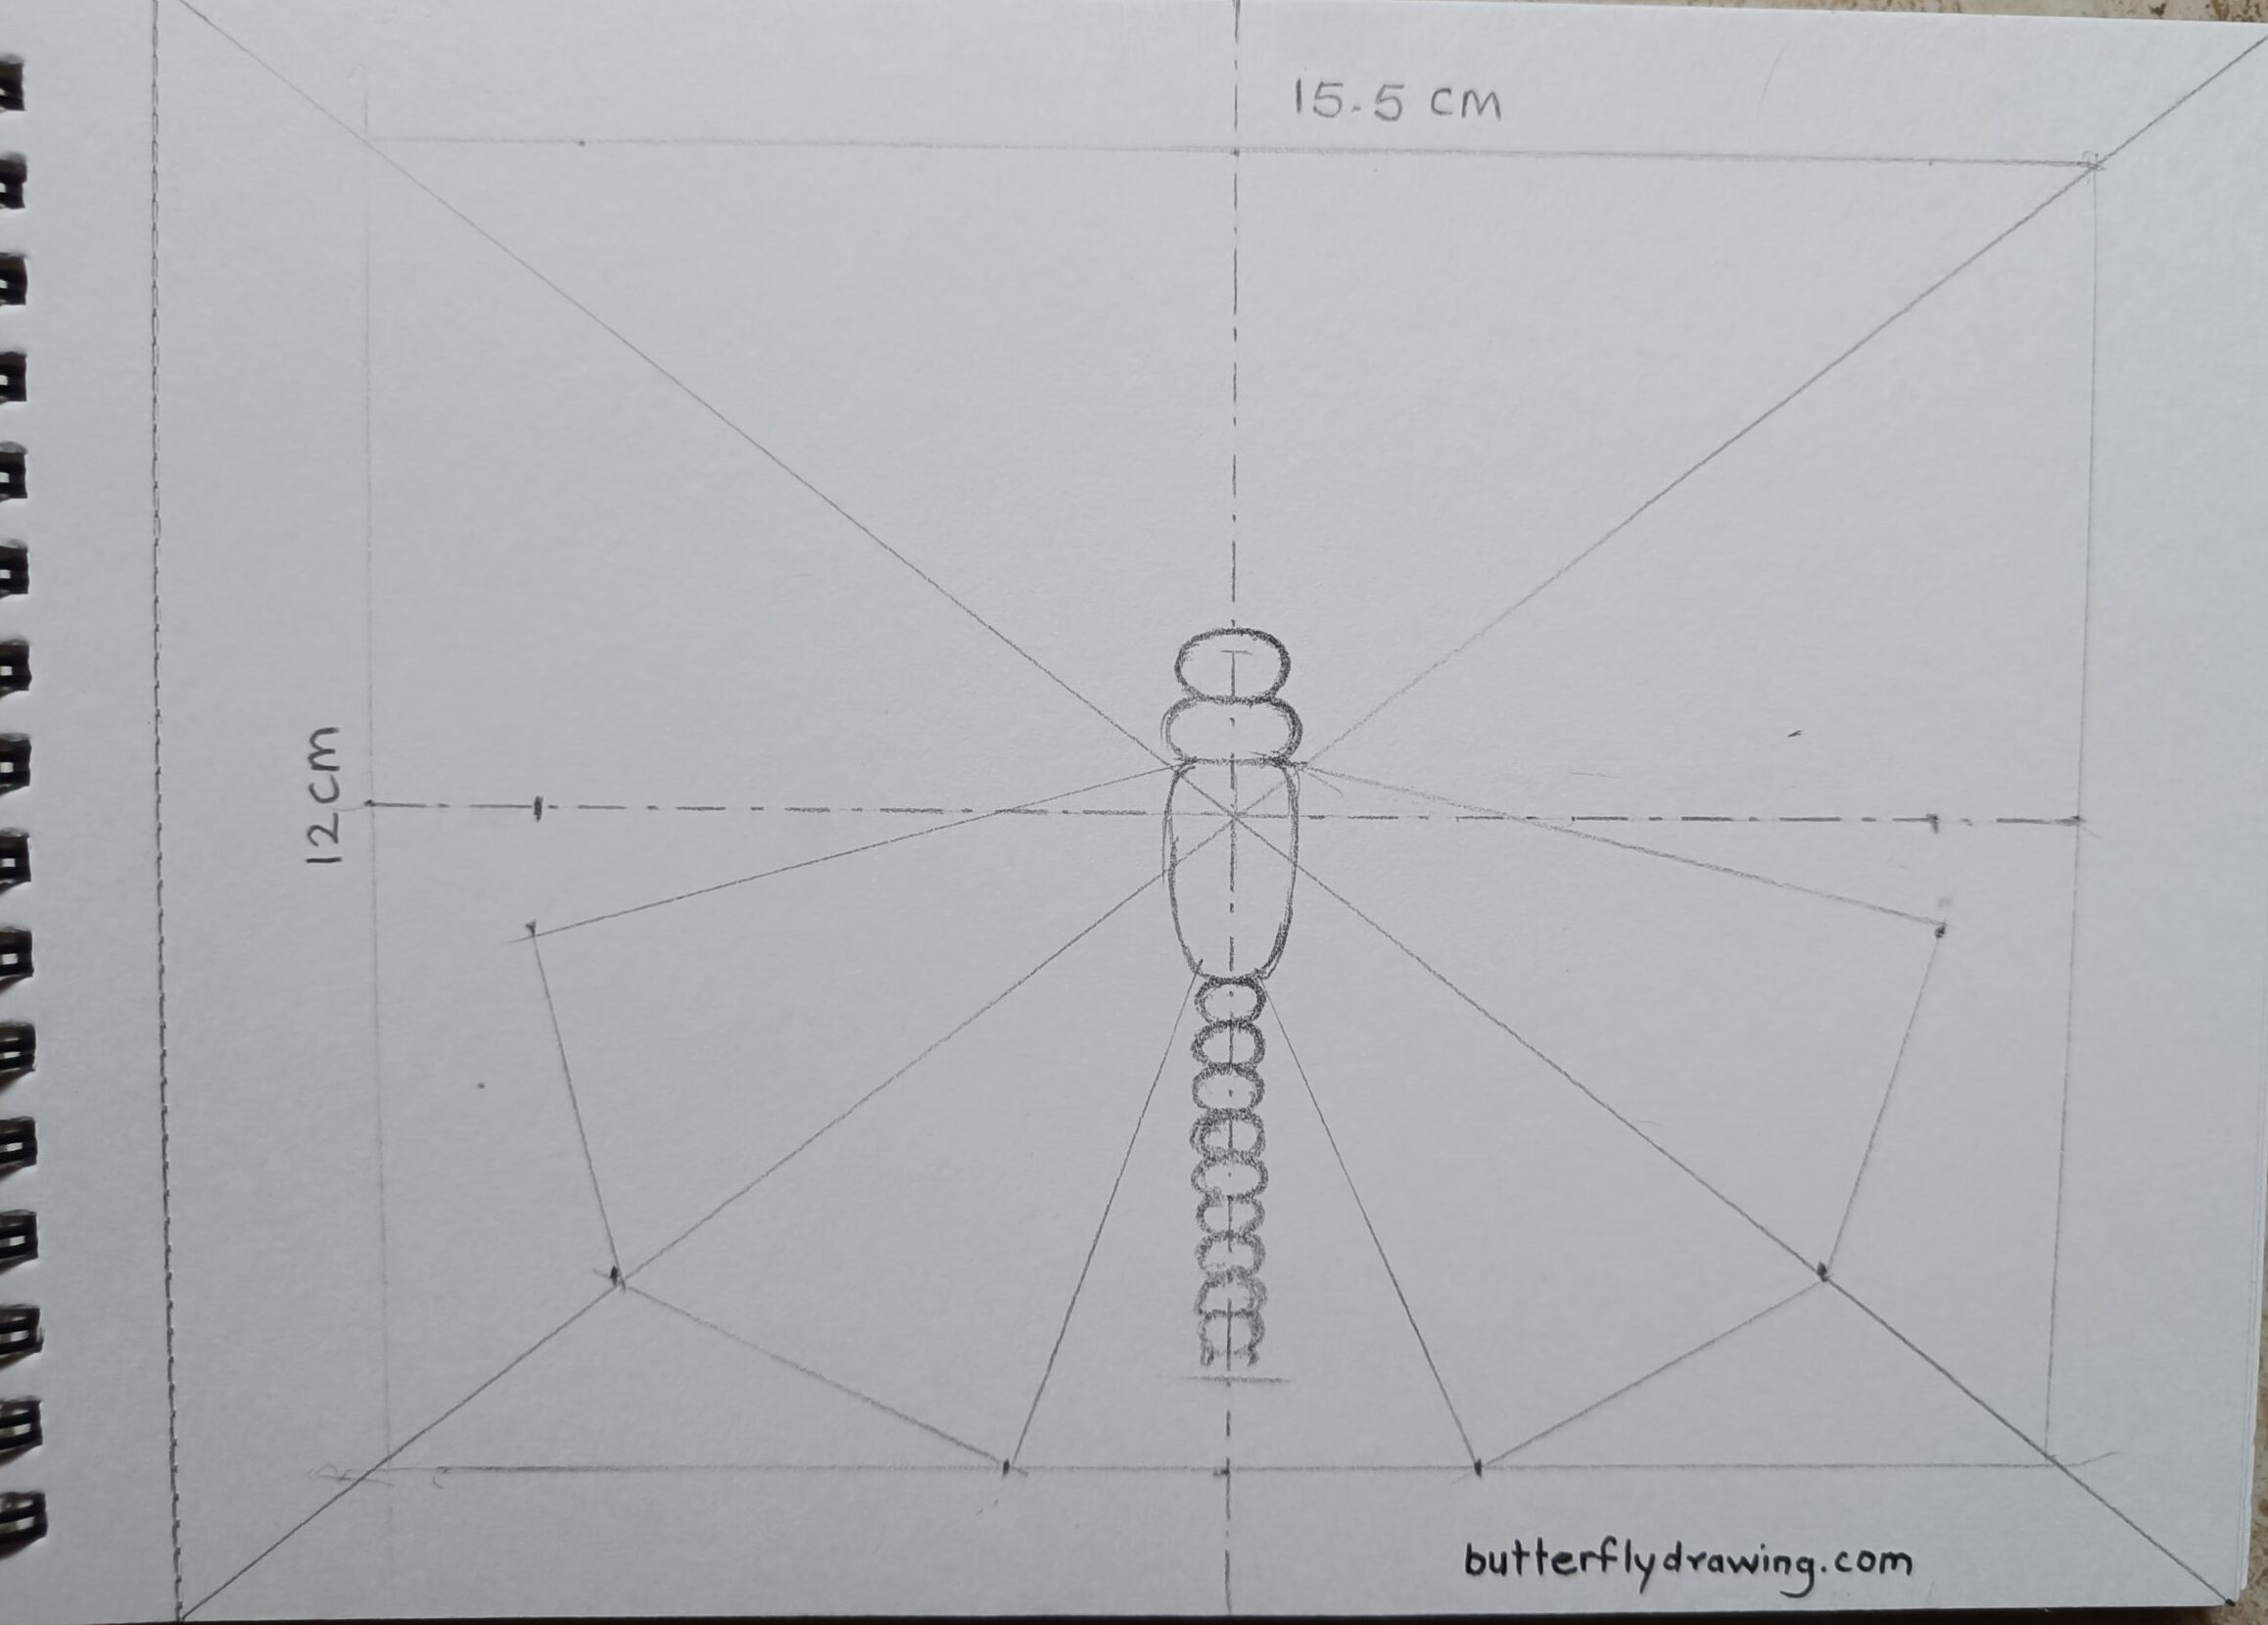
Step 4: Draw Wings
Monarch Butterfly have two wings Forewing and Hindwing. lets start first from forewing.
- upper side two rectangle portion used for forewing as reference
- start curve path from thorax and end with corner point of rectangle. make sure your pencil move free hand so it make perfect curve.
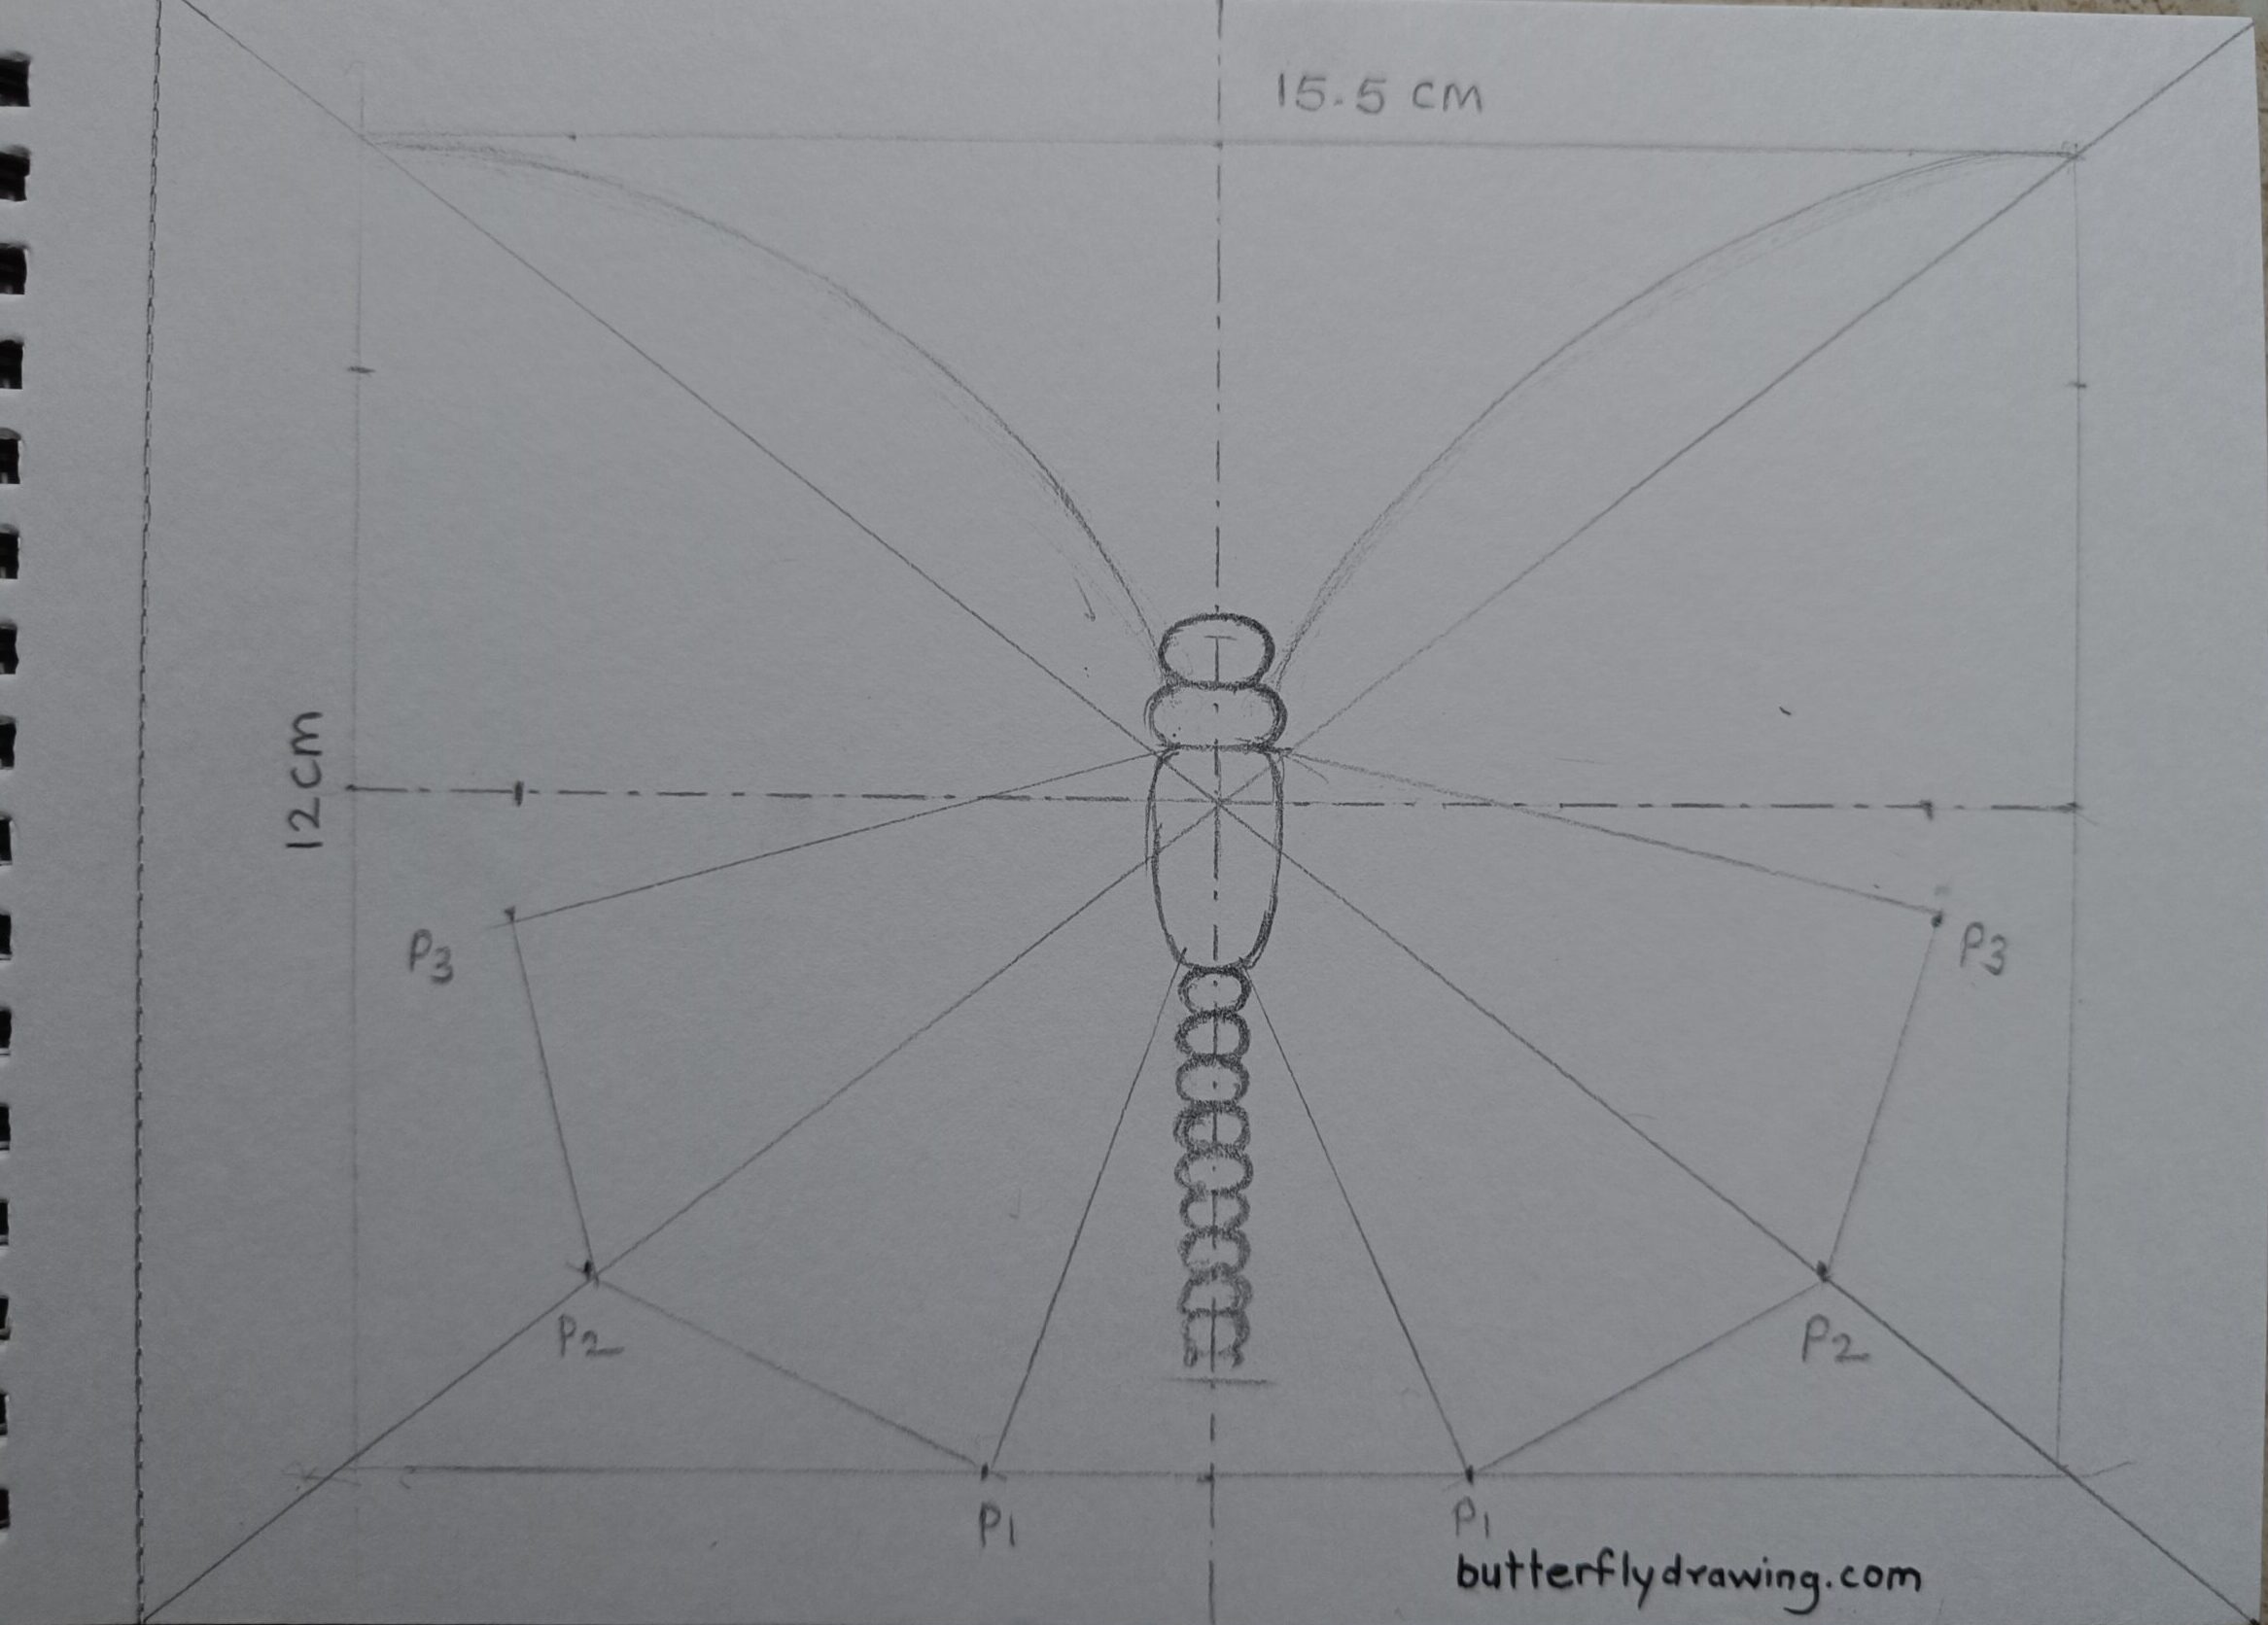
- Move end corner point to down side and make shape like human ear.
- Slightly move curve toward the horizontal thin chain line. refer chain thin line as Monarch Butterfly Drawing wings outline.
- Convert straight line of hindwing into curve line which start from the thorax and end at P3 point.
- Similarly at point P1 start making curve line and end at thorax bottom side.
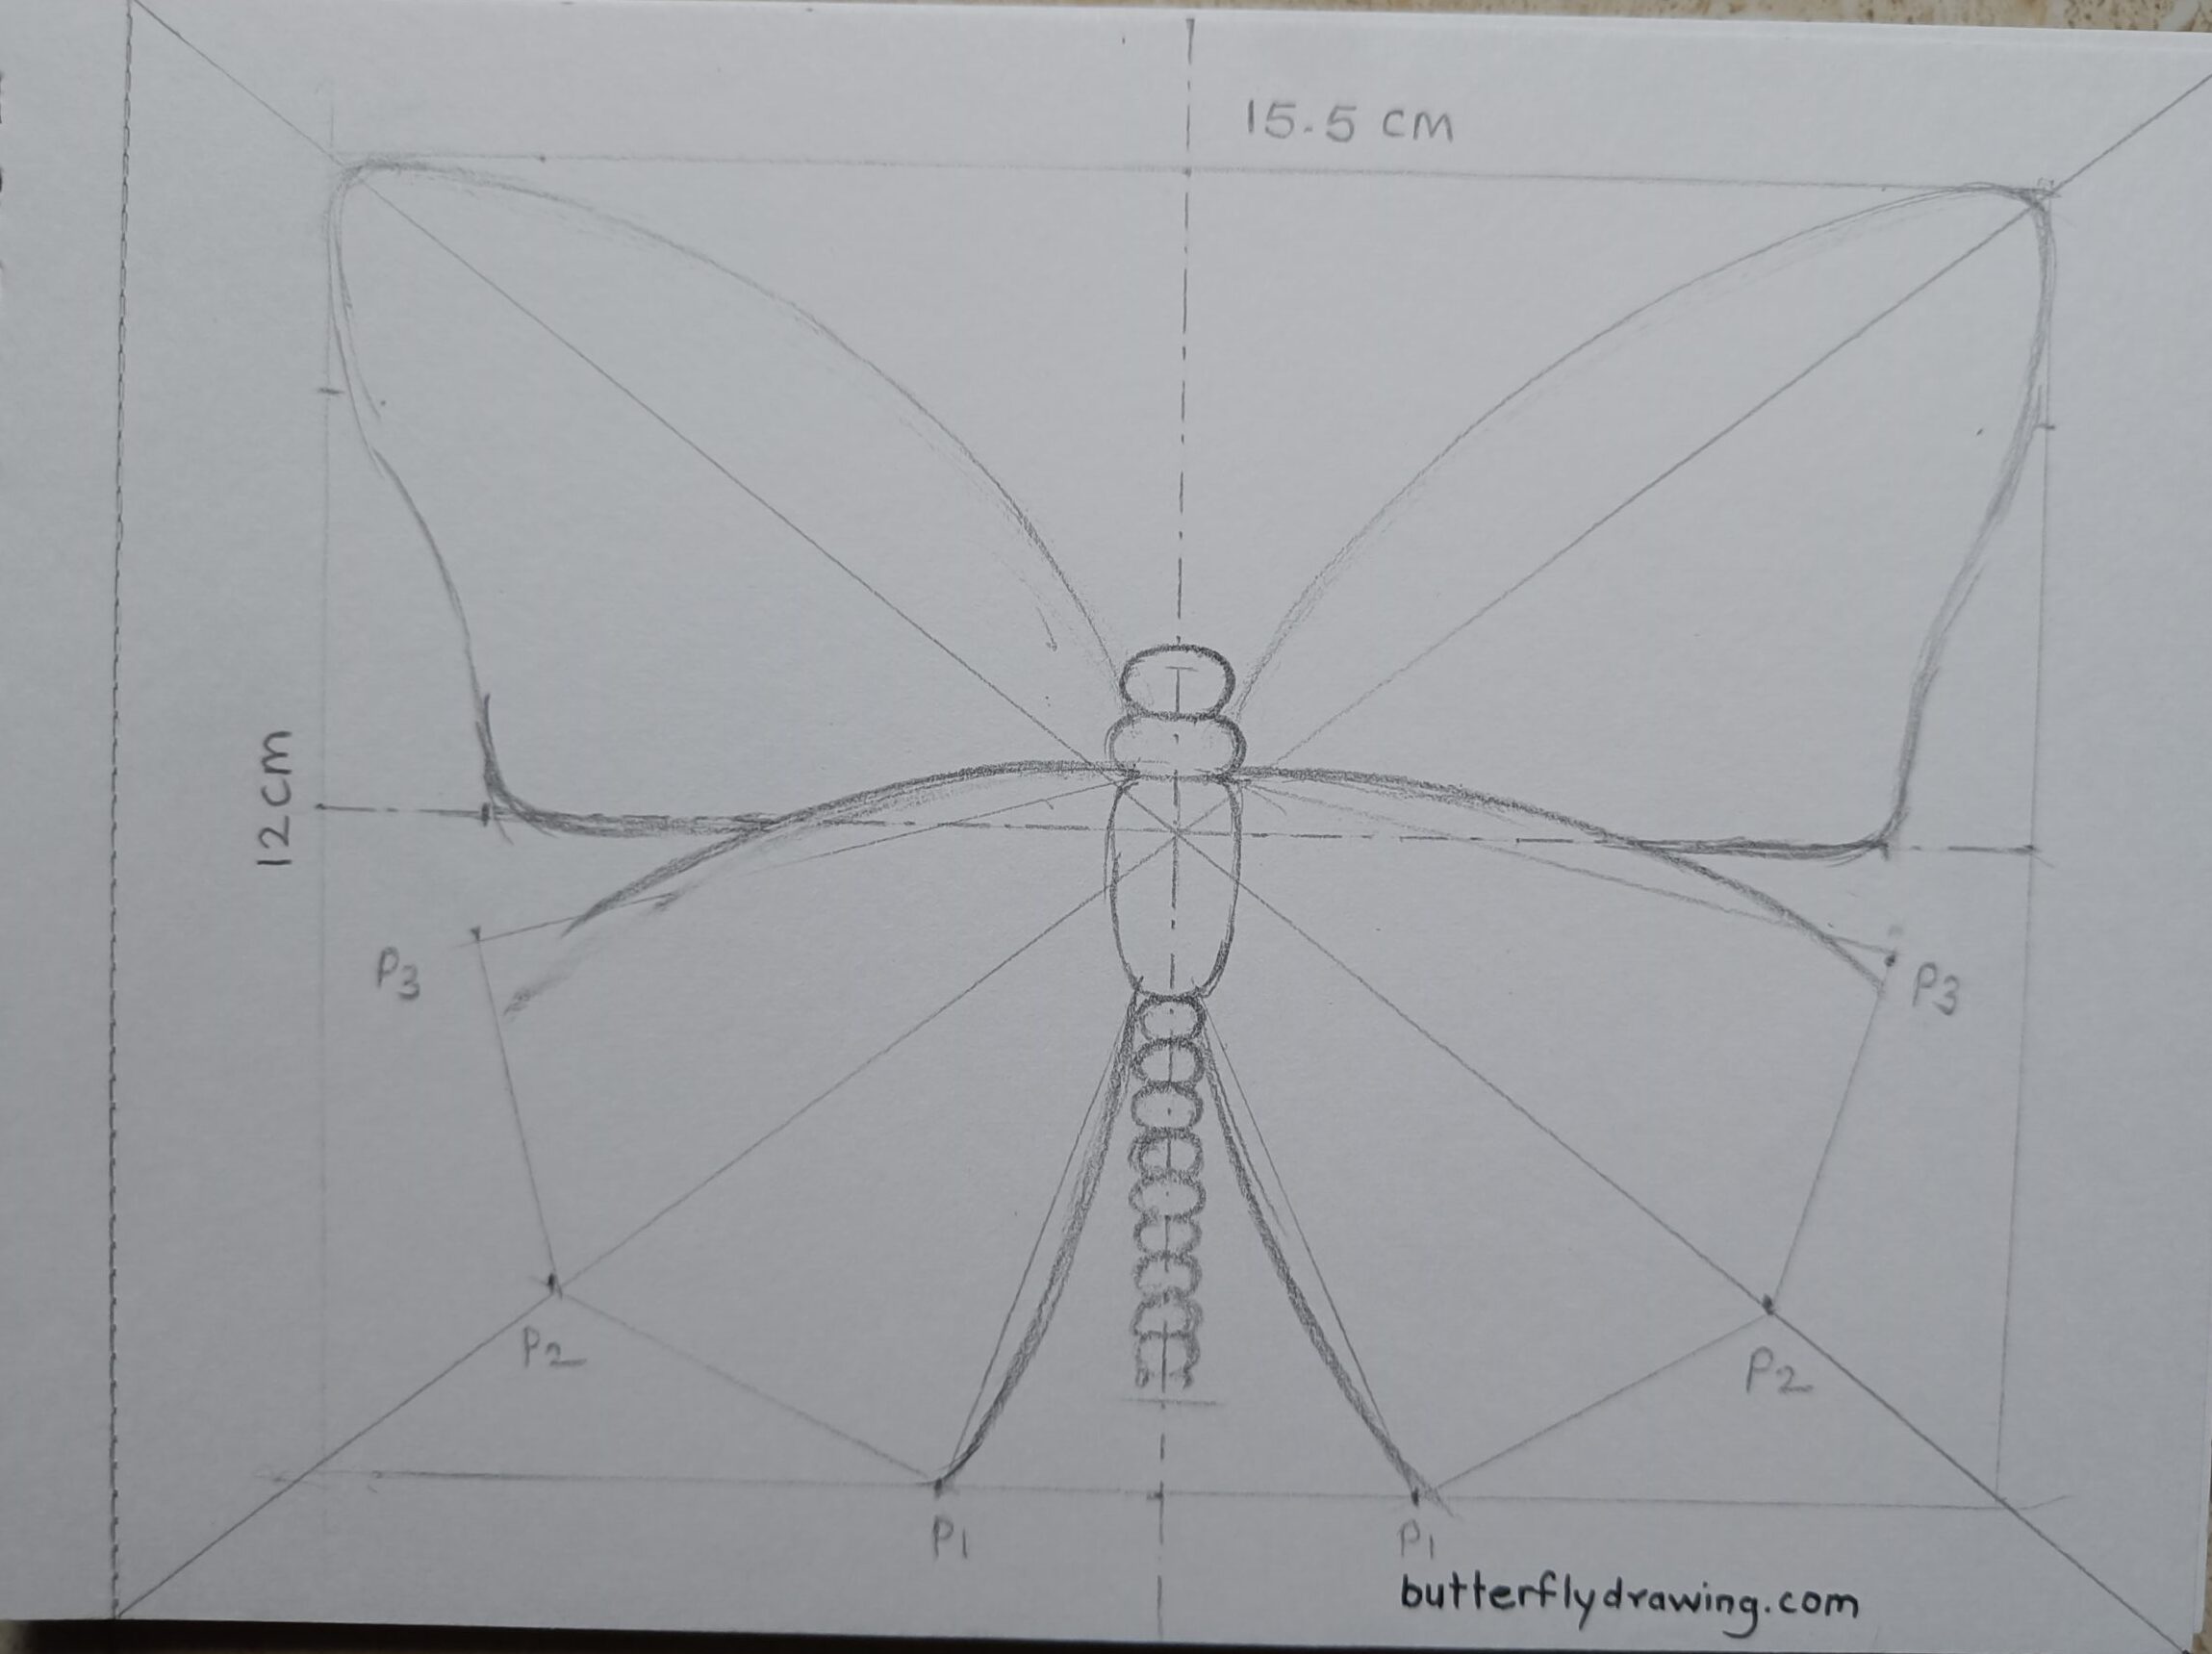
- Join point P1, P2 and P3 point with slight curve and start erasing internal reference point.
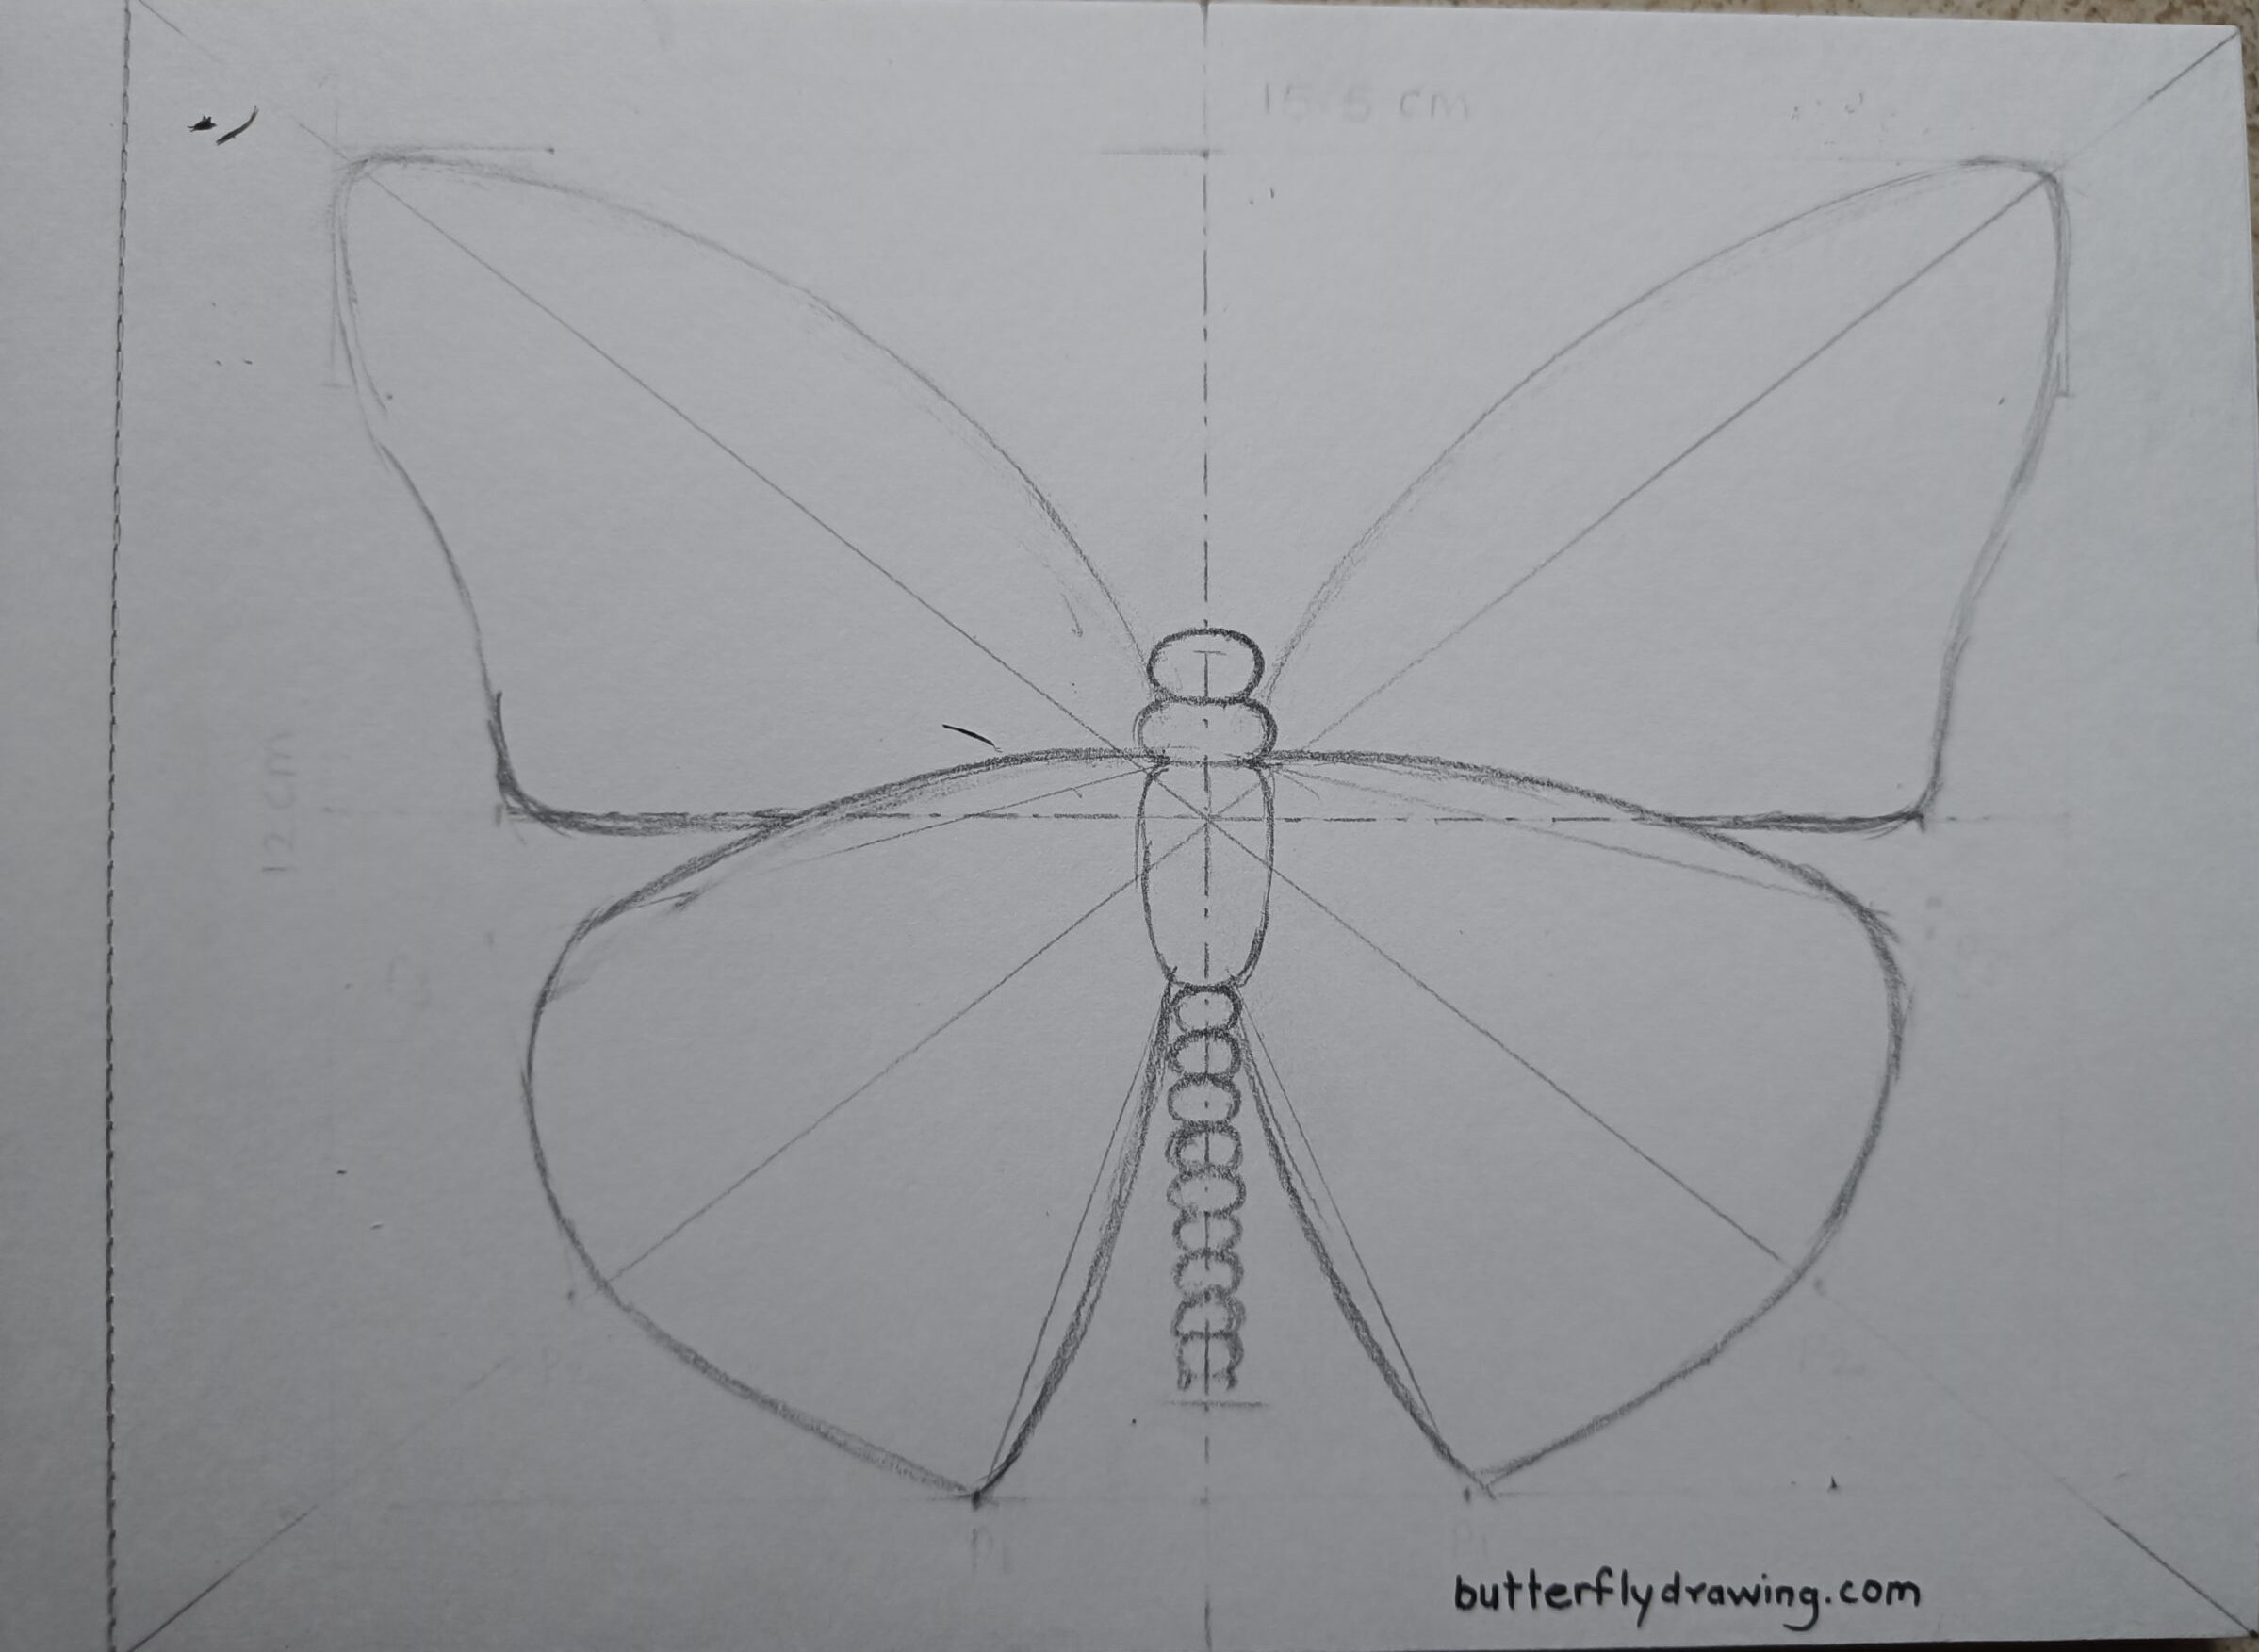
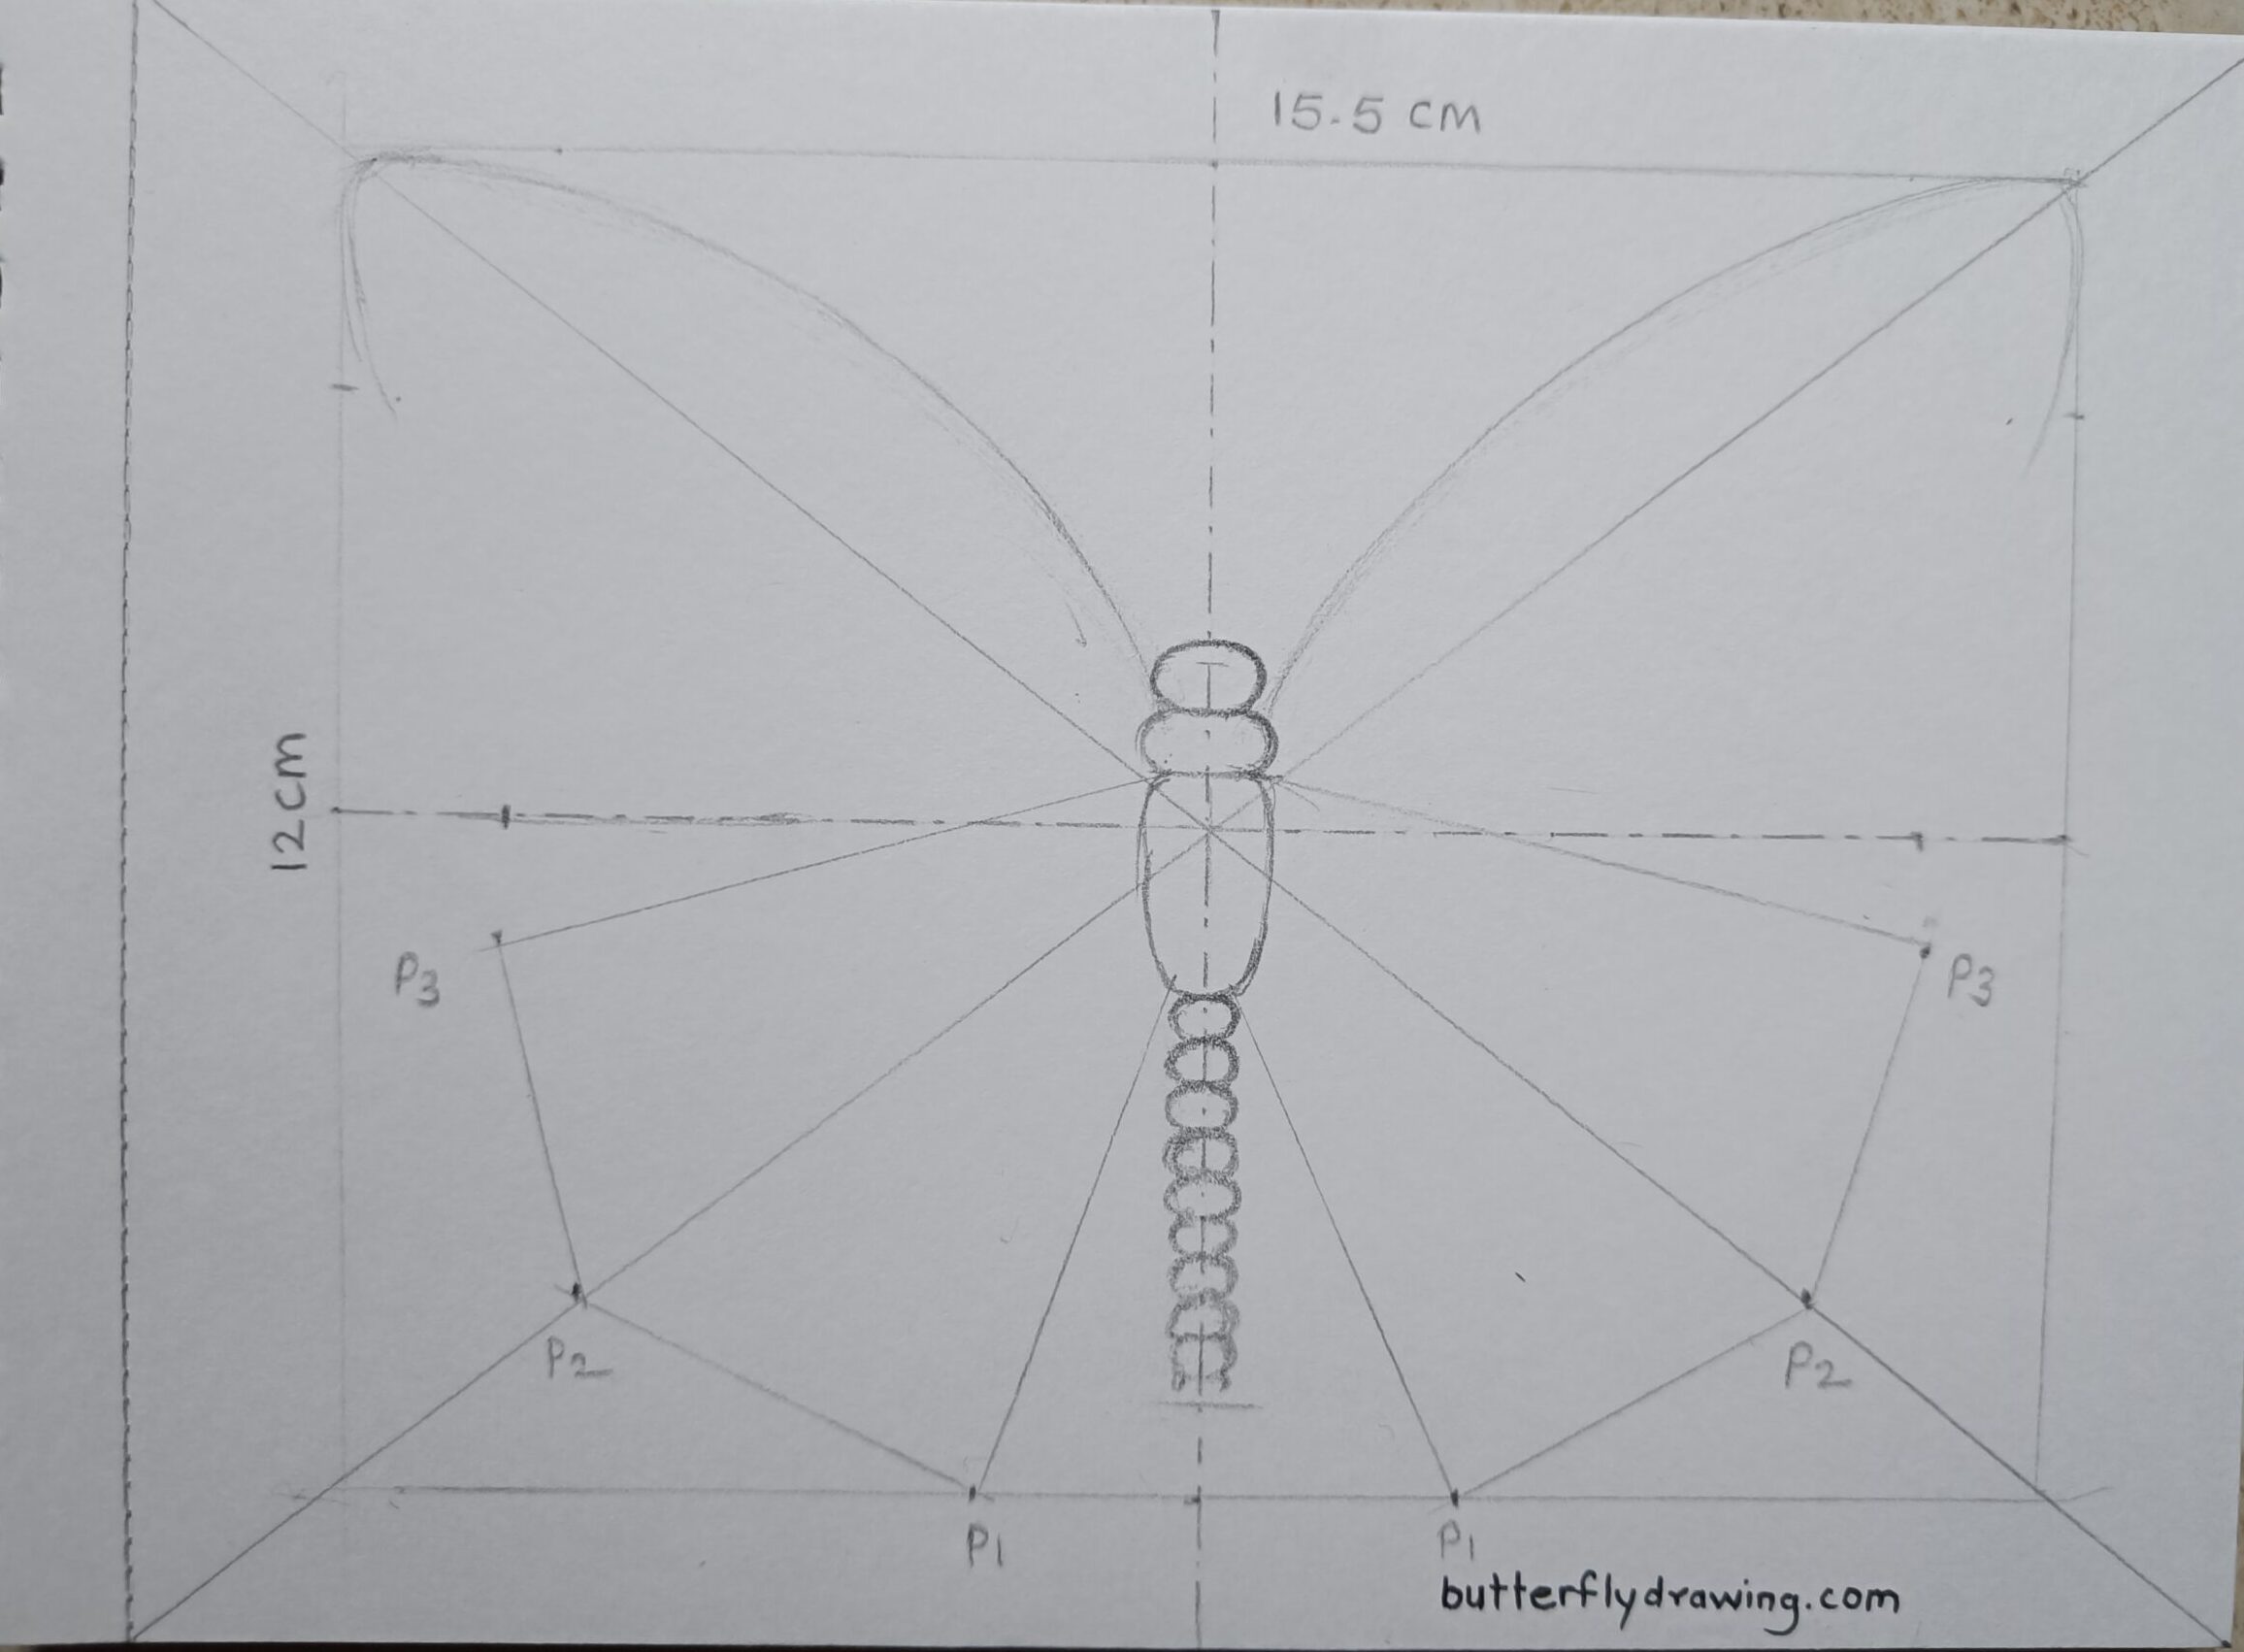
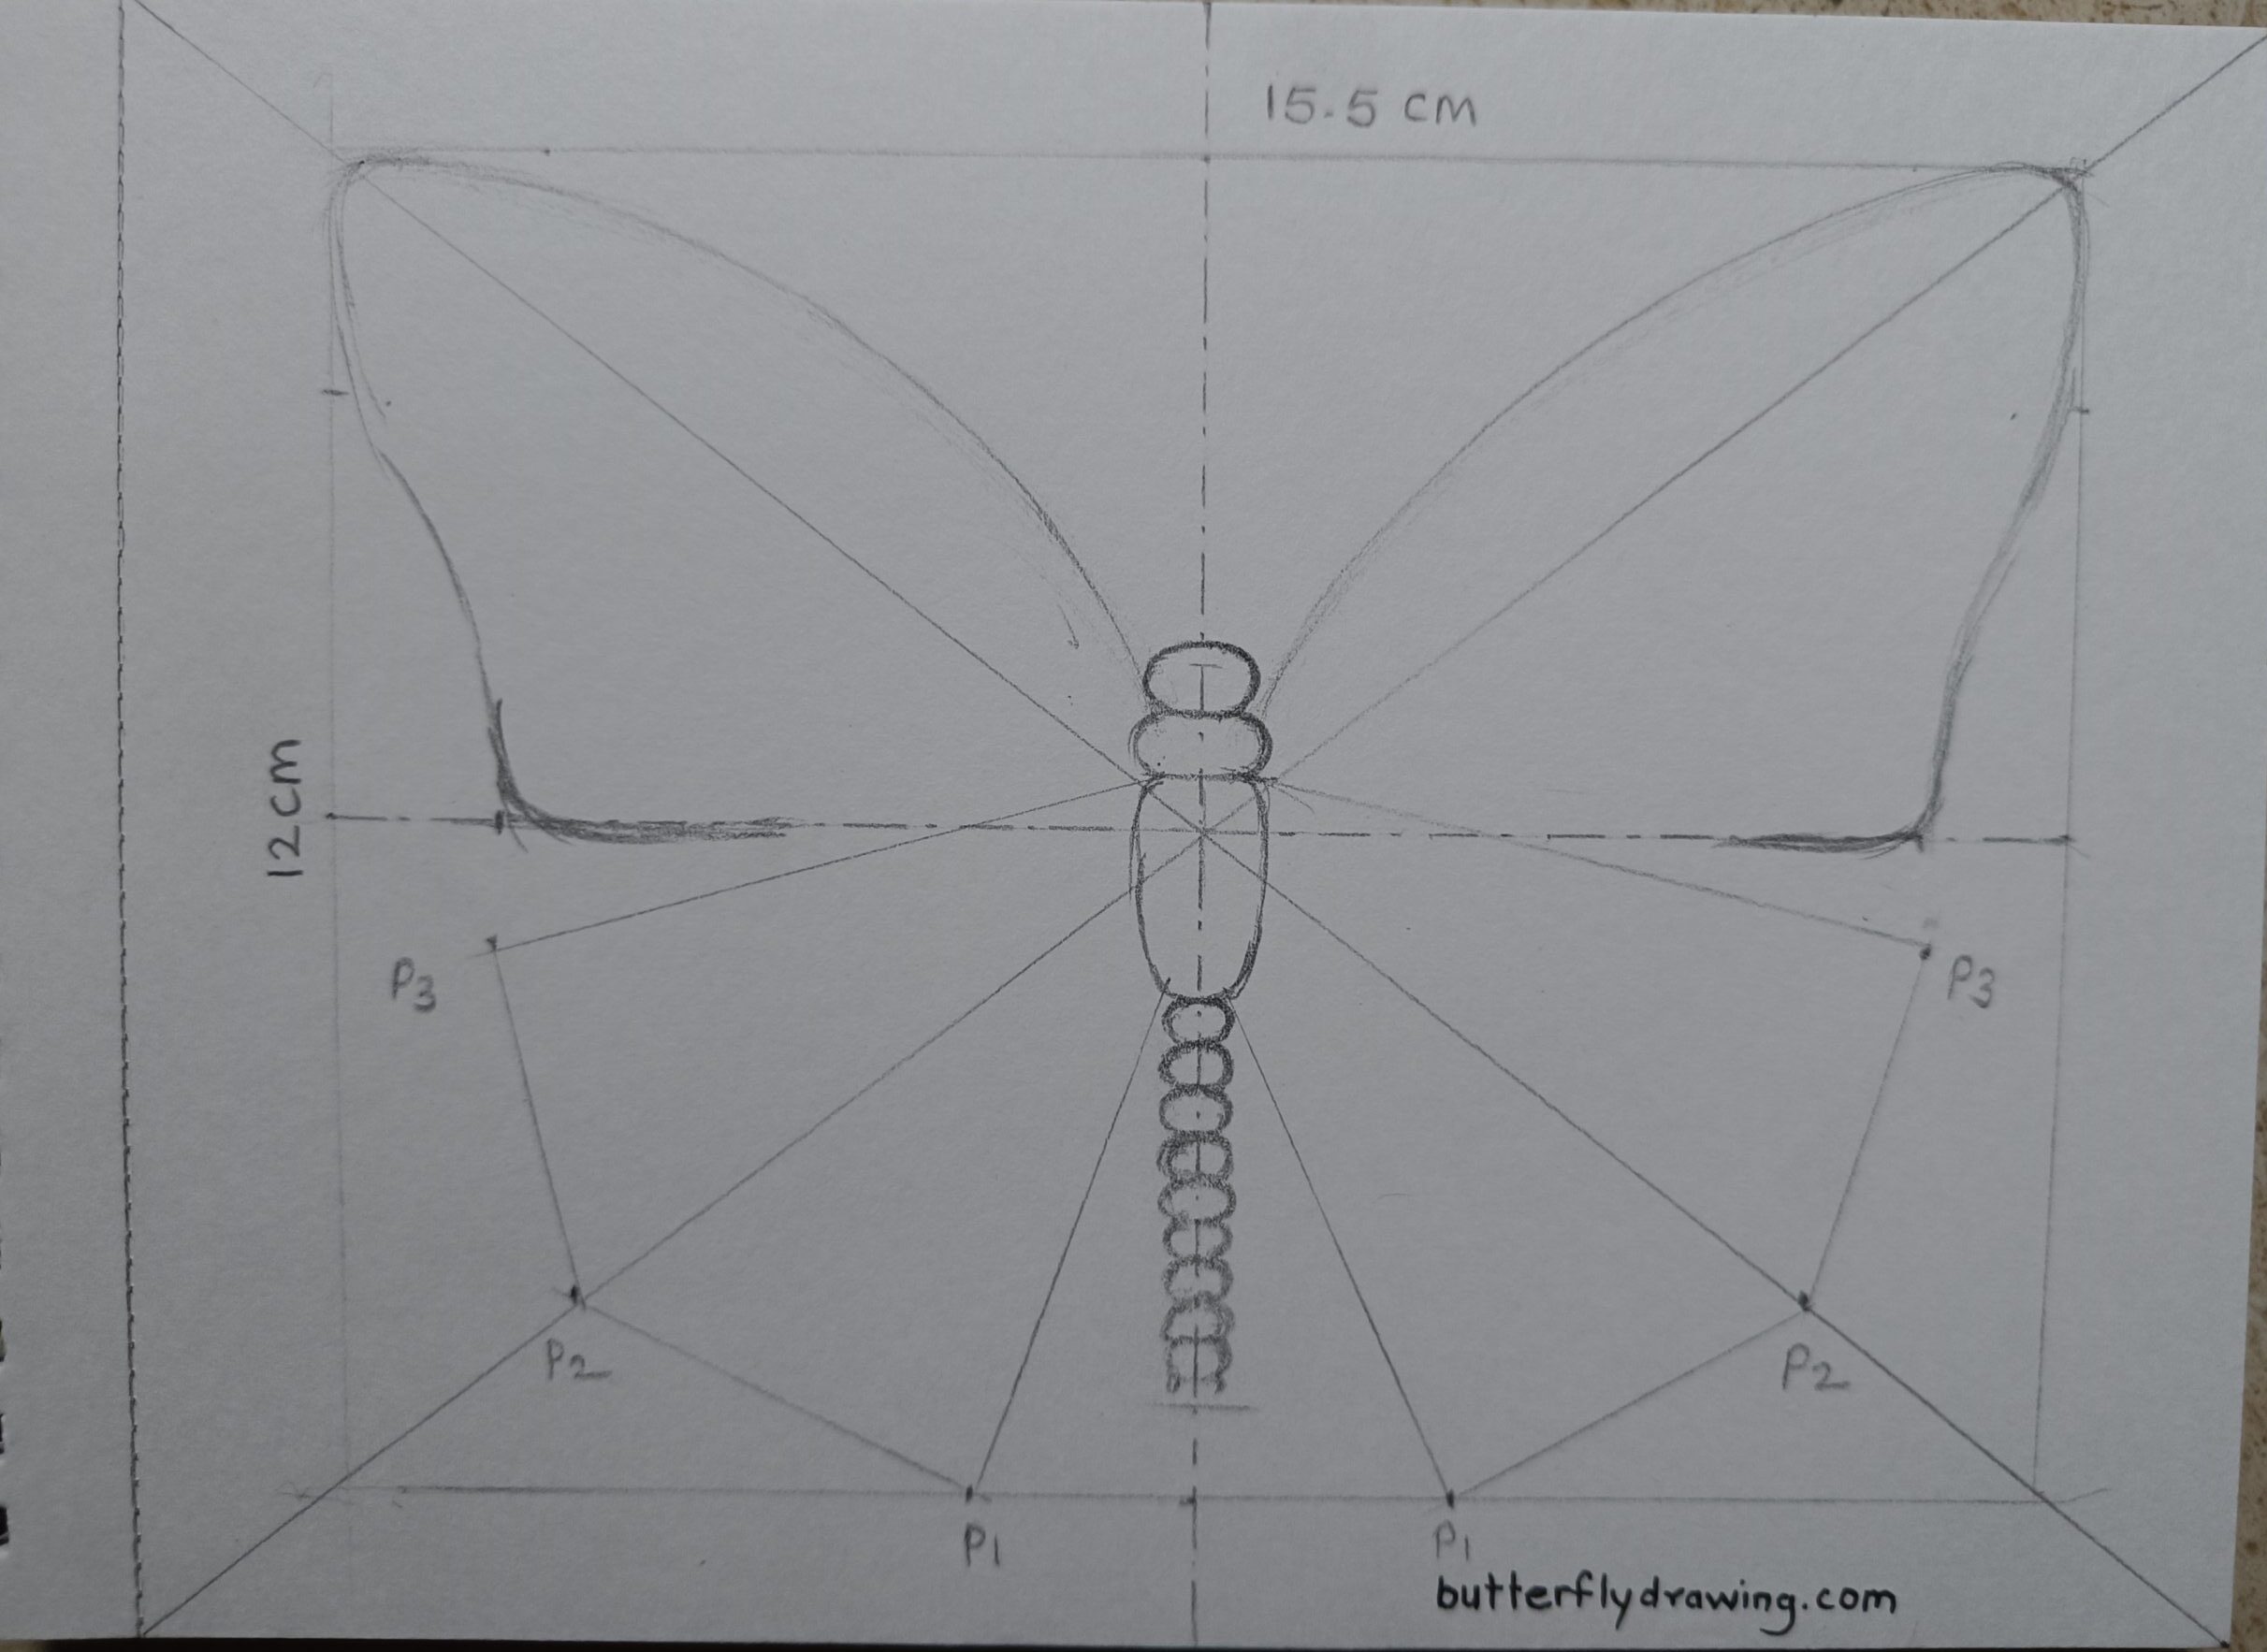
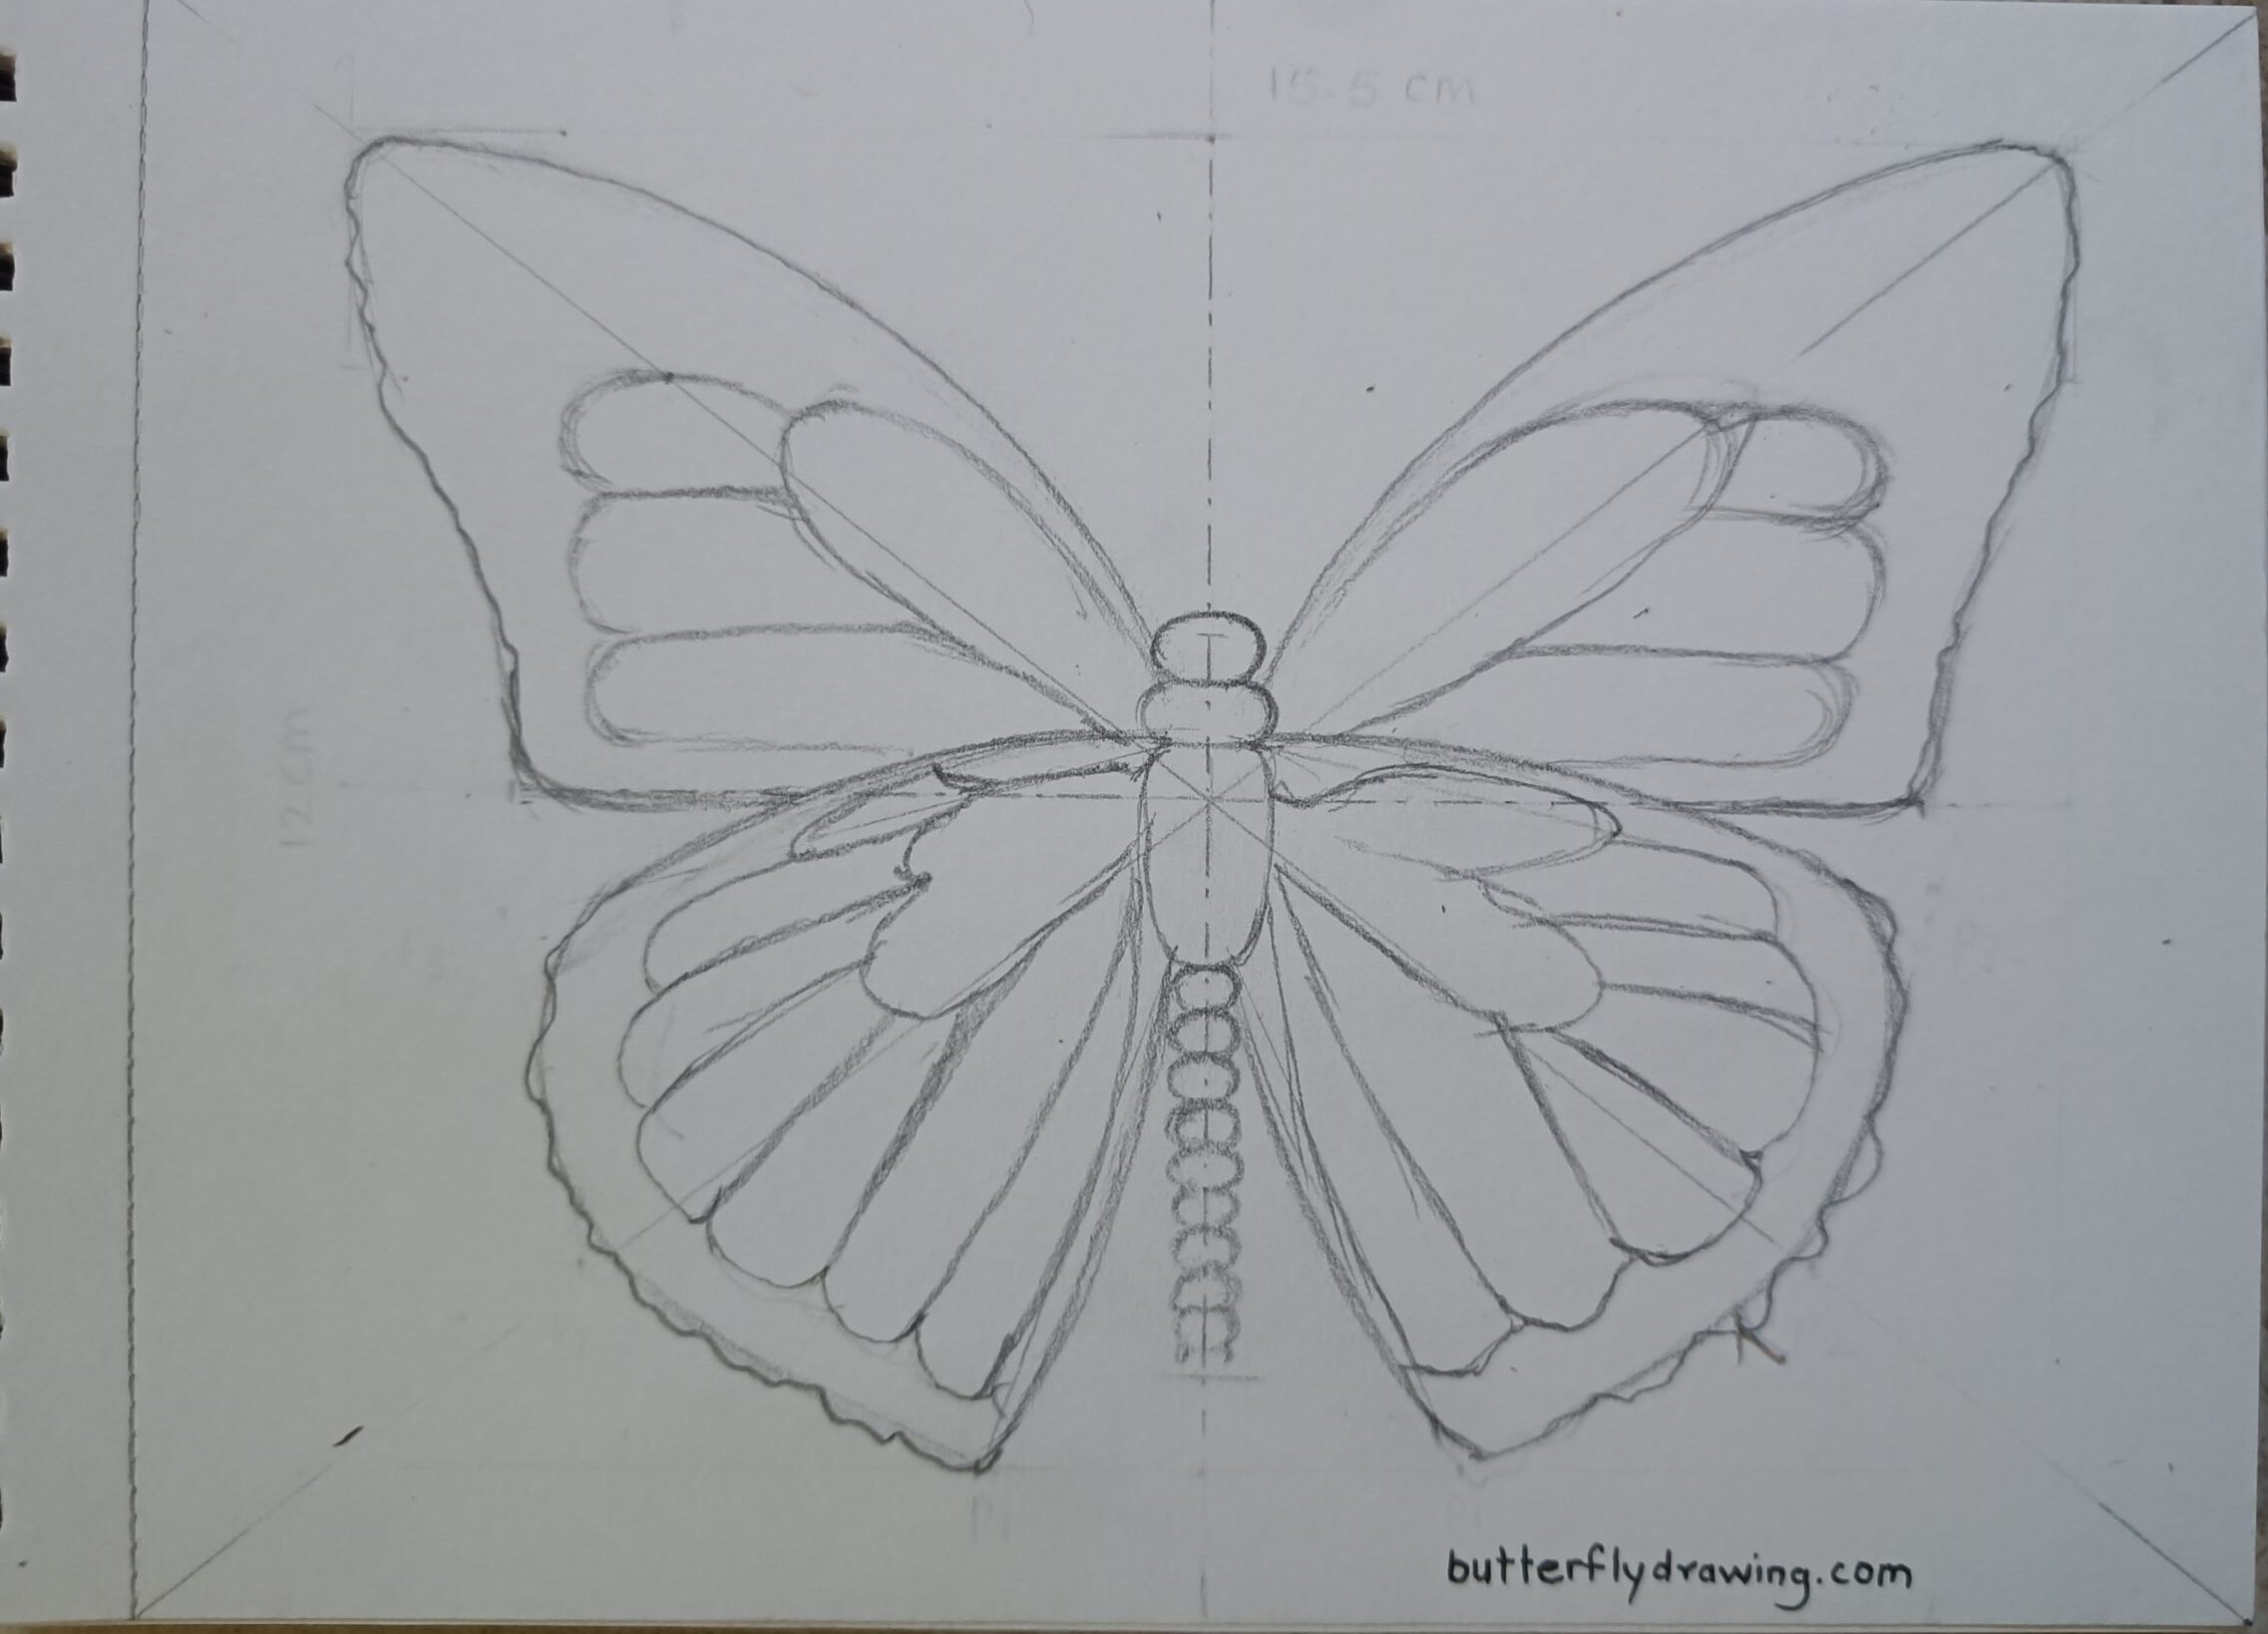
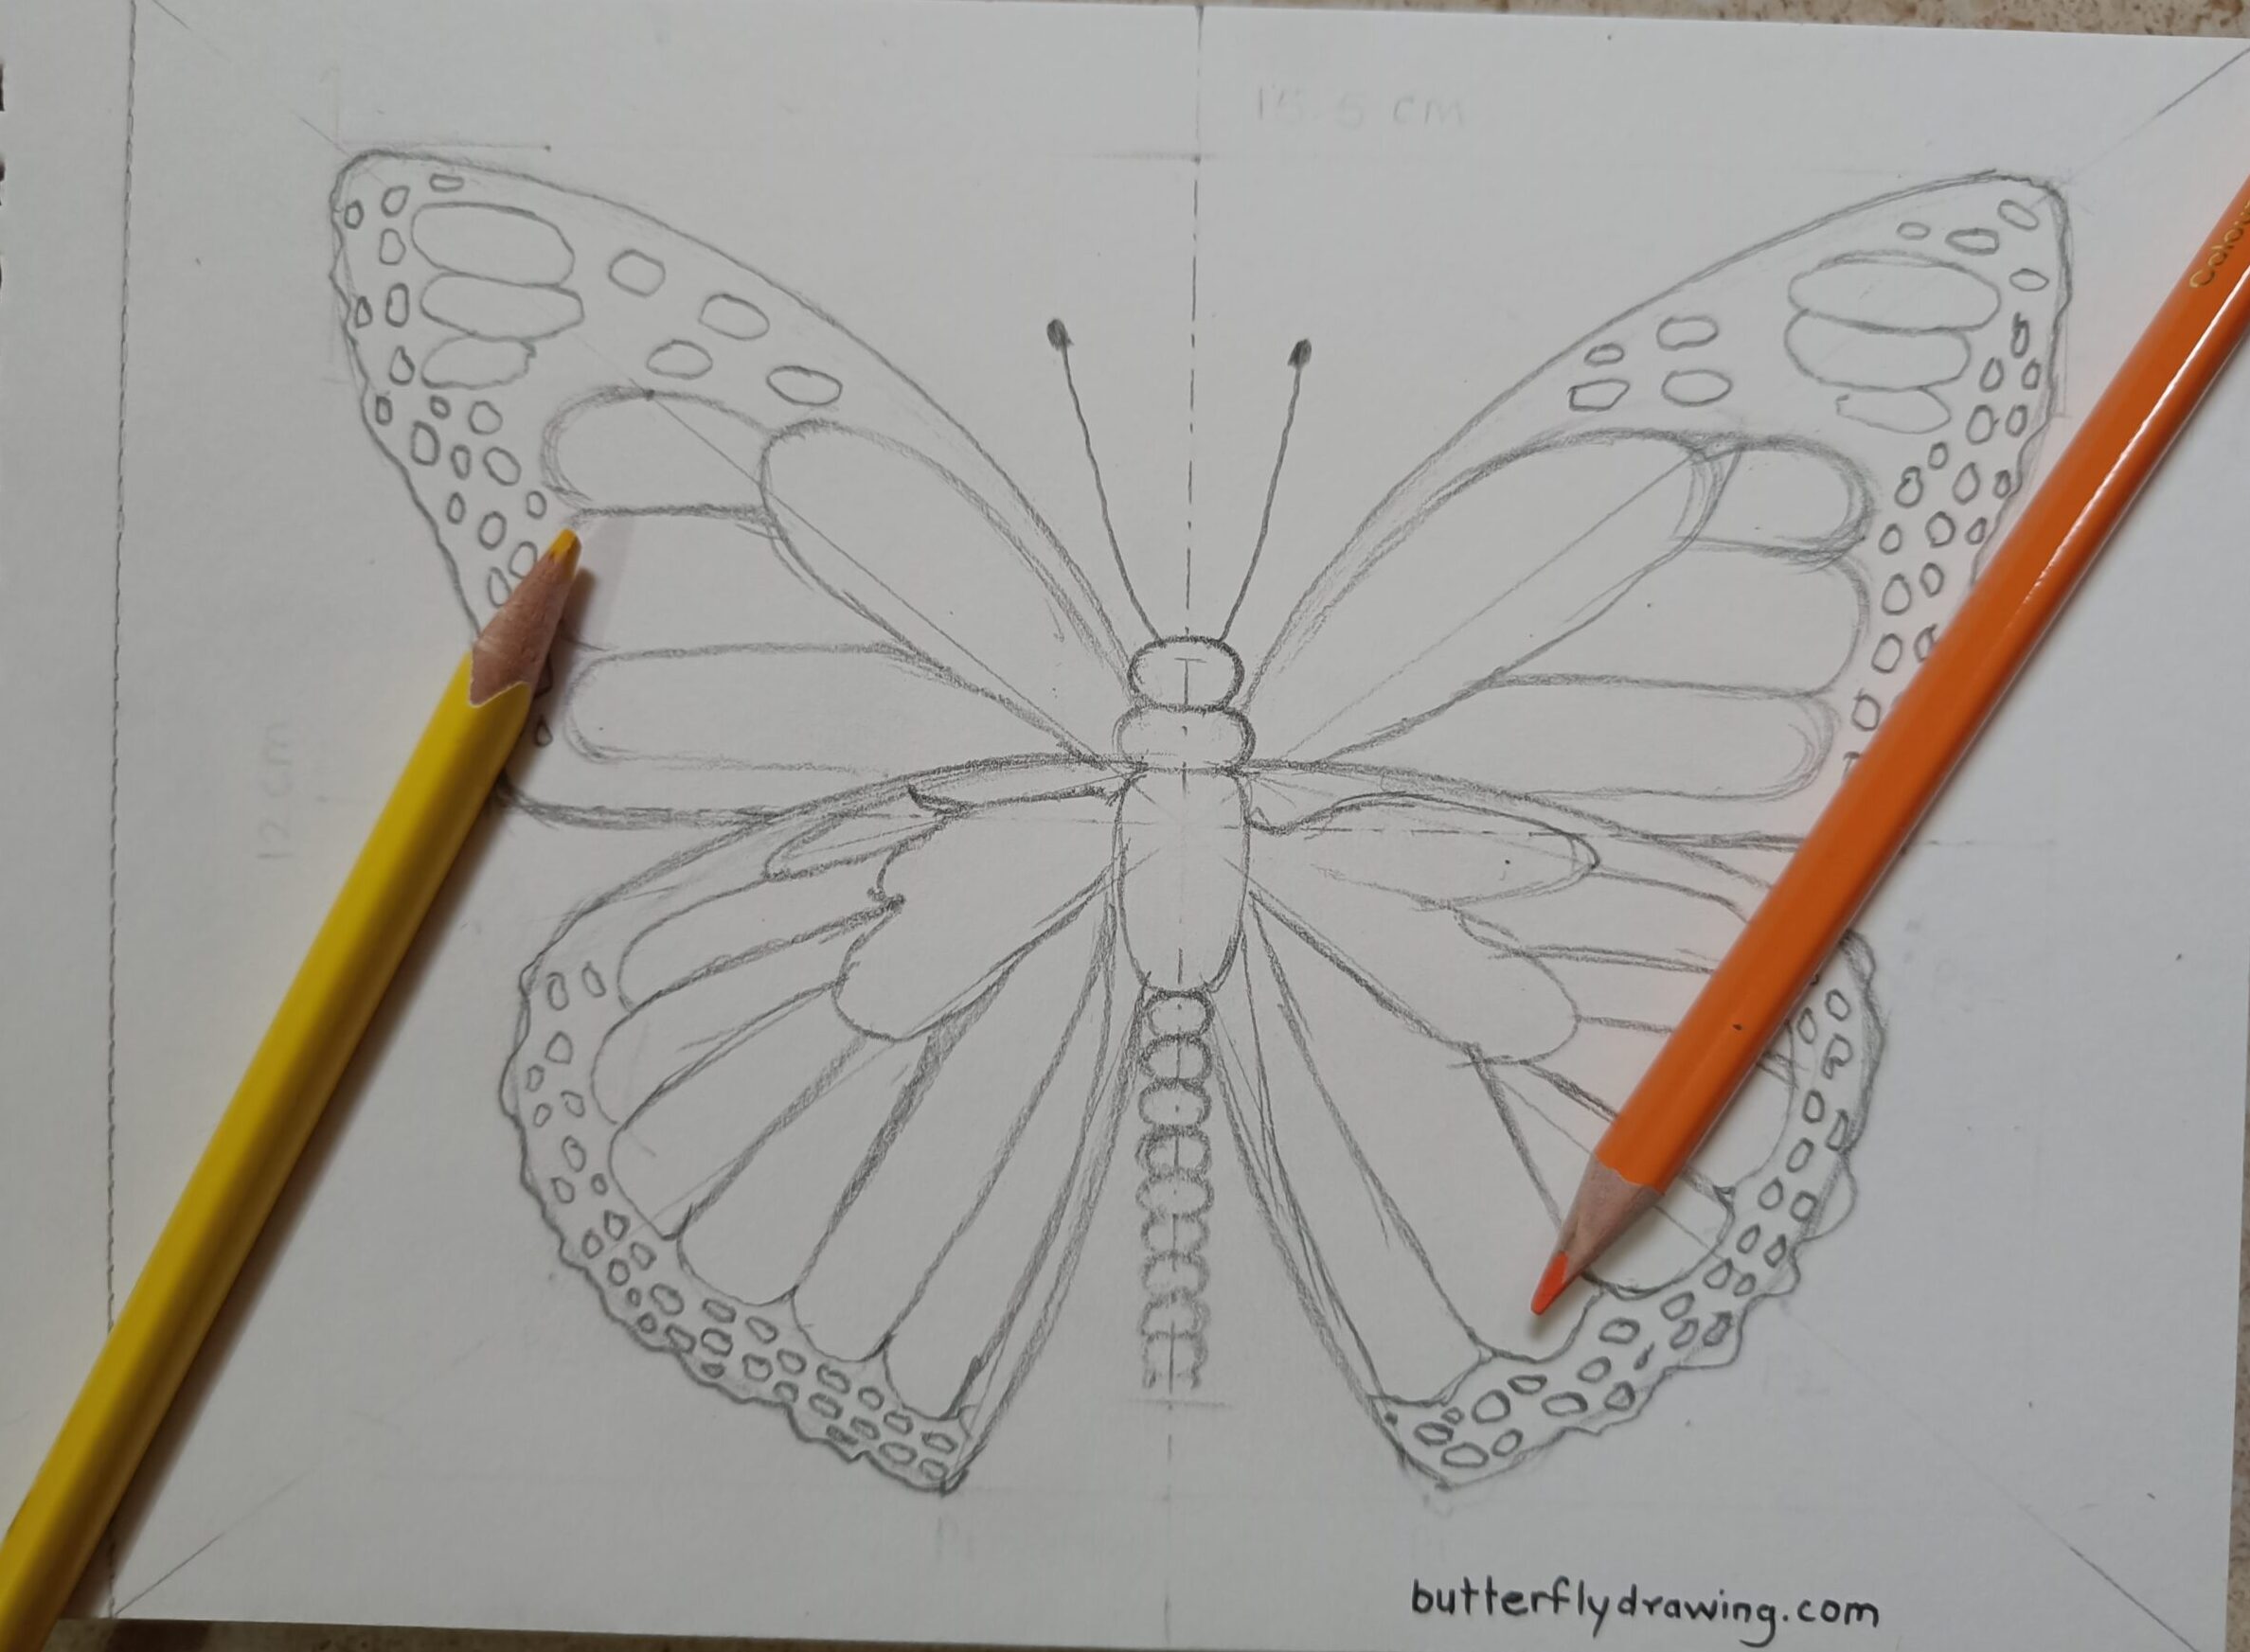
Step 5: Erase Reference Line & Create Doodle Line.
- Remove all reference line. make sure don’t erase centre line.
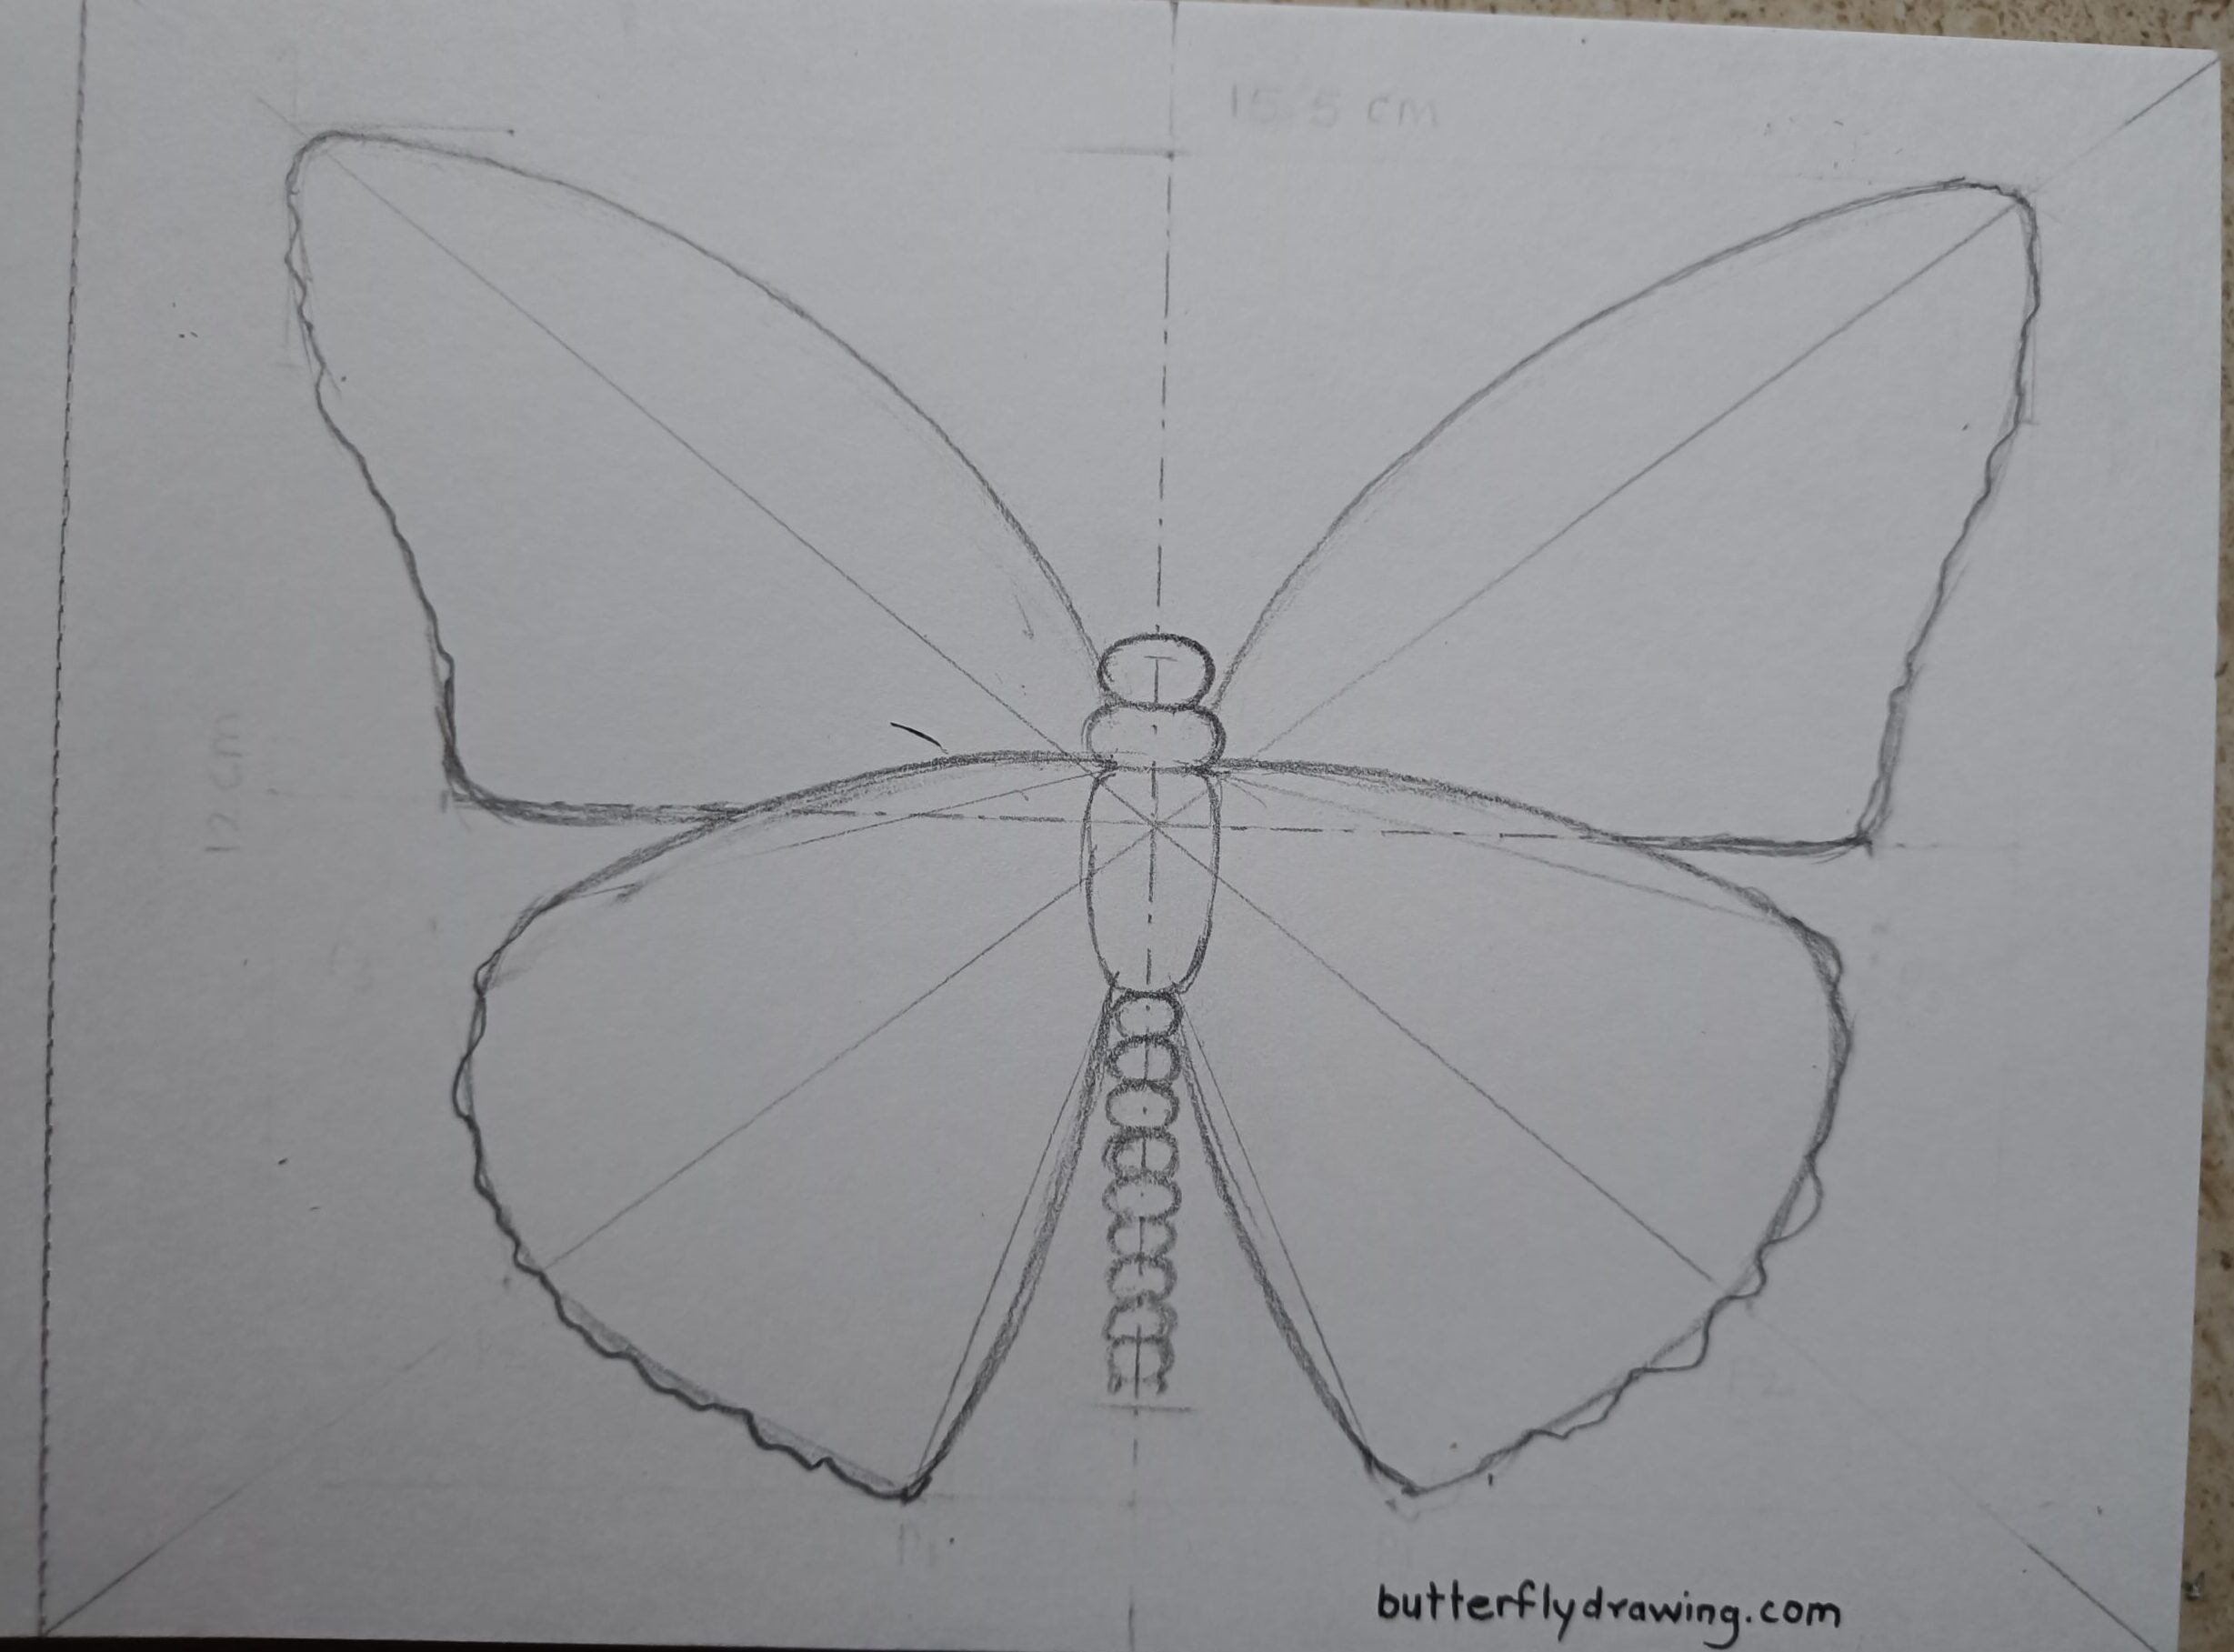
- Monarch Butterfly wings not having plane wings outline its always in the form of doodle line. start making doodle line outer line of Forewing and Hindwing.
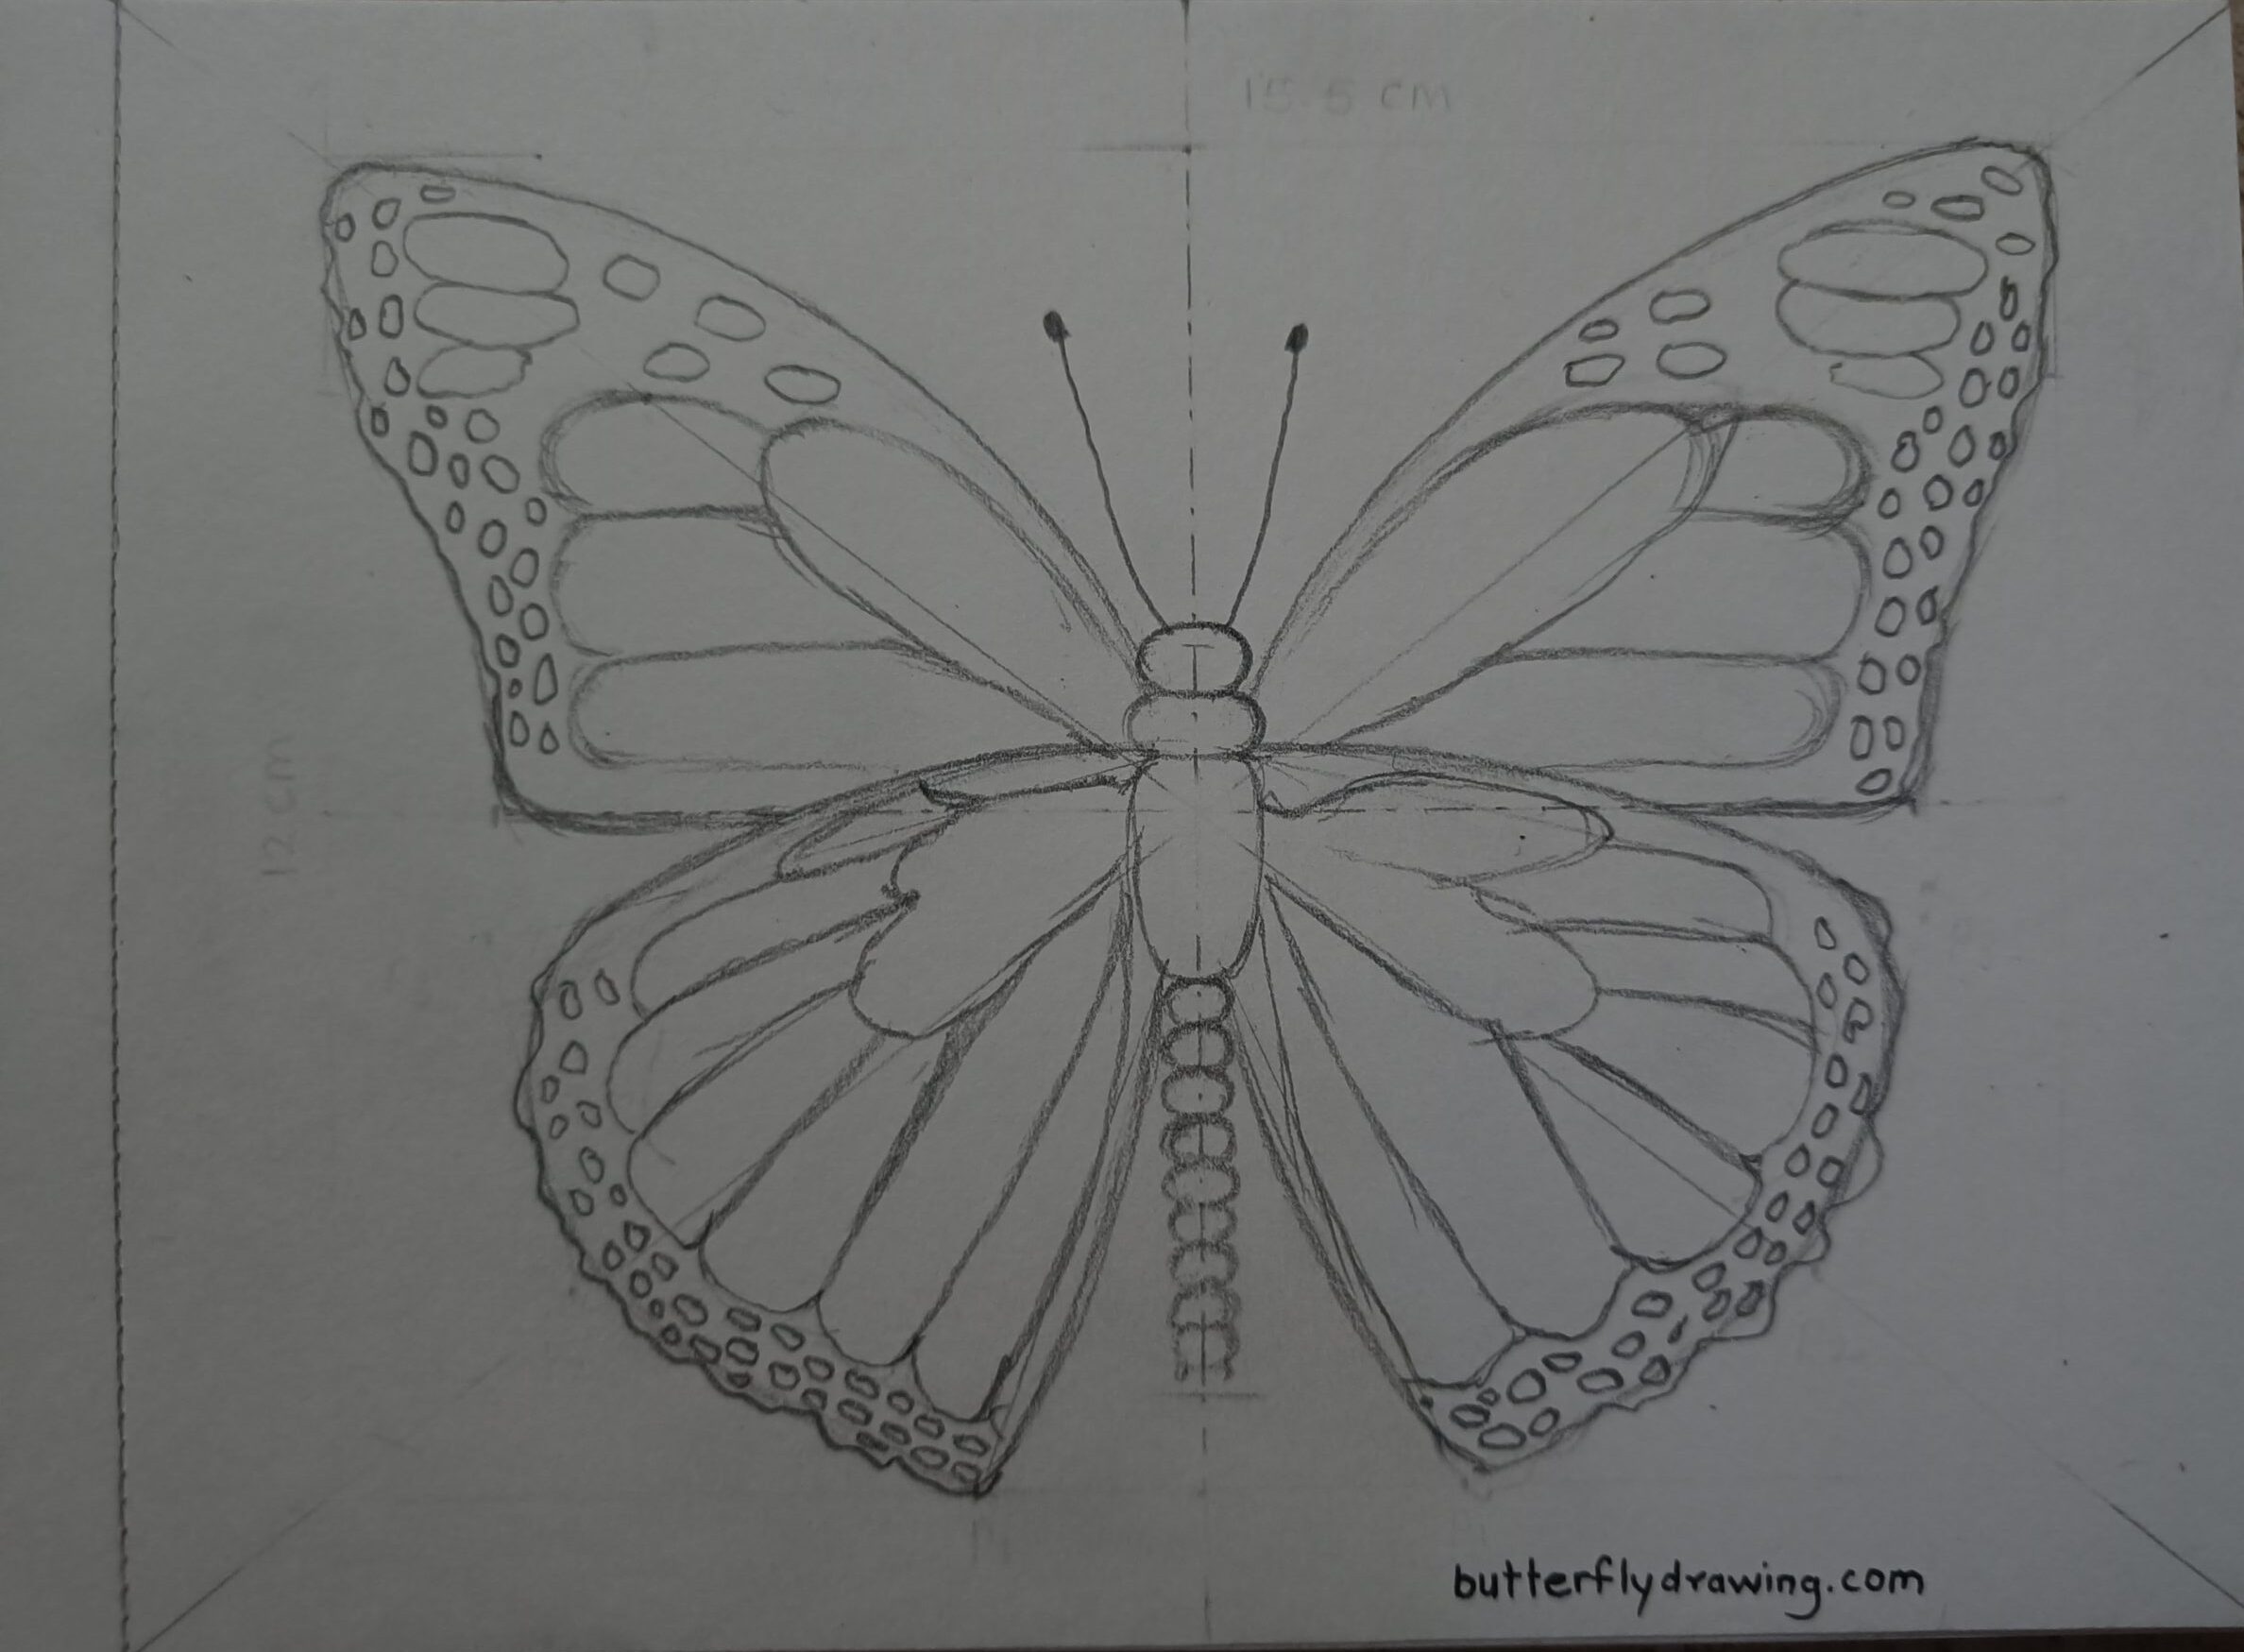
Step 6: Draw Black Forewing & Dot Pattern
- To draw black forewing start it from internal part of main wings. take reference of outer line of wings
- Make doodle pattern for black forewing. for more understanding refer below figure.
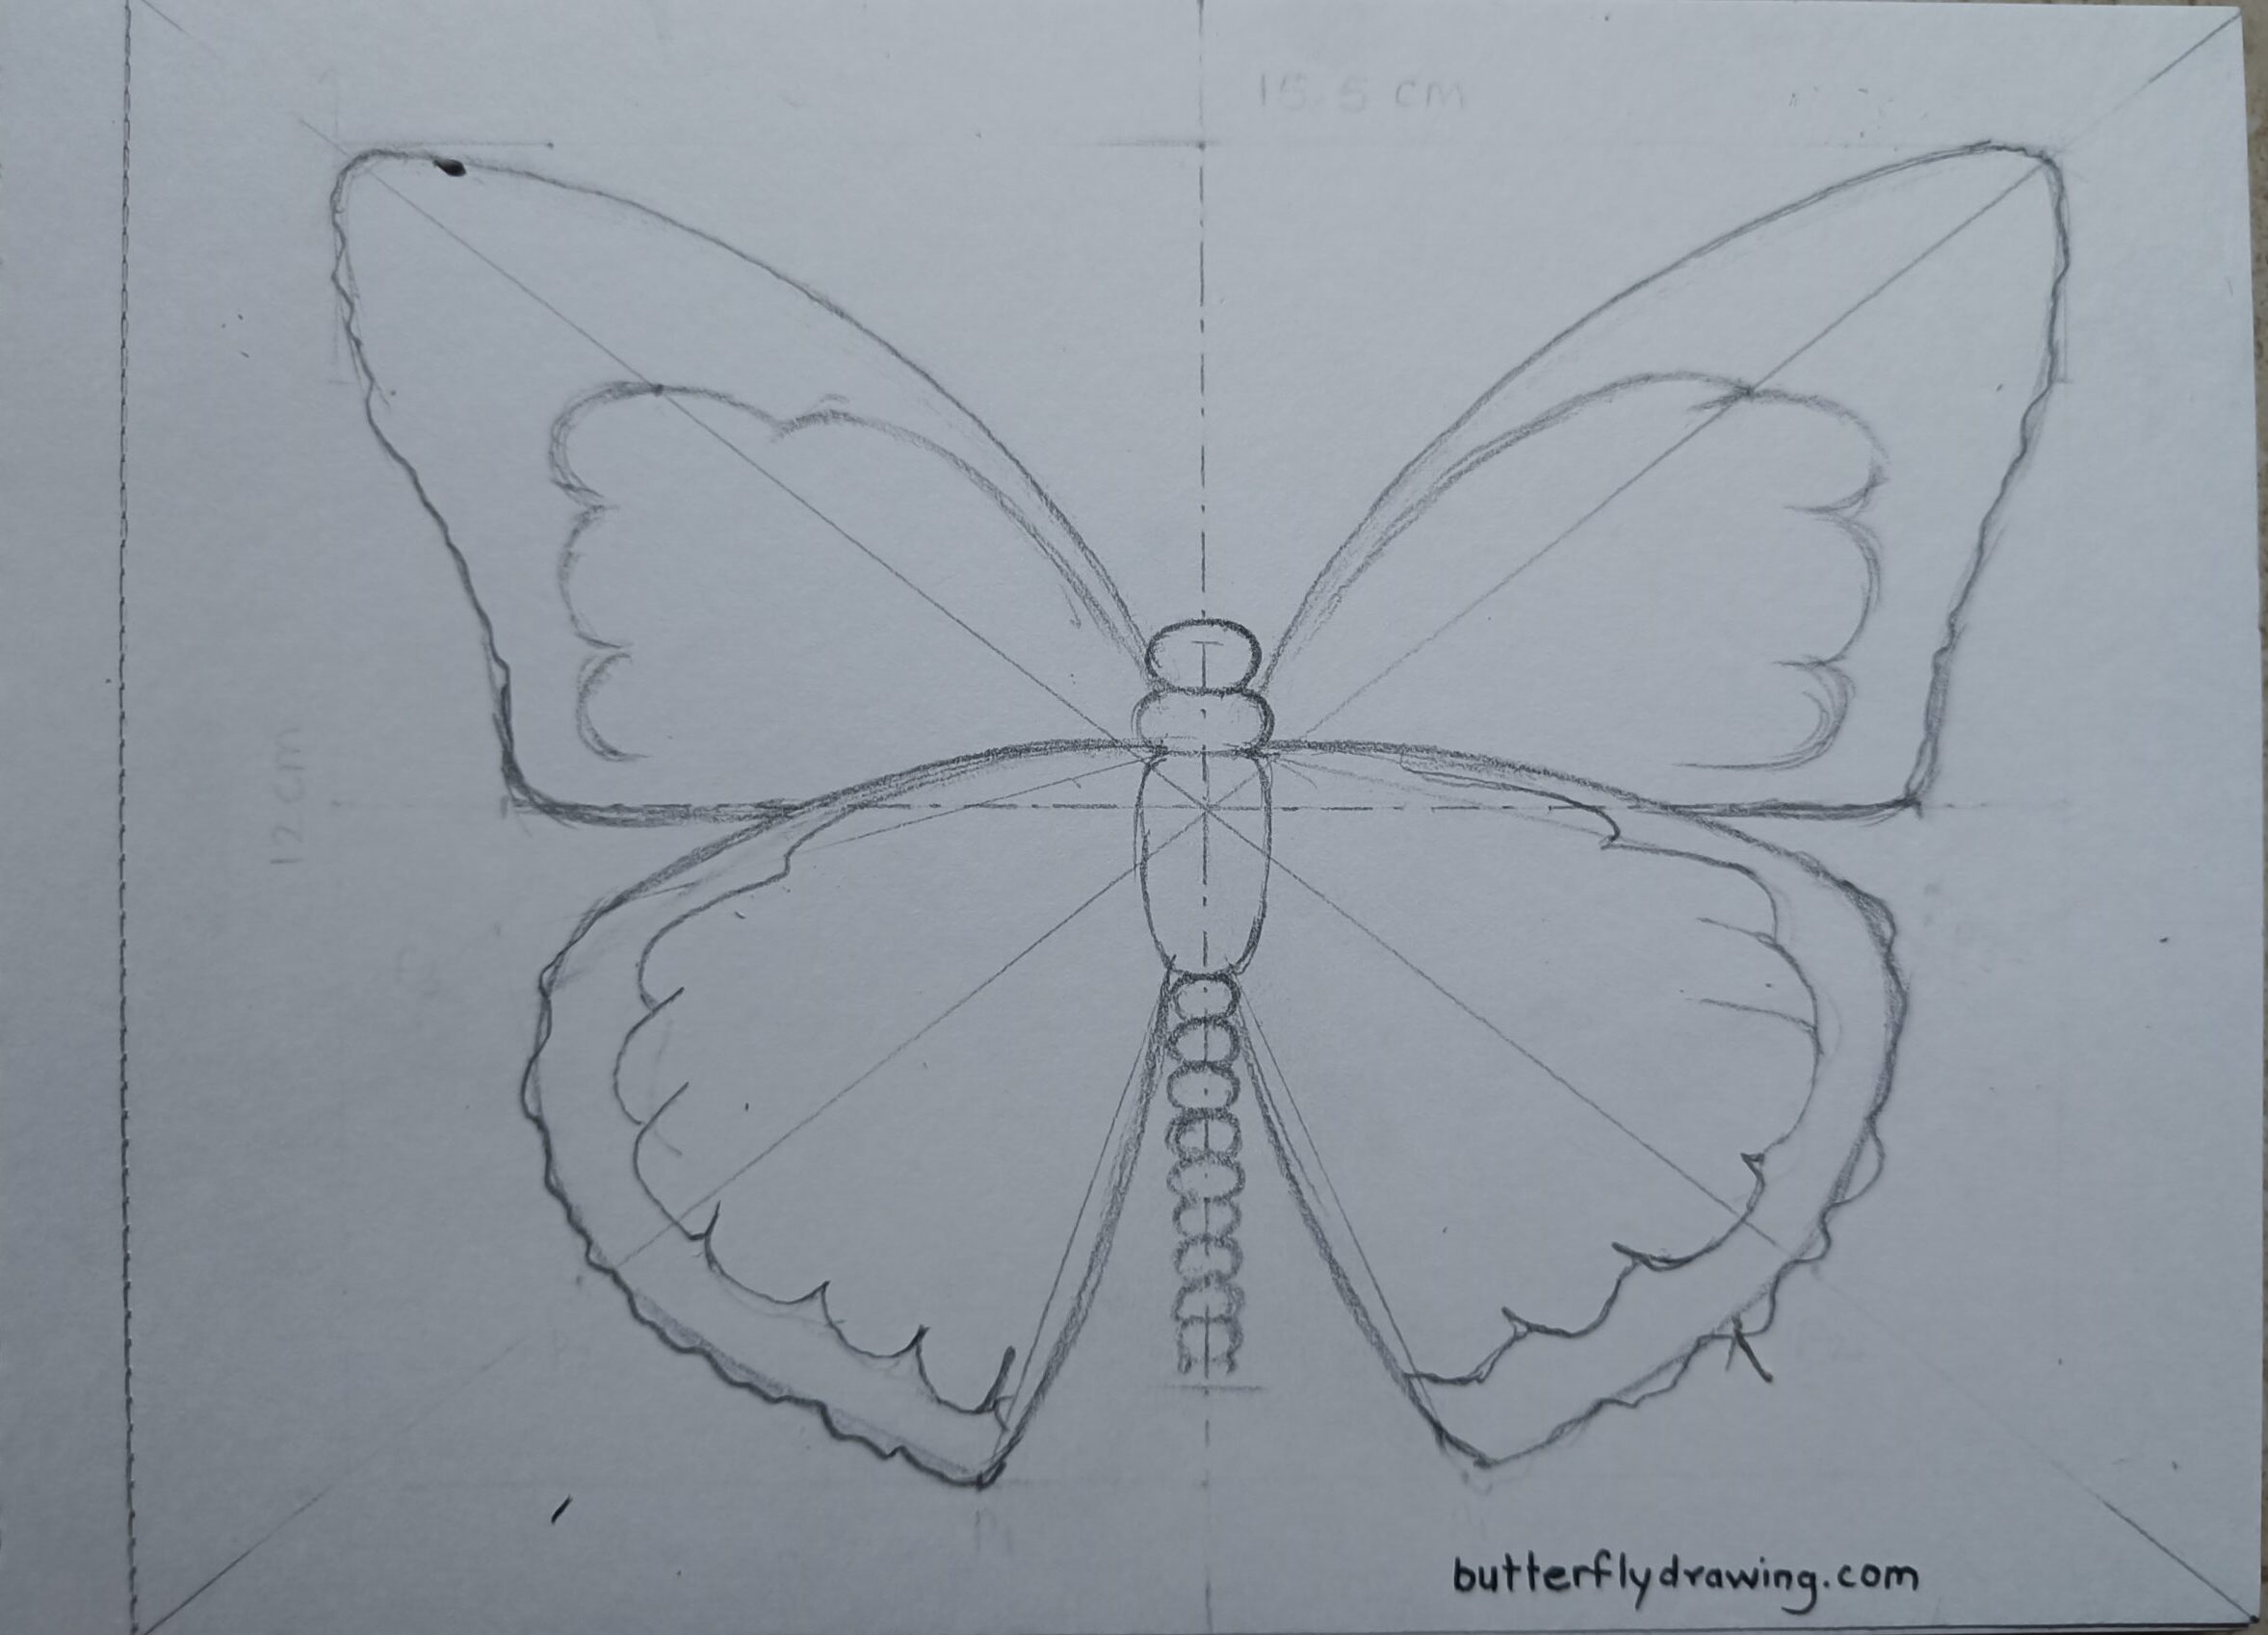
- Start creating wings veins pattern connect every black veins line with doodle pointer line.
- Complete veins pattern for upper wings and lower wing of Monarch Butterfly Drawing with free hand
- Start creating Dot pattern on black forewing as well as on hindwing.
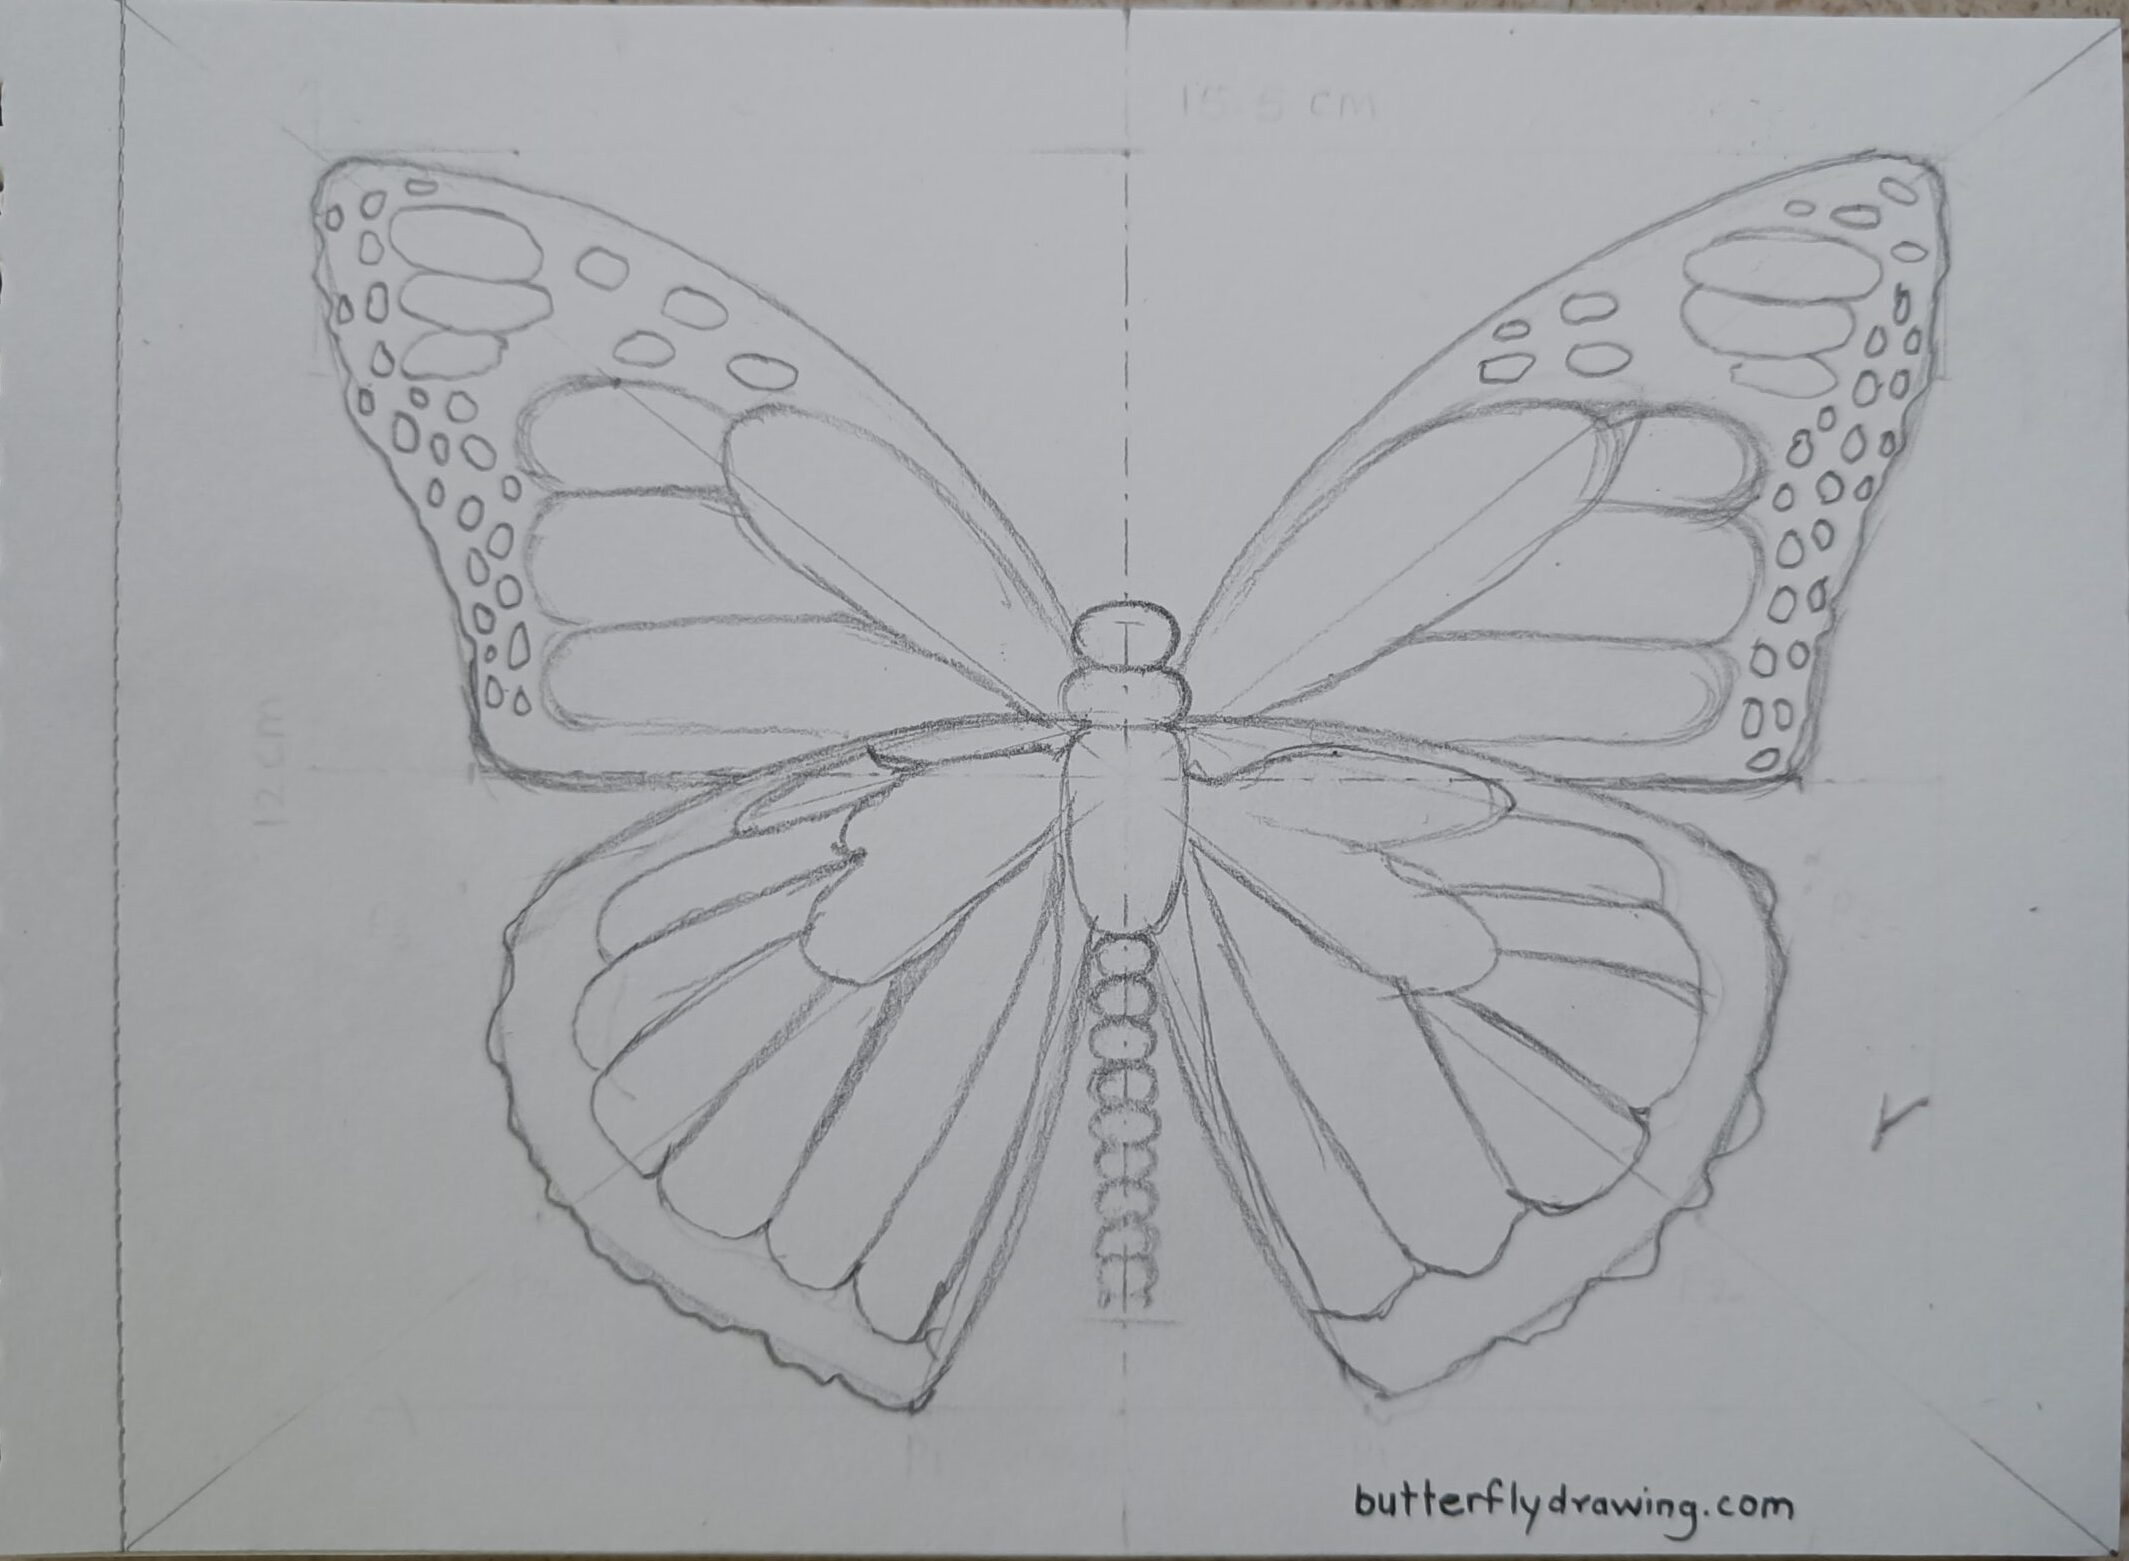
- Similarly make dot pattern for down side of wings. and draw antenna of Monarch butterfly. you can create antenna at end of drawing because its very easy to draw.
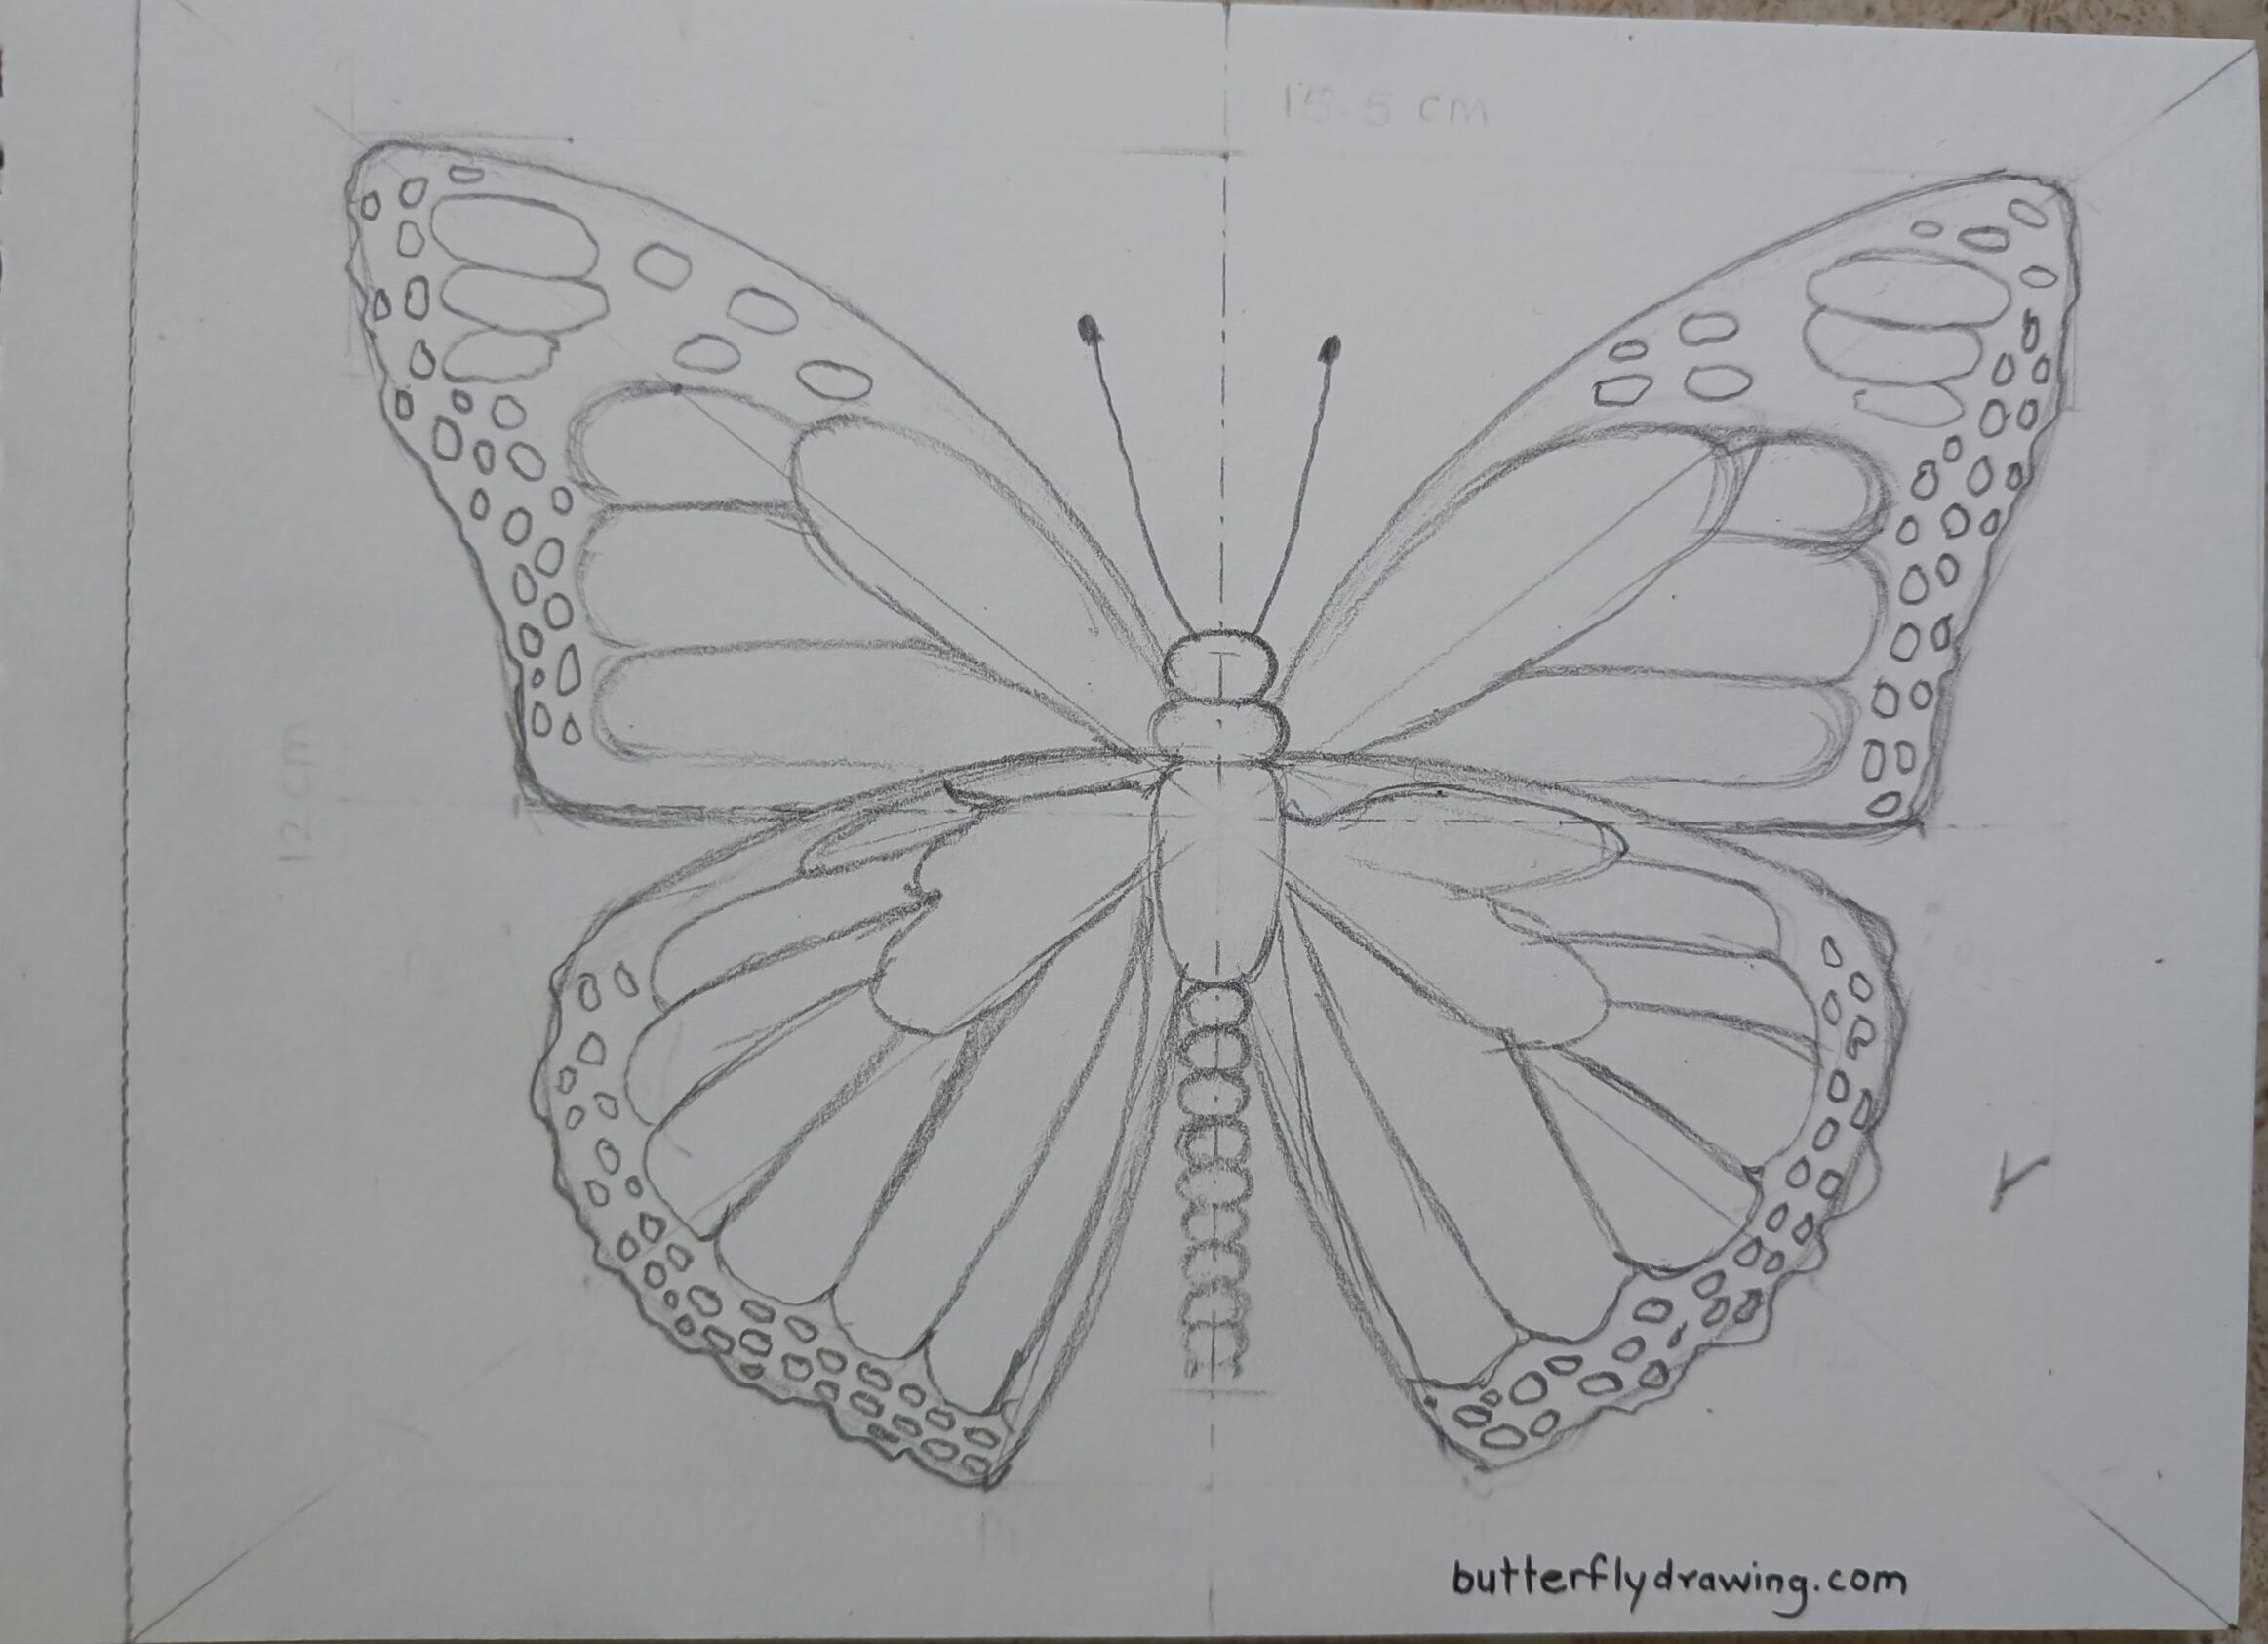
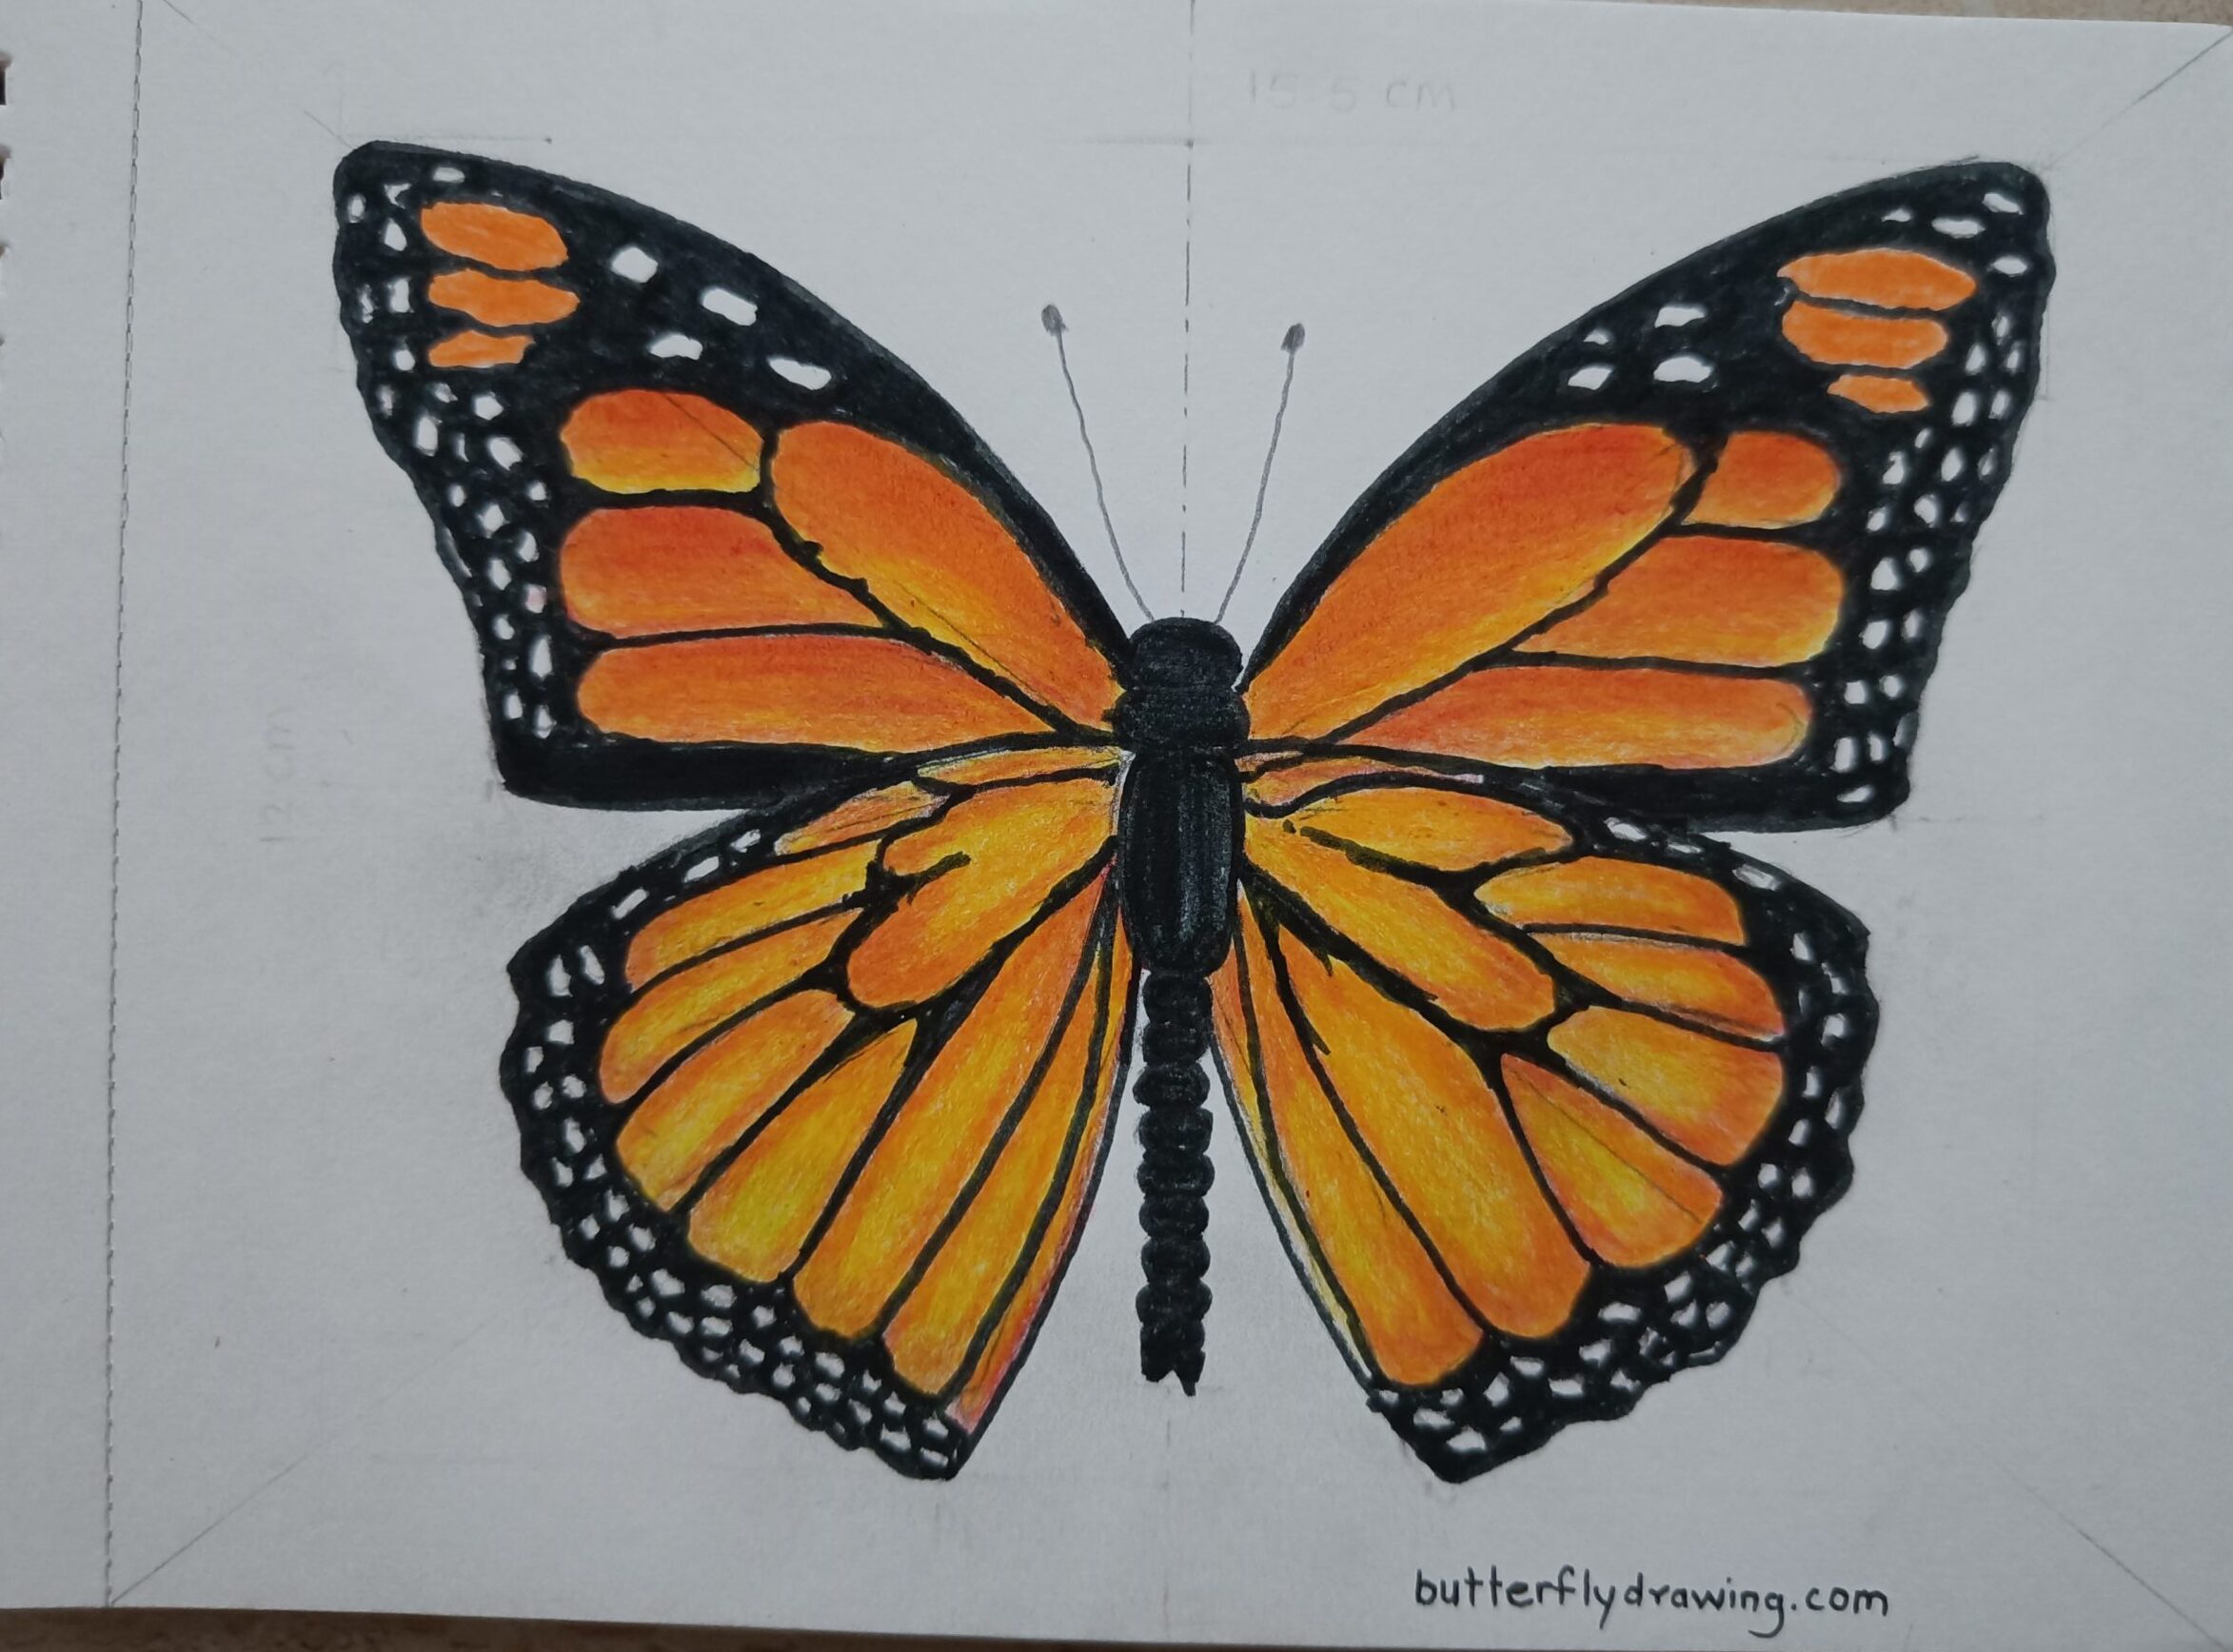
Black & White Complete Monarch Butterfly Drawing
Step 9: Fill Colour
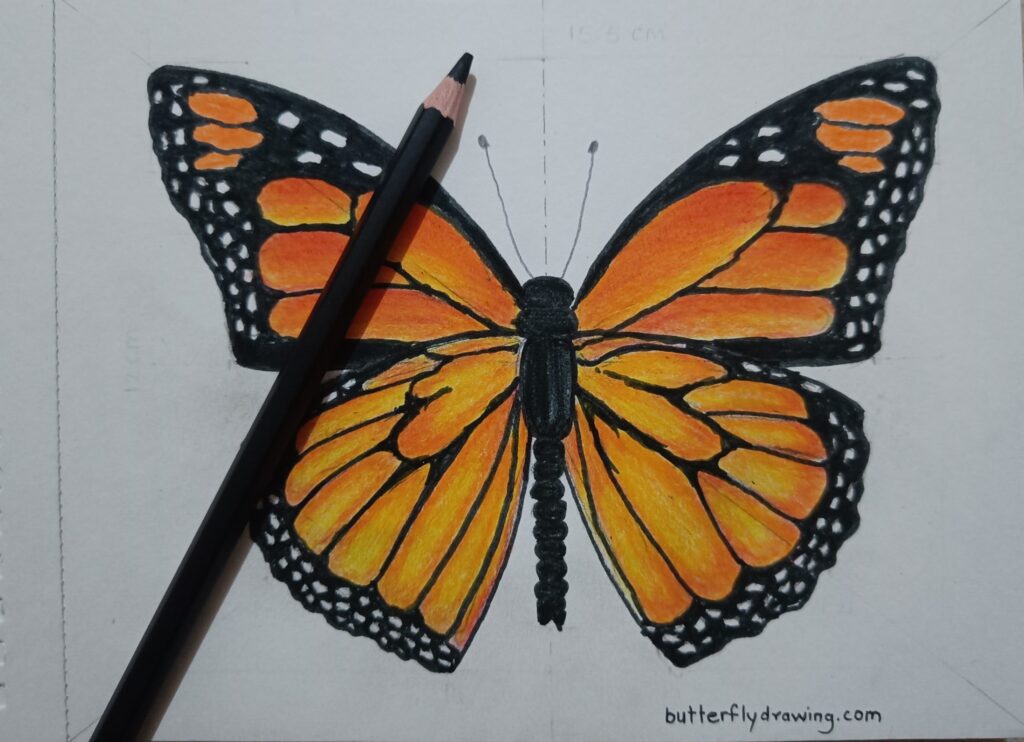
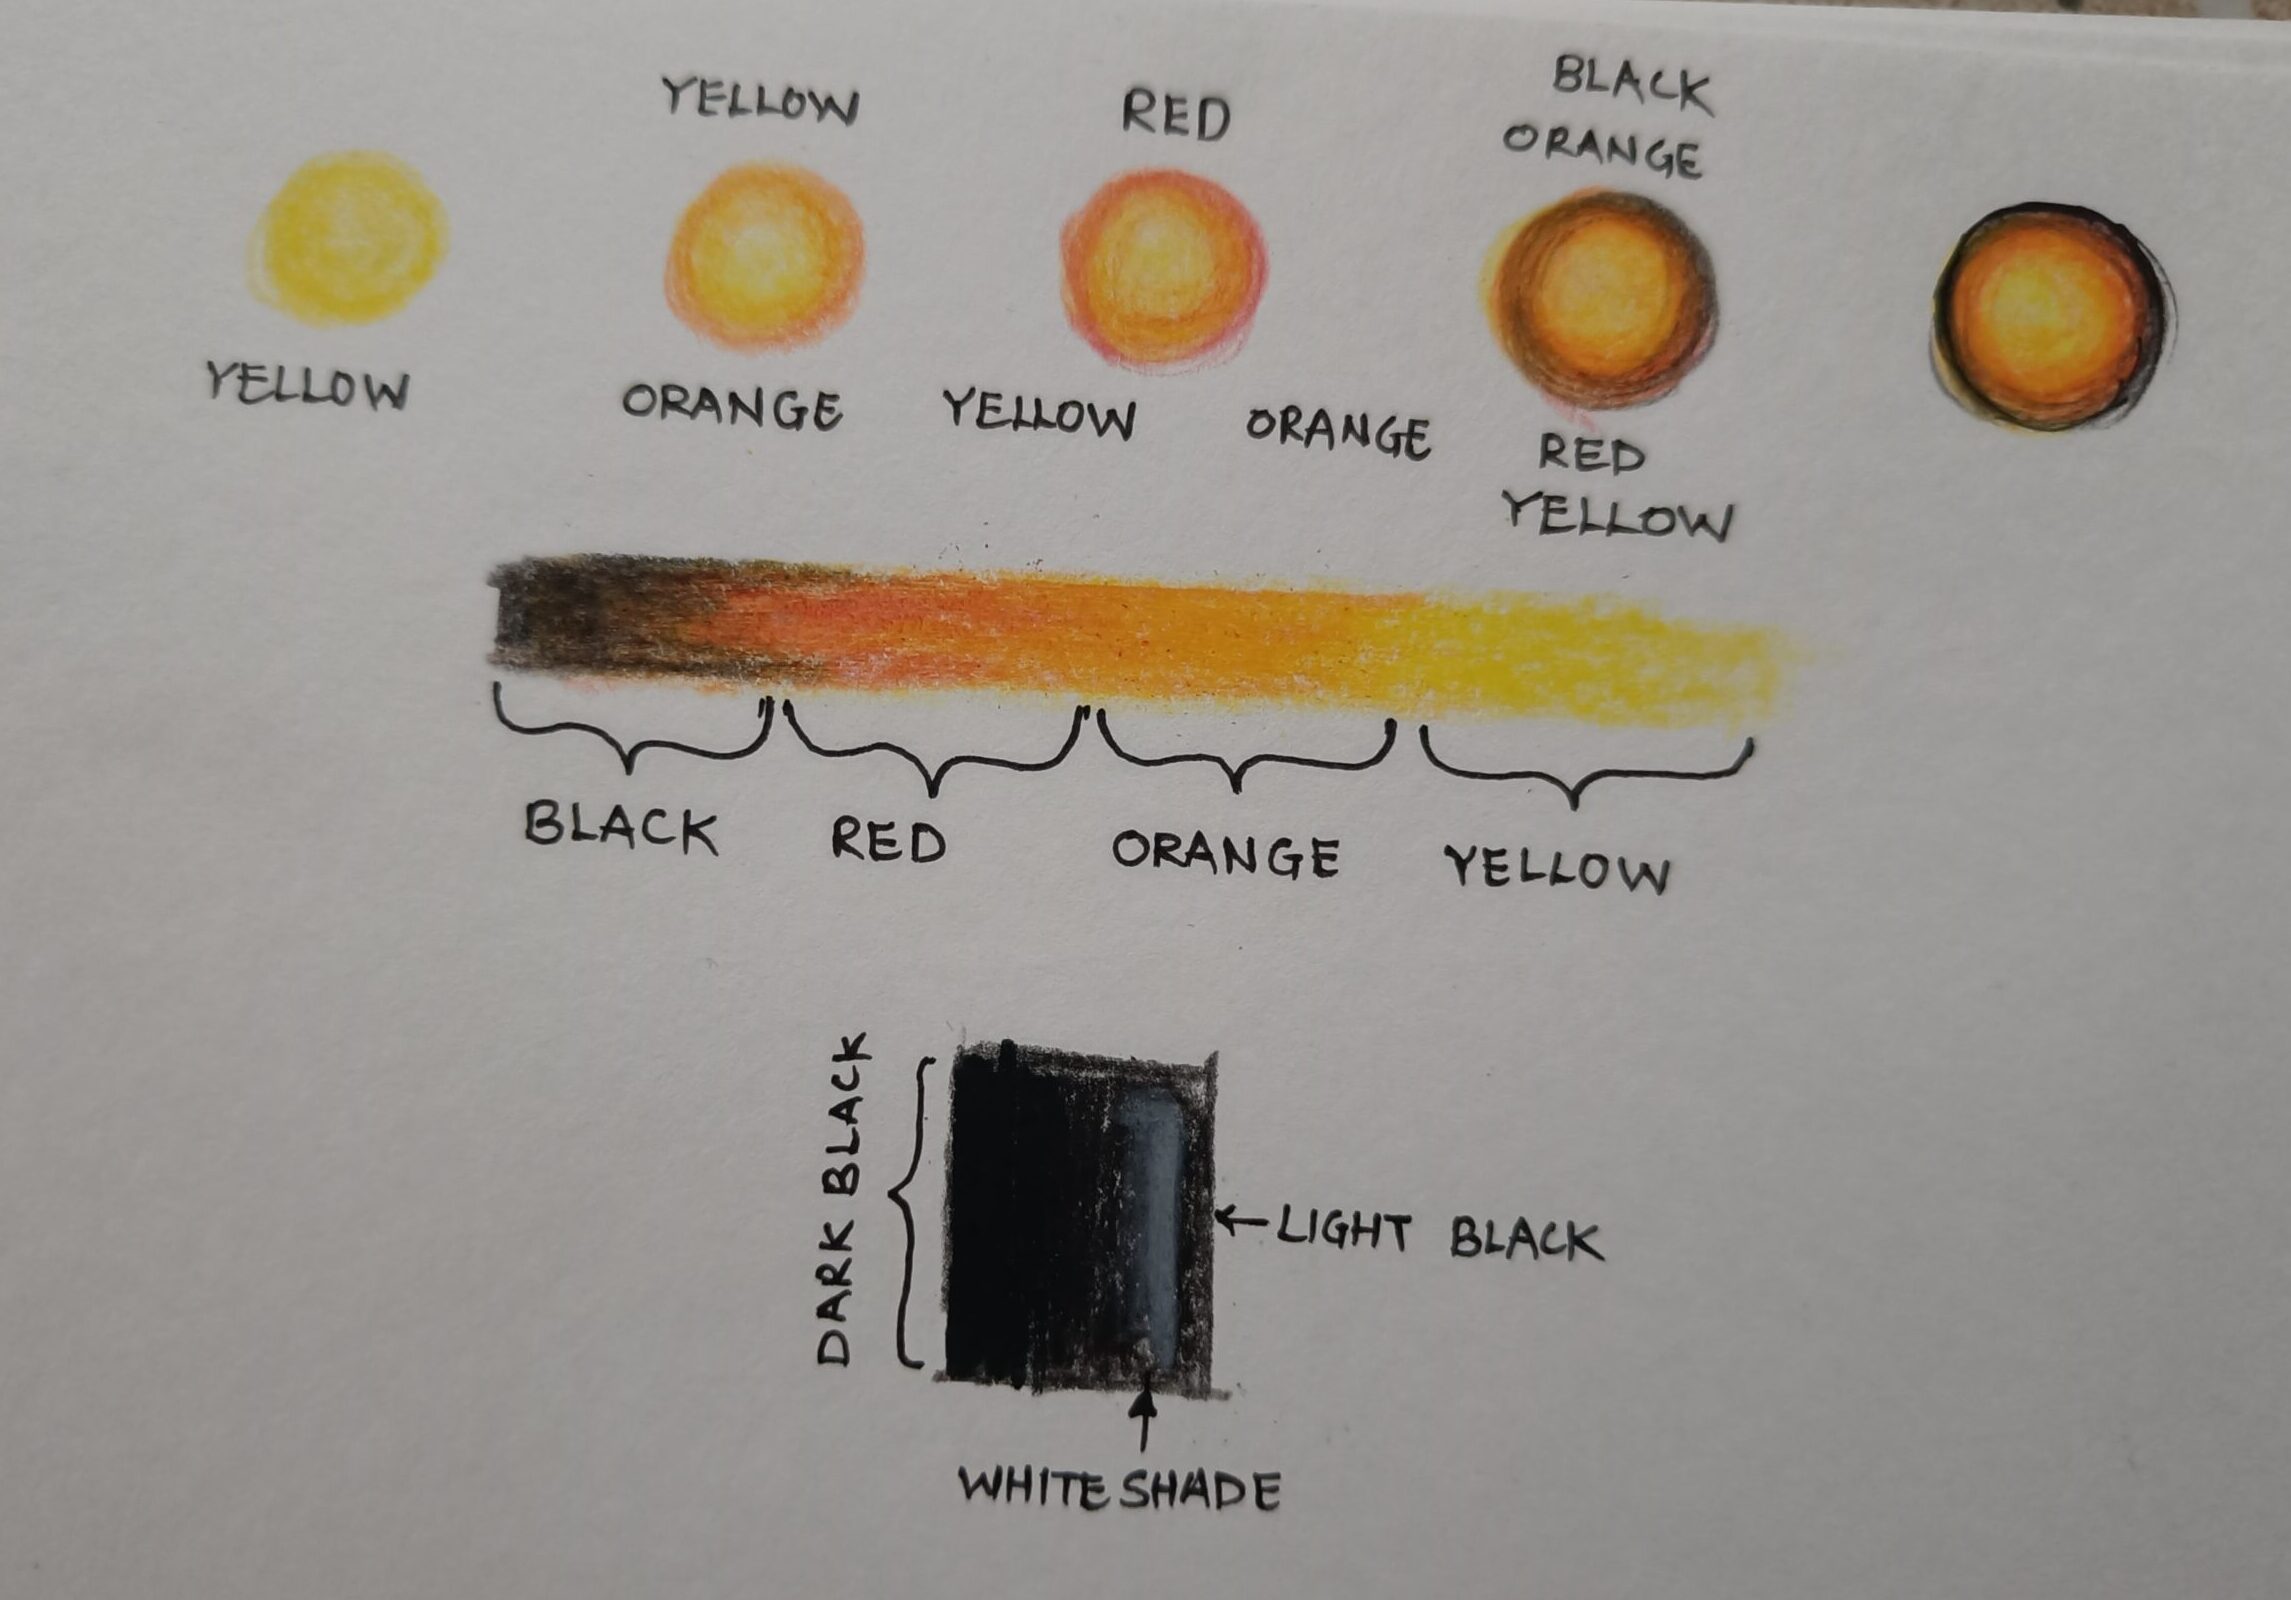
for Monarch Butterfly Drawing I used Colour pencils, Black sketch-pen, Engineer Pointer pen and White glass Marker. for colour pencils I use Yellow, Orange, red and Black colour.
Following are the Monarch Butterfly Drawing used colour shades
- Yellow + Orange
- Yellow + Orange + Red
- Yellow + Orange + Red + Black
- Black + White Glass Pencil
below displayed chart is very useful while you colouring your butterfly.
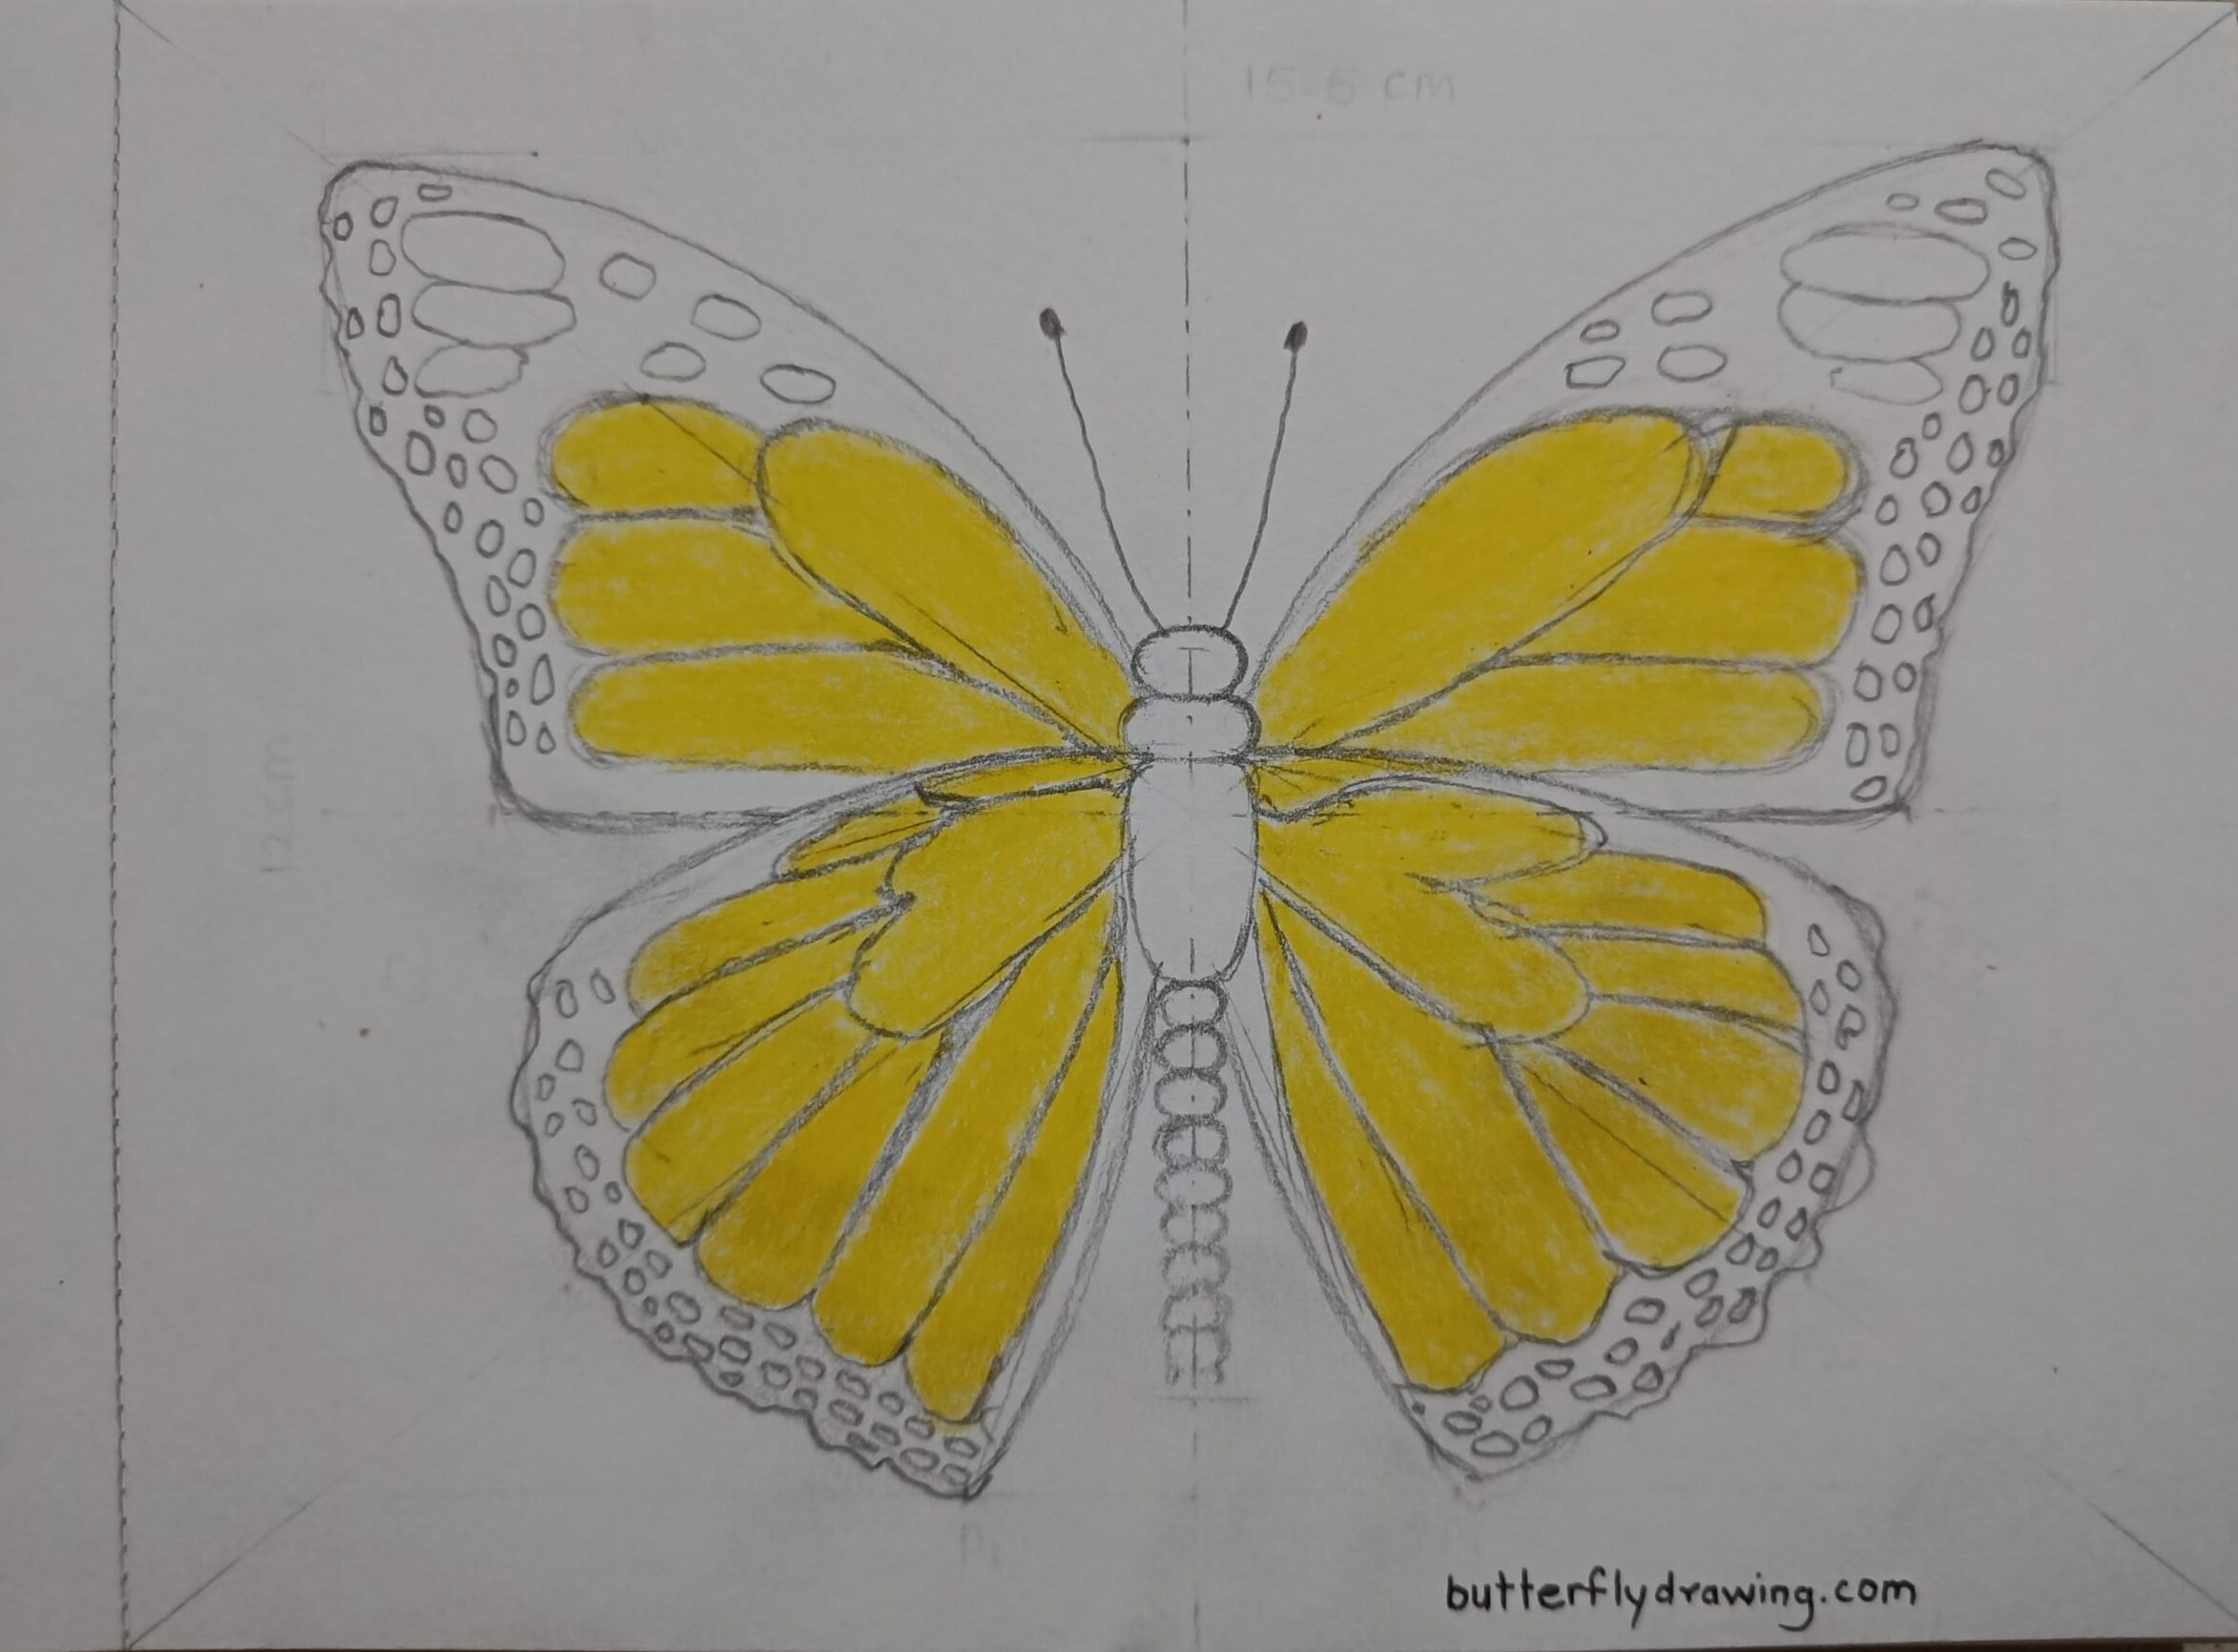
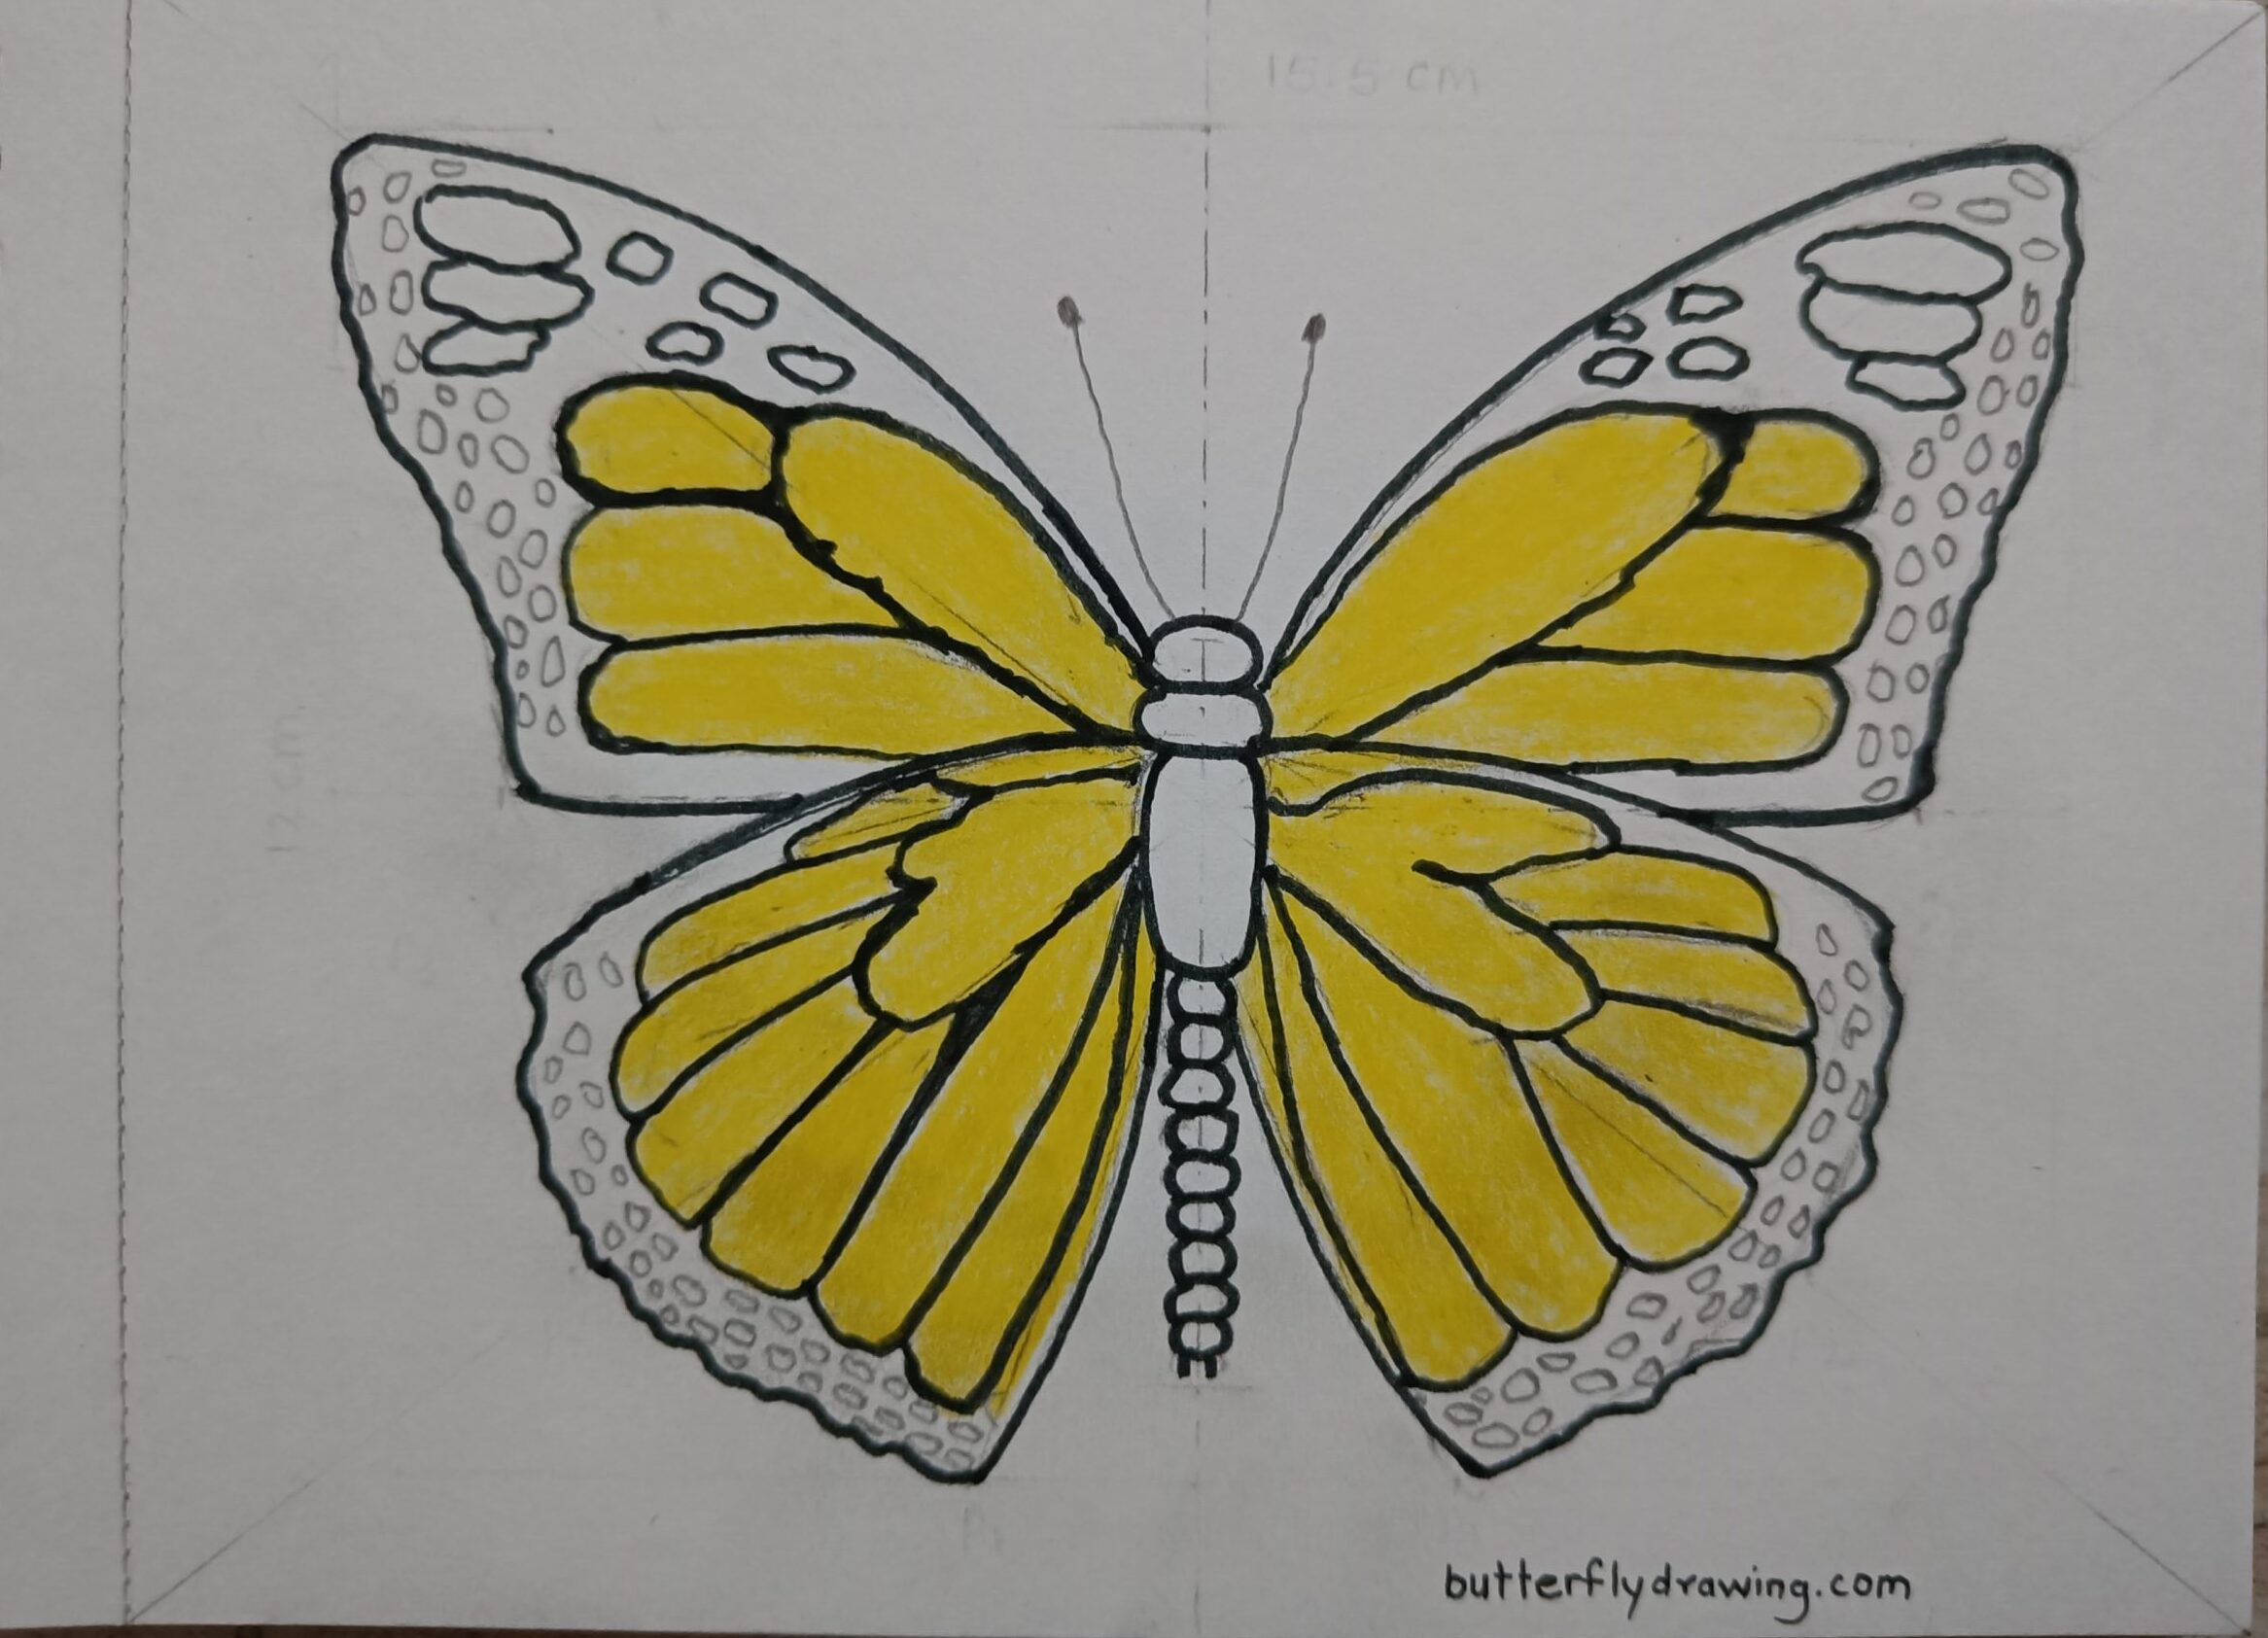
Fill Yellow Colour Shade
- fill yellow colour shade in internal side of Monarch butterflies wings. use simple filling technique.
- Avoid crossing pencil nips from veins of butterfly wing. it can spread black mark on wings.
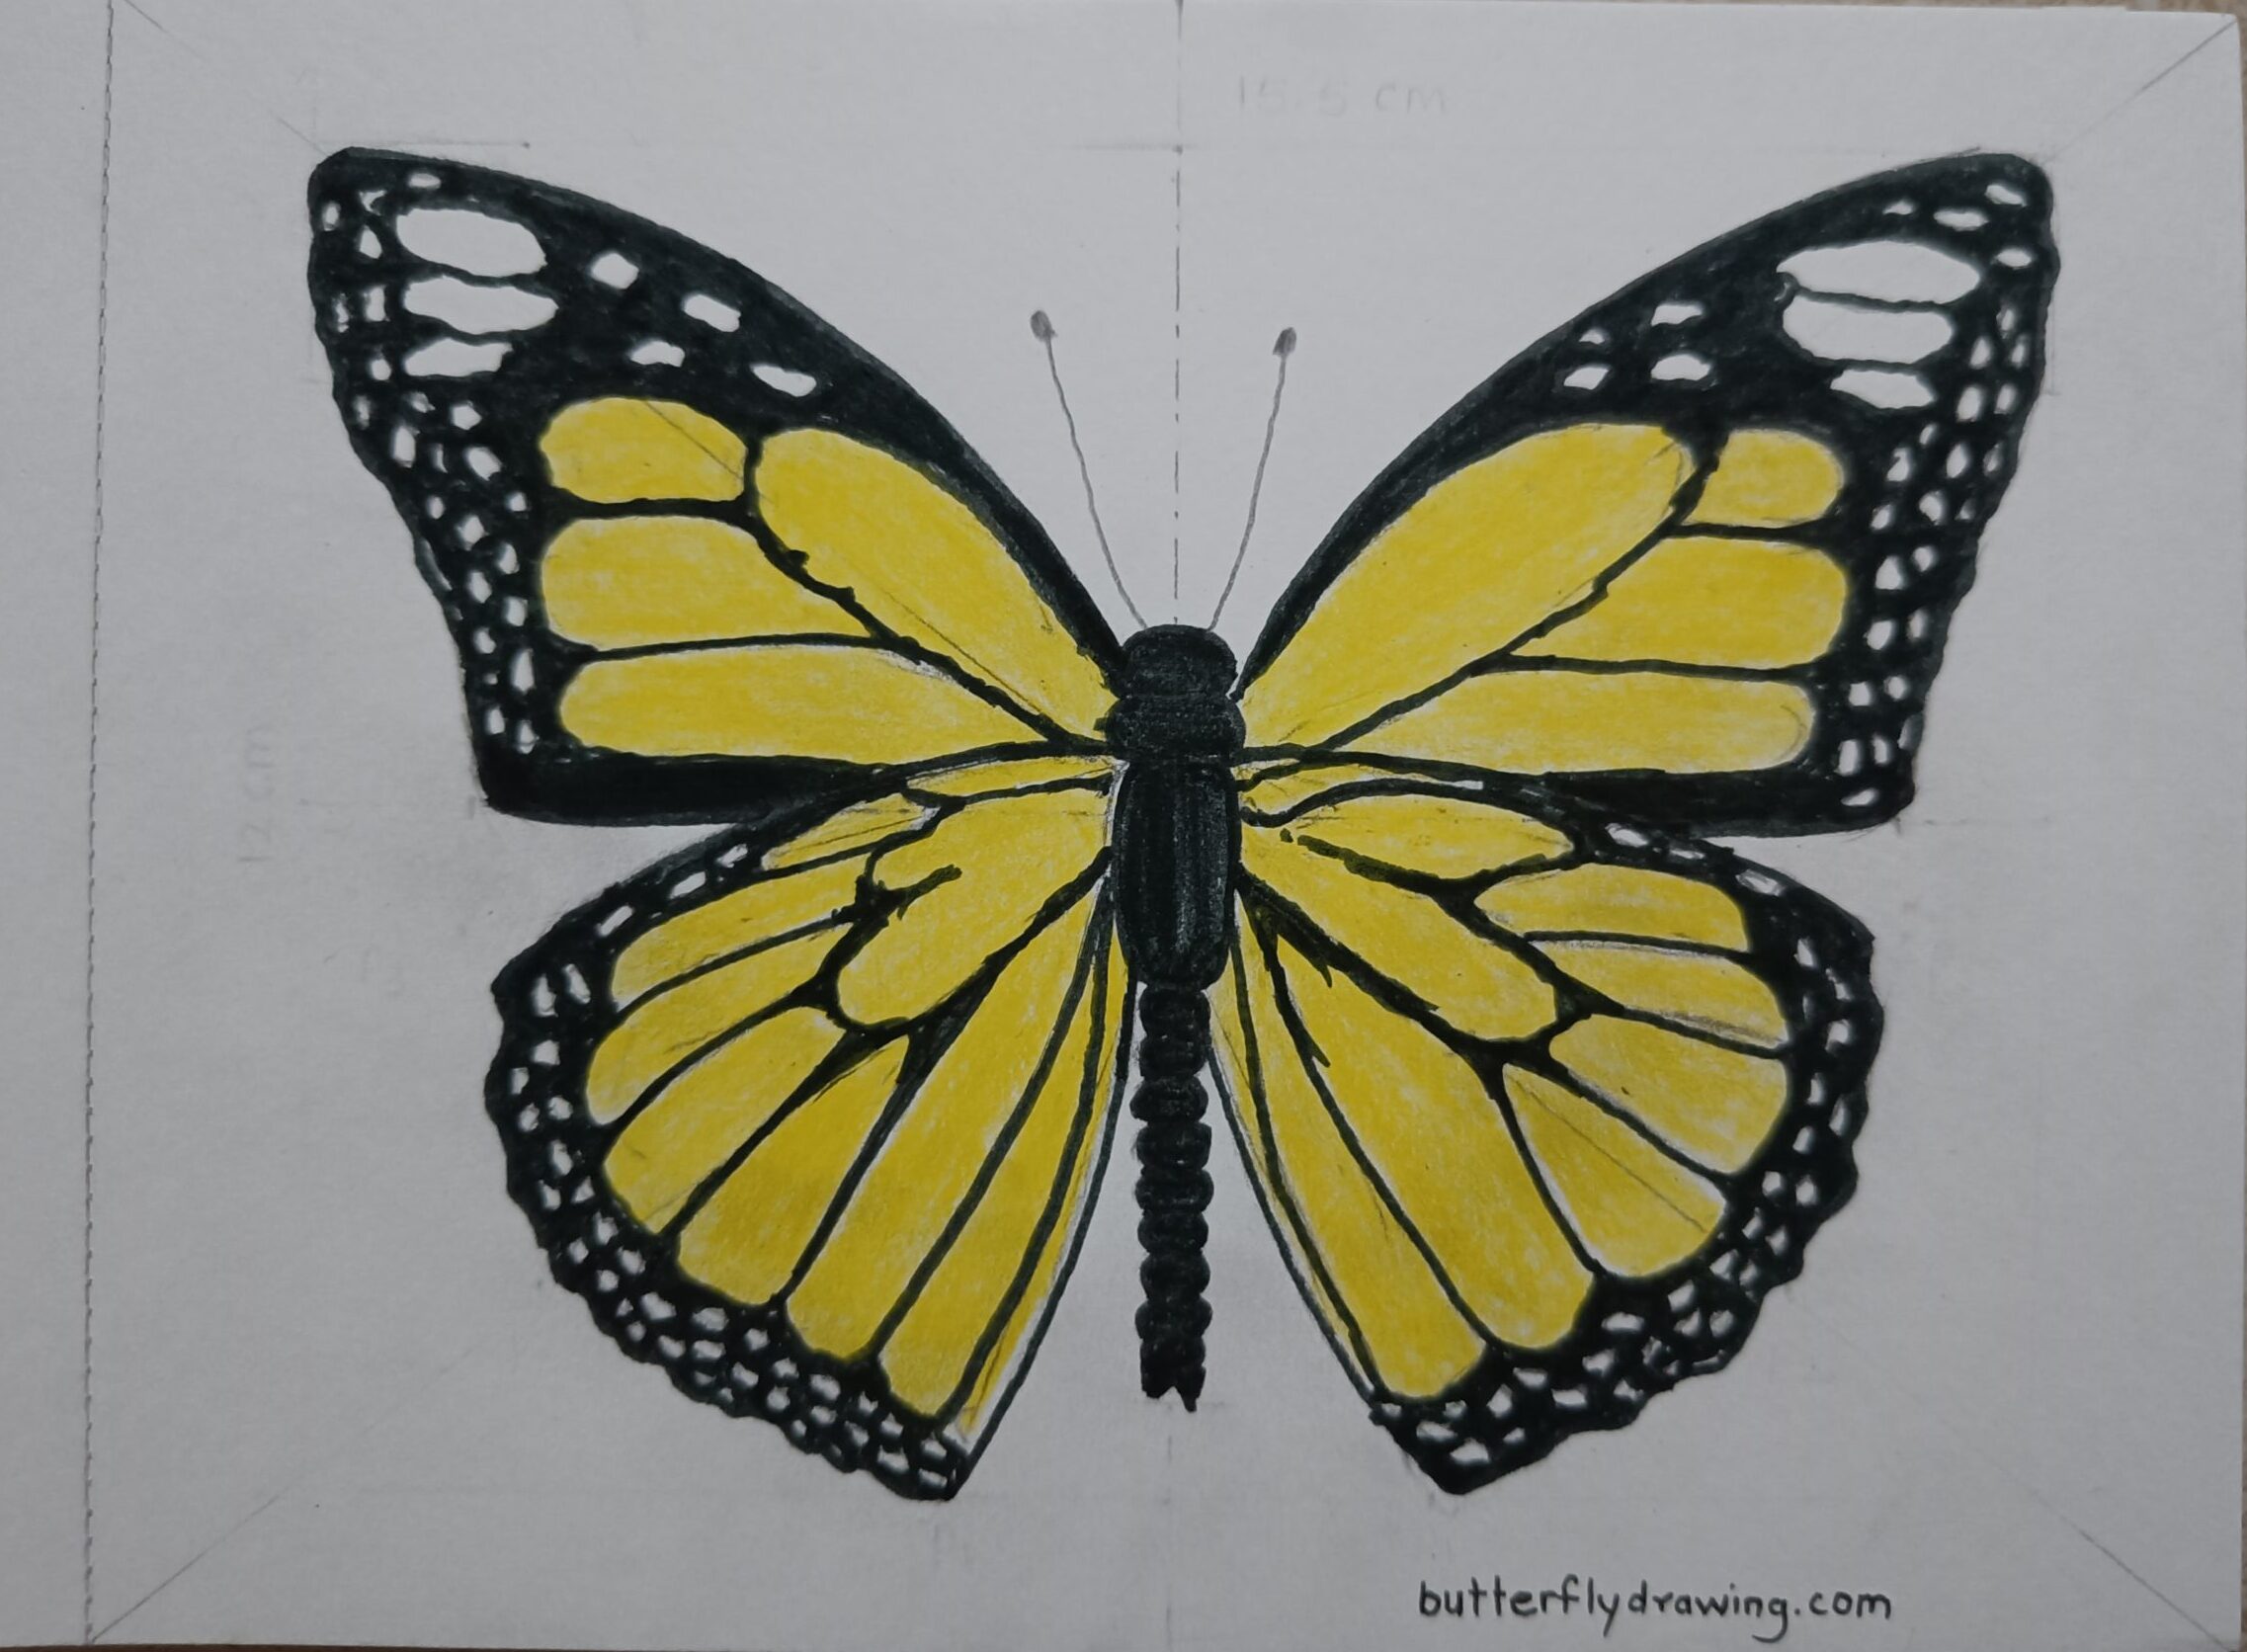
Fill Veins with Black Pen
- use black pen or Sketch-pen and redraw border of butterfly as well as veins and make it dark black as possible. avoid overlapping.
Fill Border and Body with Black Colour
- Use sketch-pen or black pen and start filling wings and keep dot separate.
- similarly use black colour for butterfly body
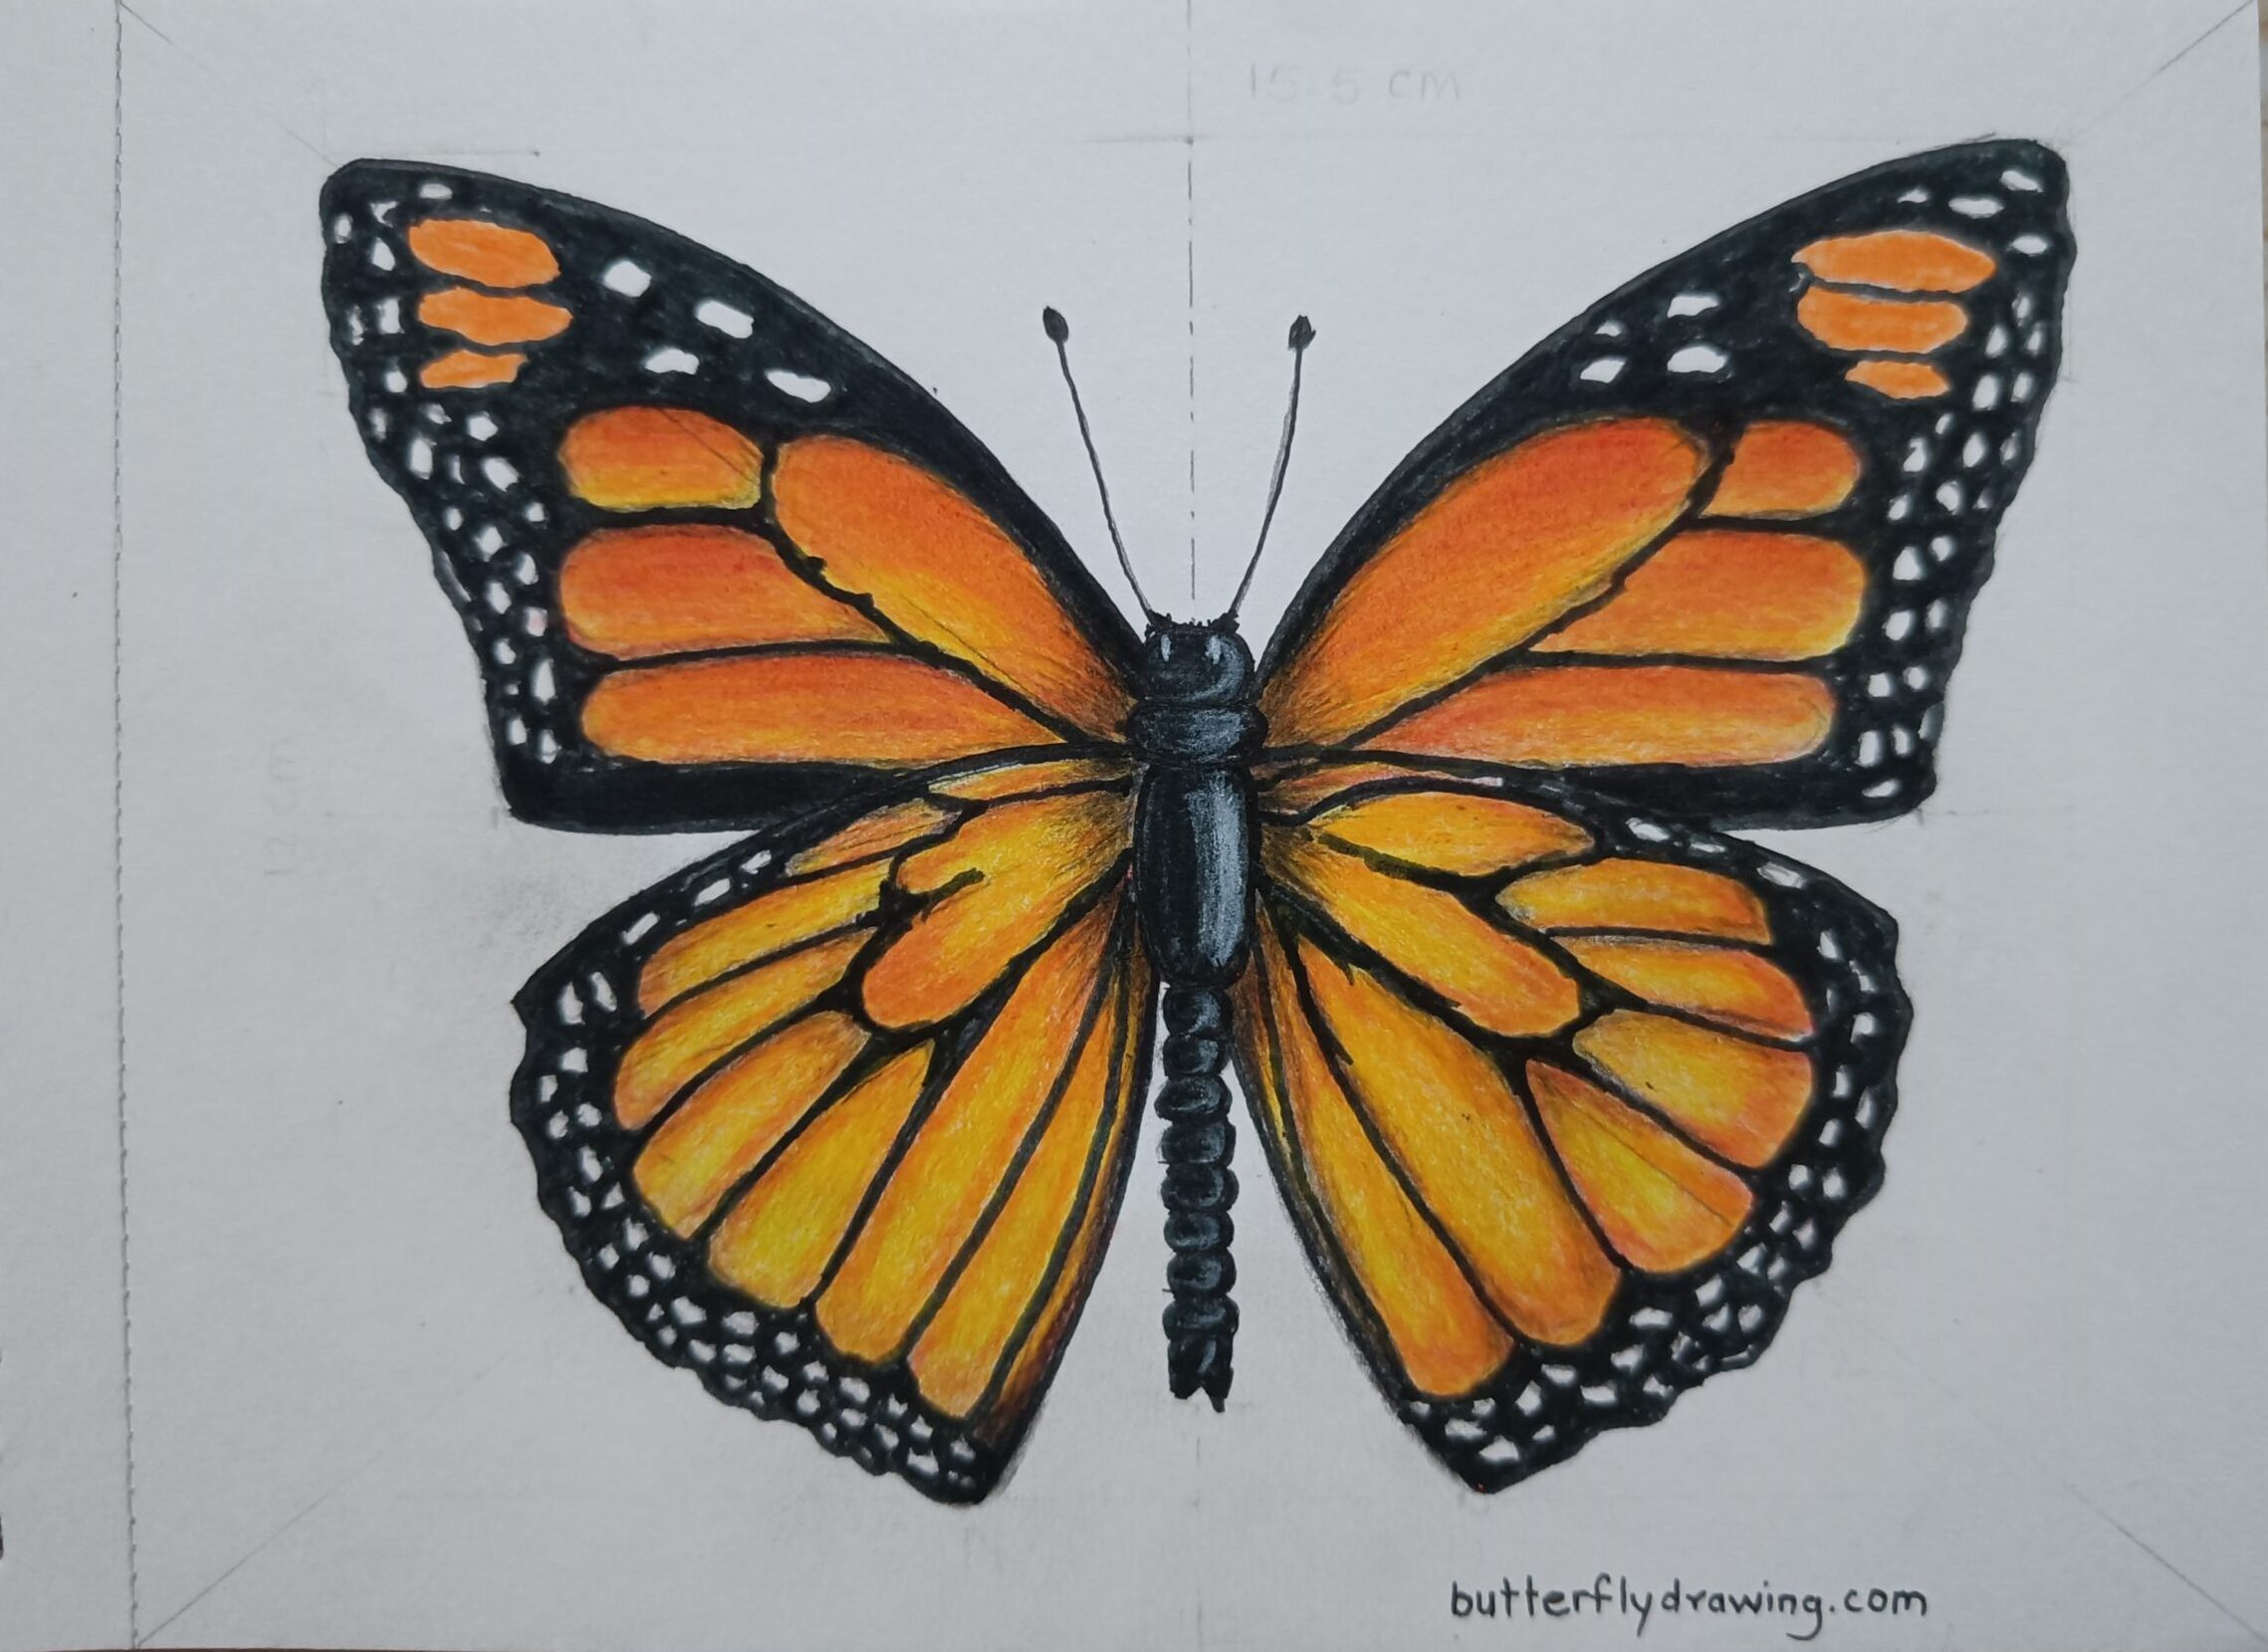
Fill Yellow + Orange Shade
- Start inserting orange colour in top wings big dots.
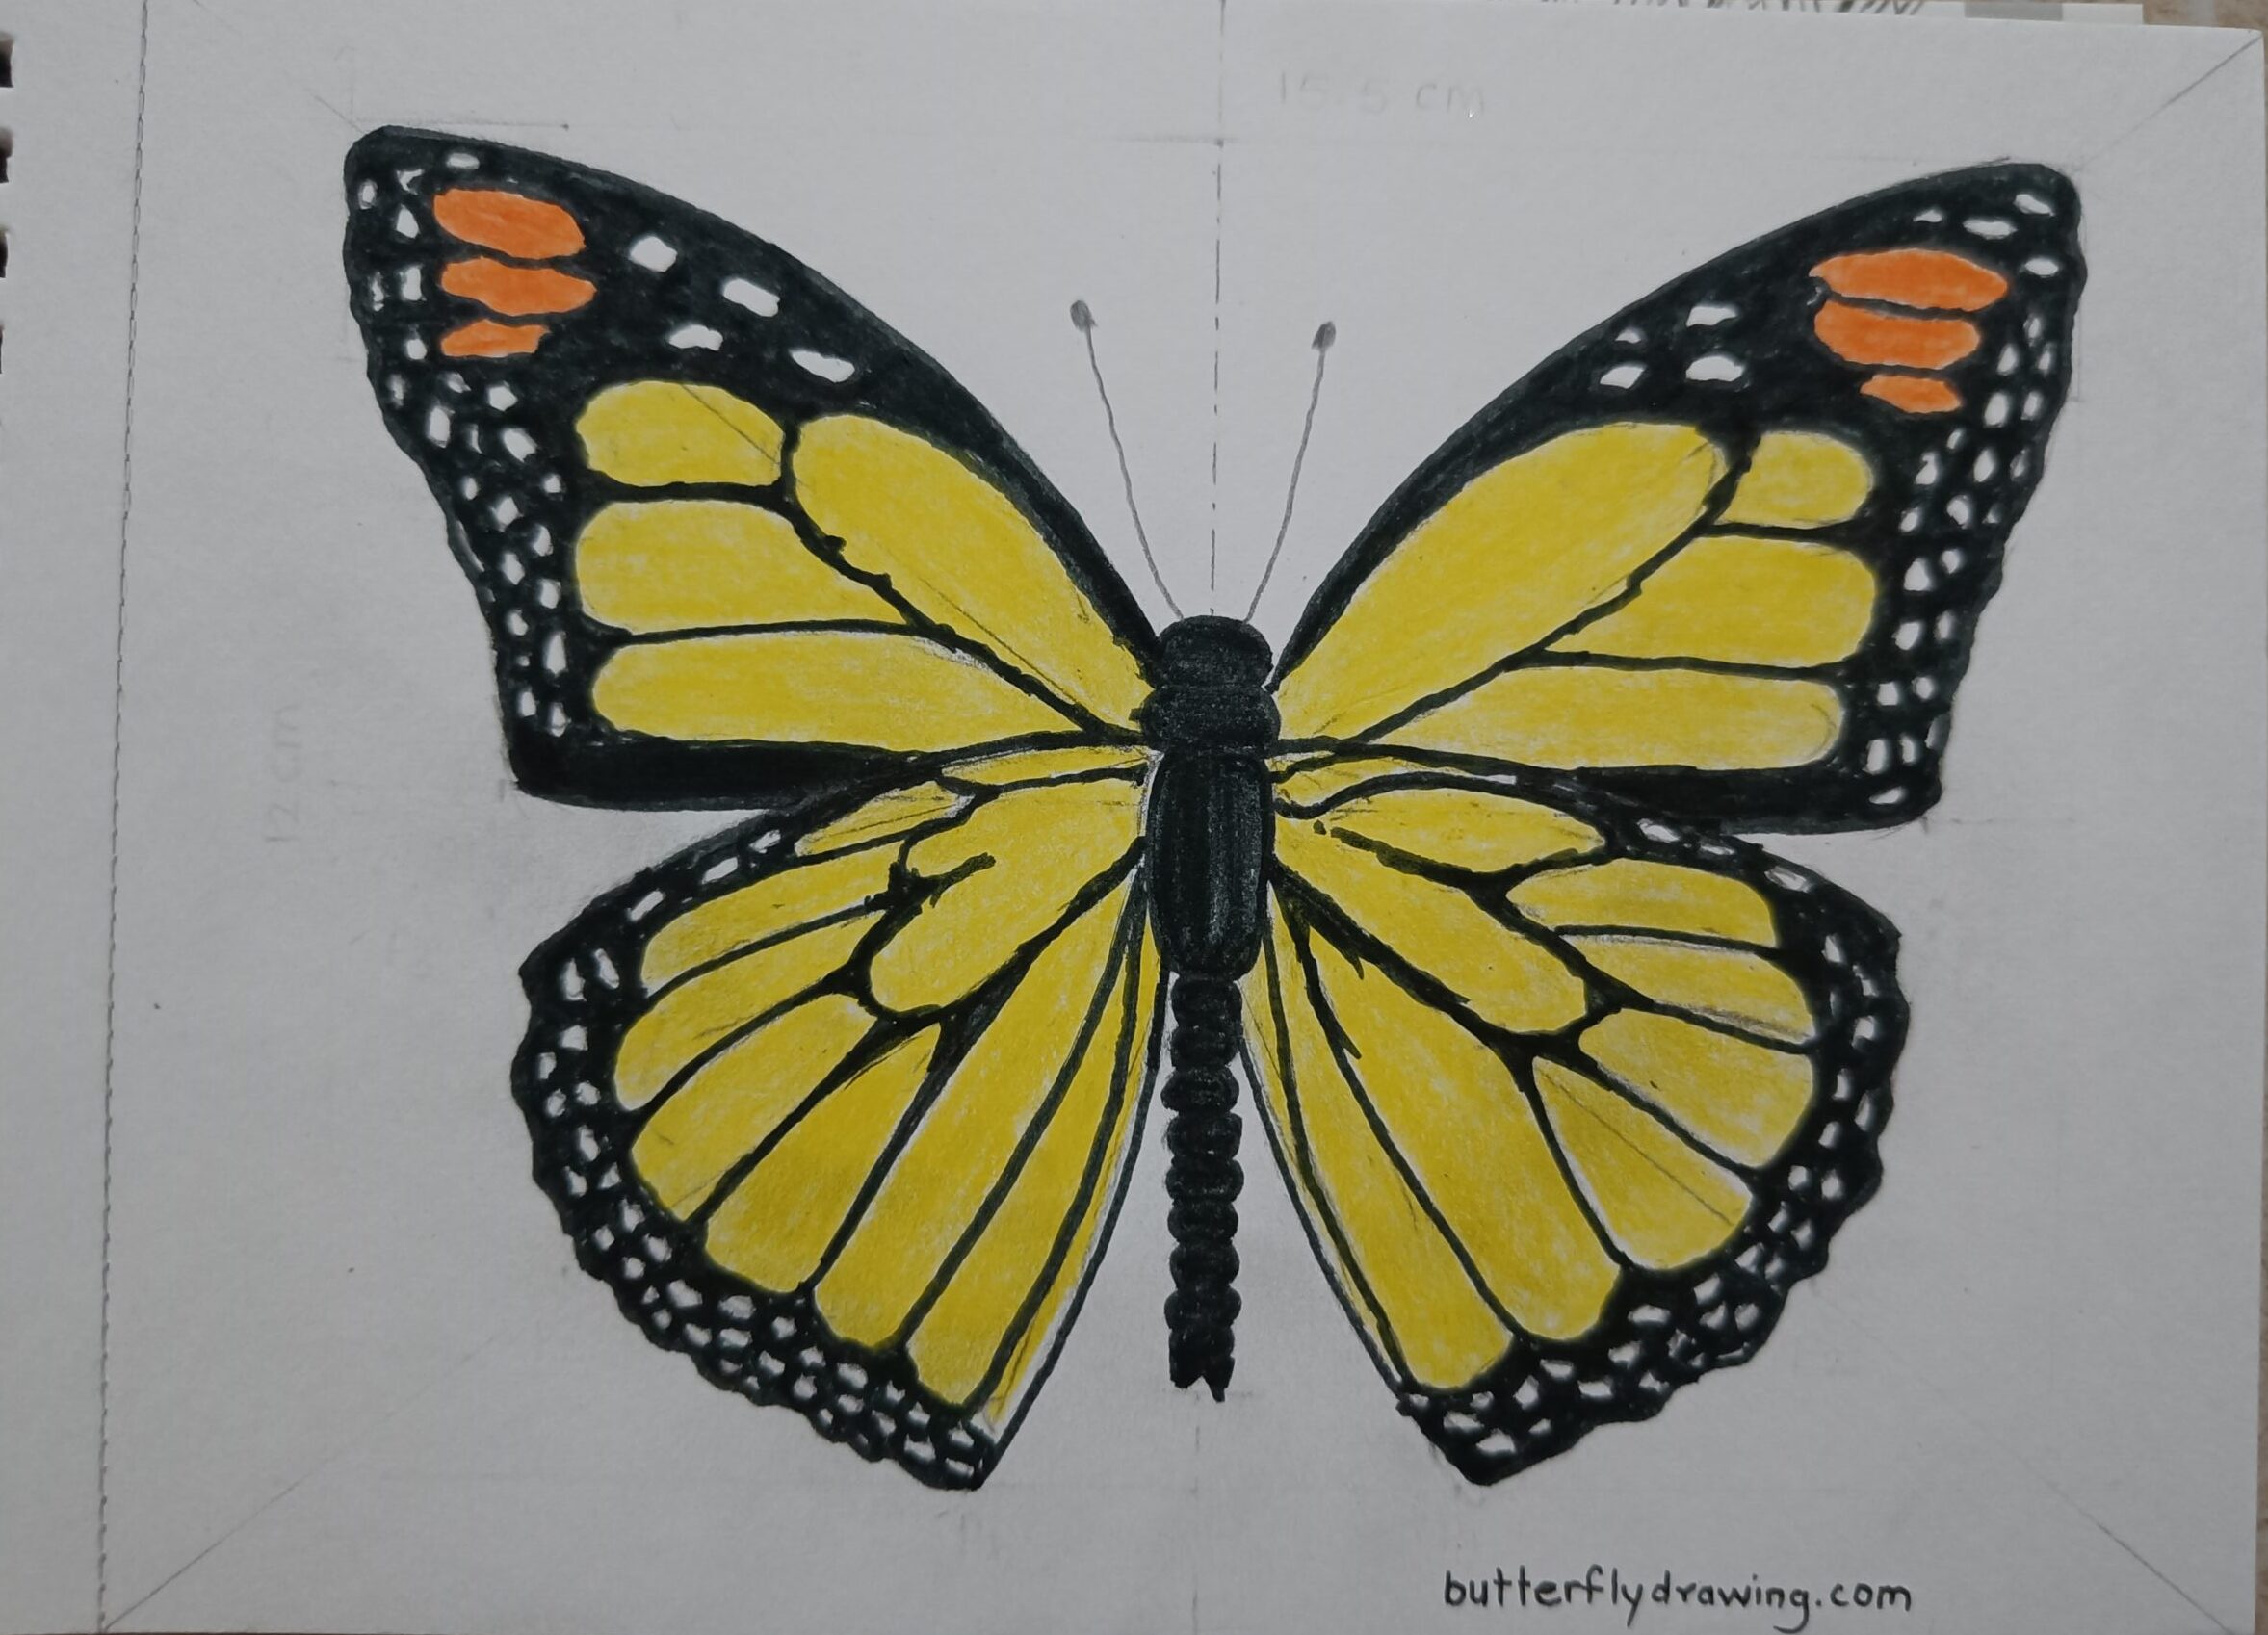
- Start filling orange colour shade and overlap with base applied yellow colour.
- use colour shading chart to create beautiful yellow orange shade.
- For more understanding differentiate above and bellow figure.
- Convert light orange yellow shade into dark shade of orange. keep wings shade more worm as possible. worm colour with colour combination which look like more stunning.
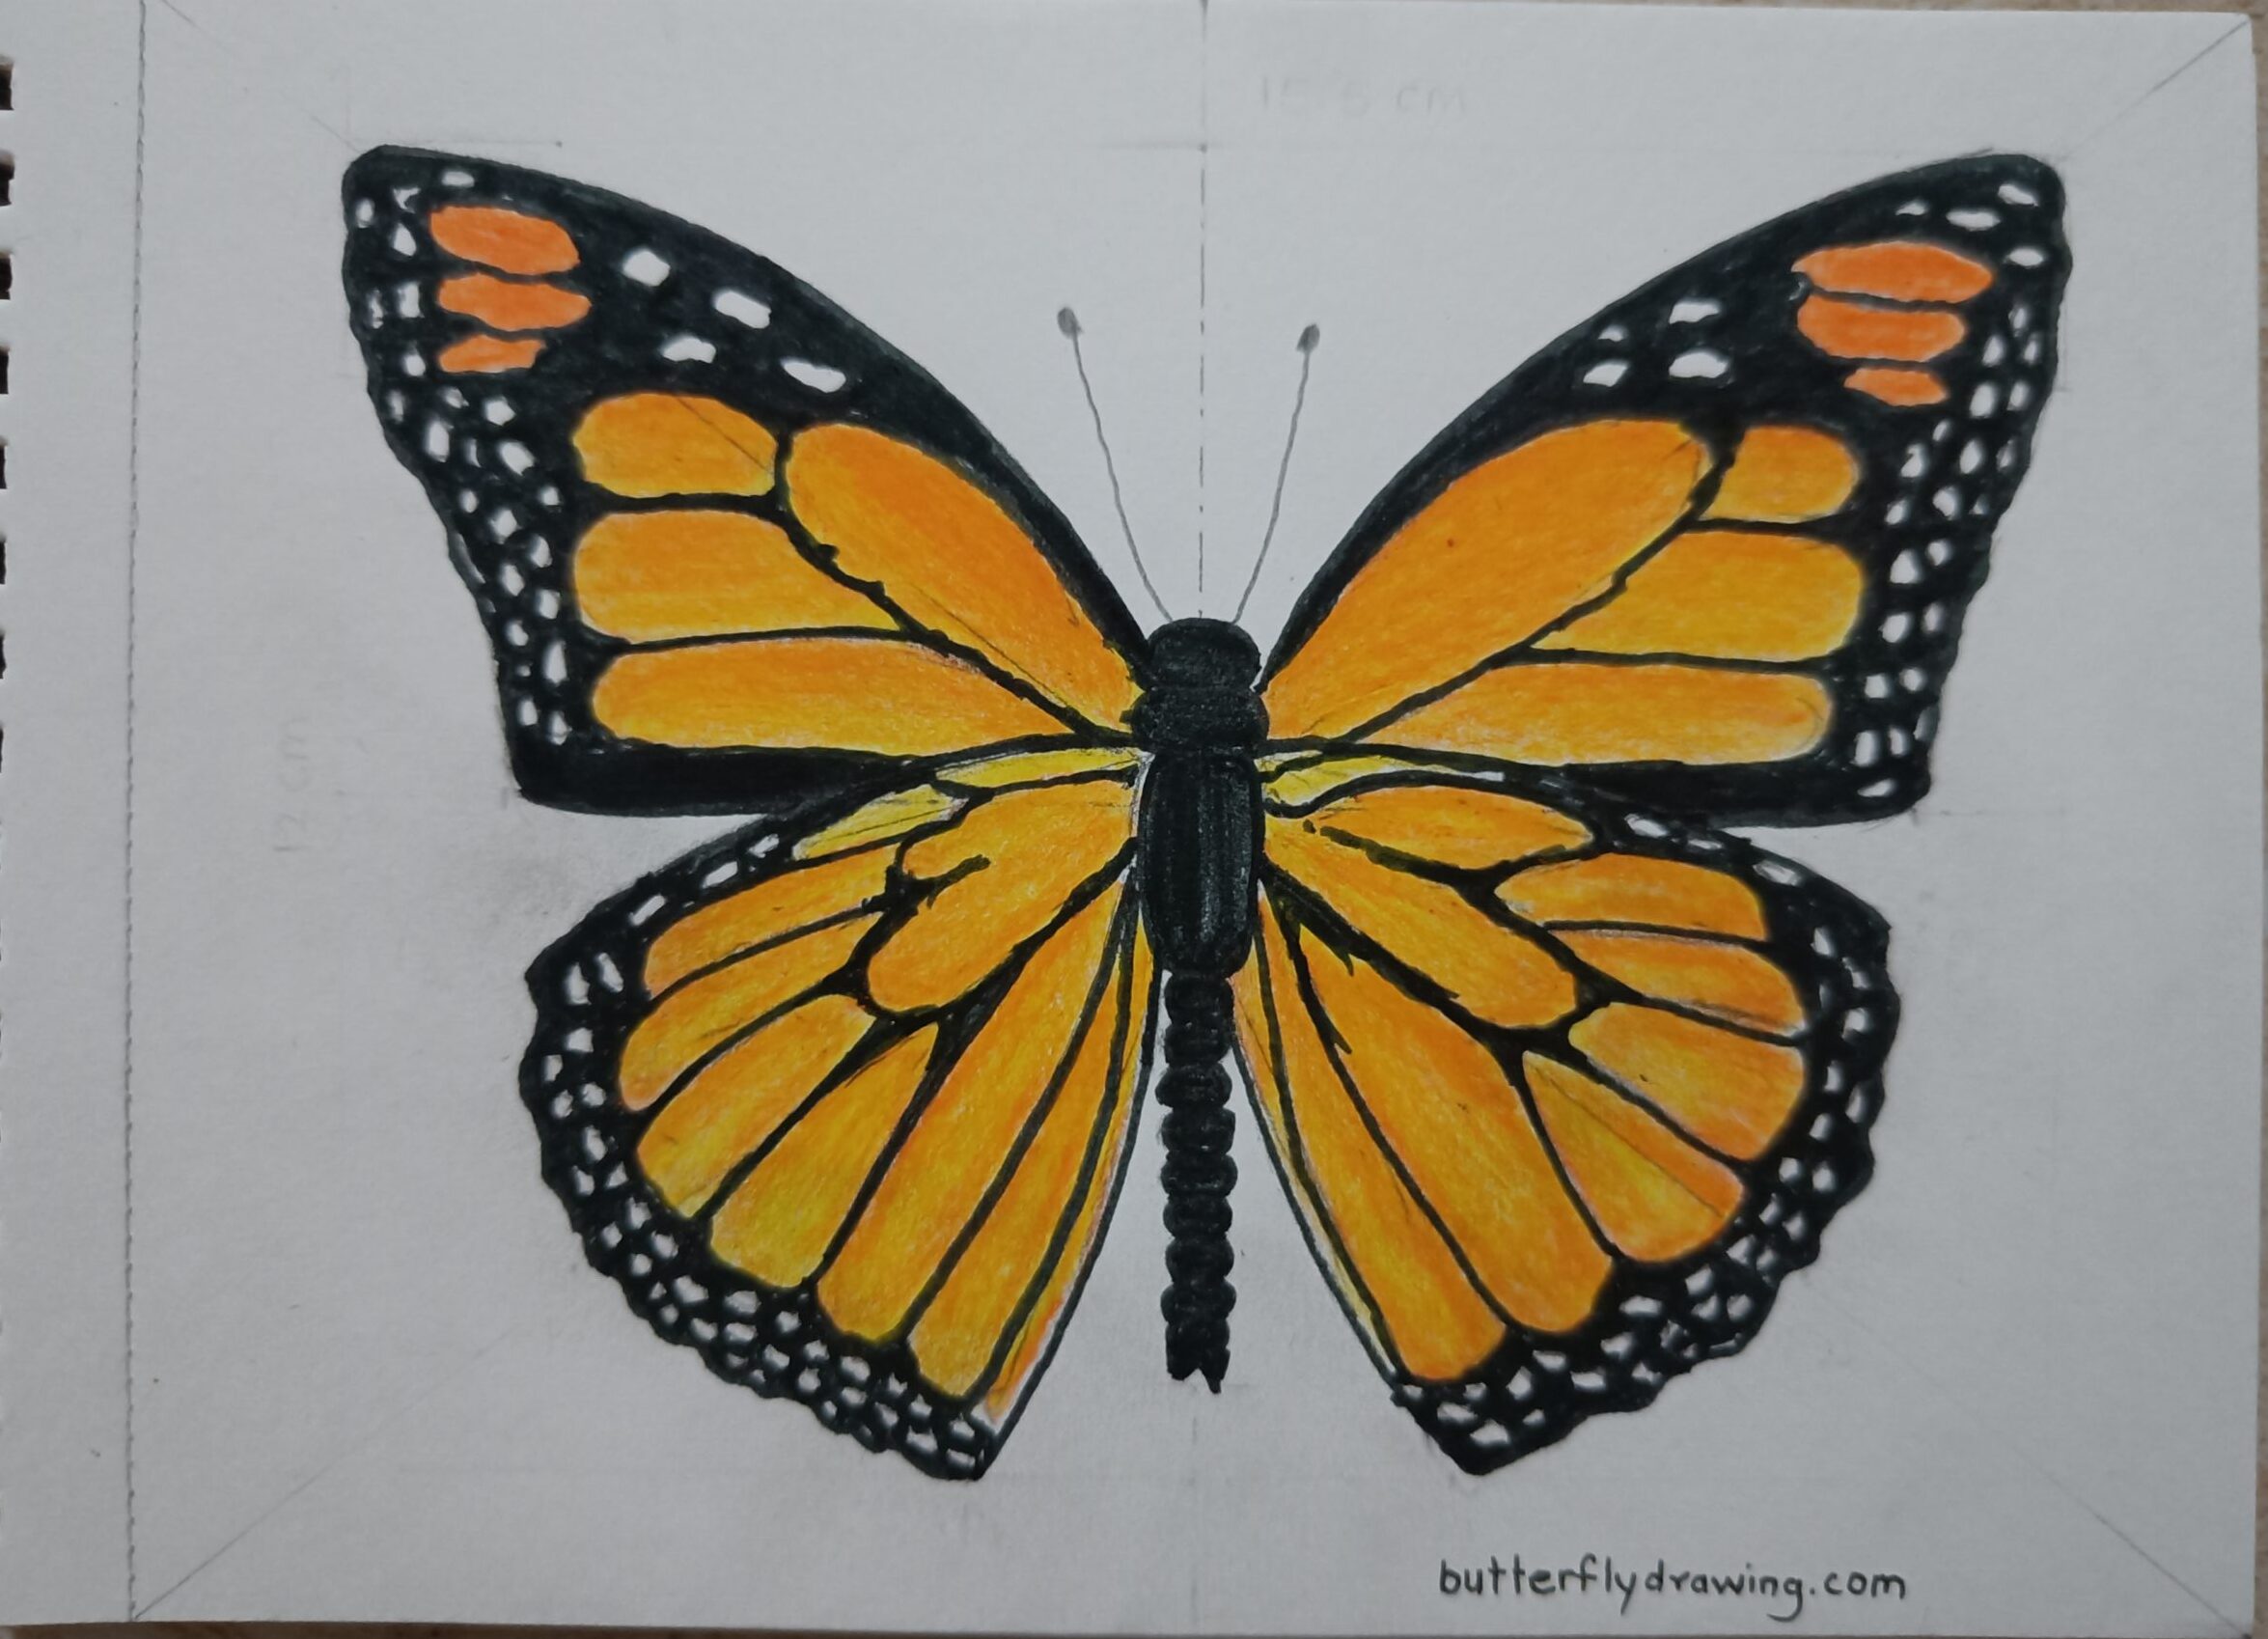
Fill Black + Orange + Yellow Colour combination
- use black colour pencil and start filling black shade in veins, wings and main body of butterfly.

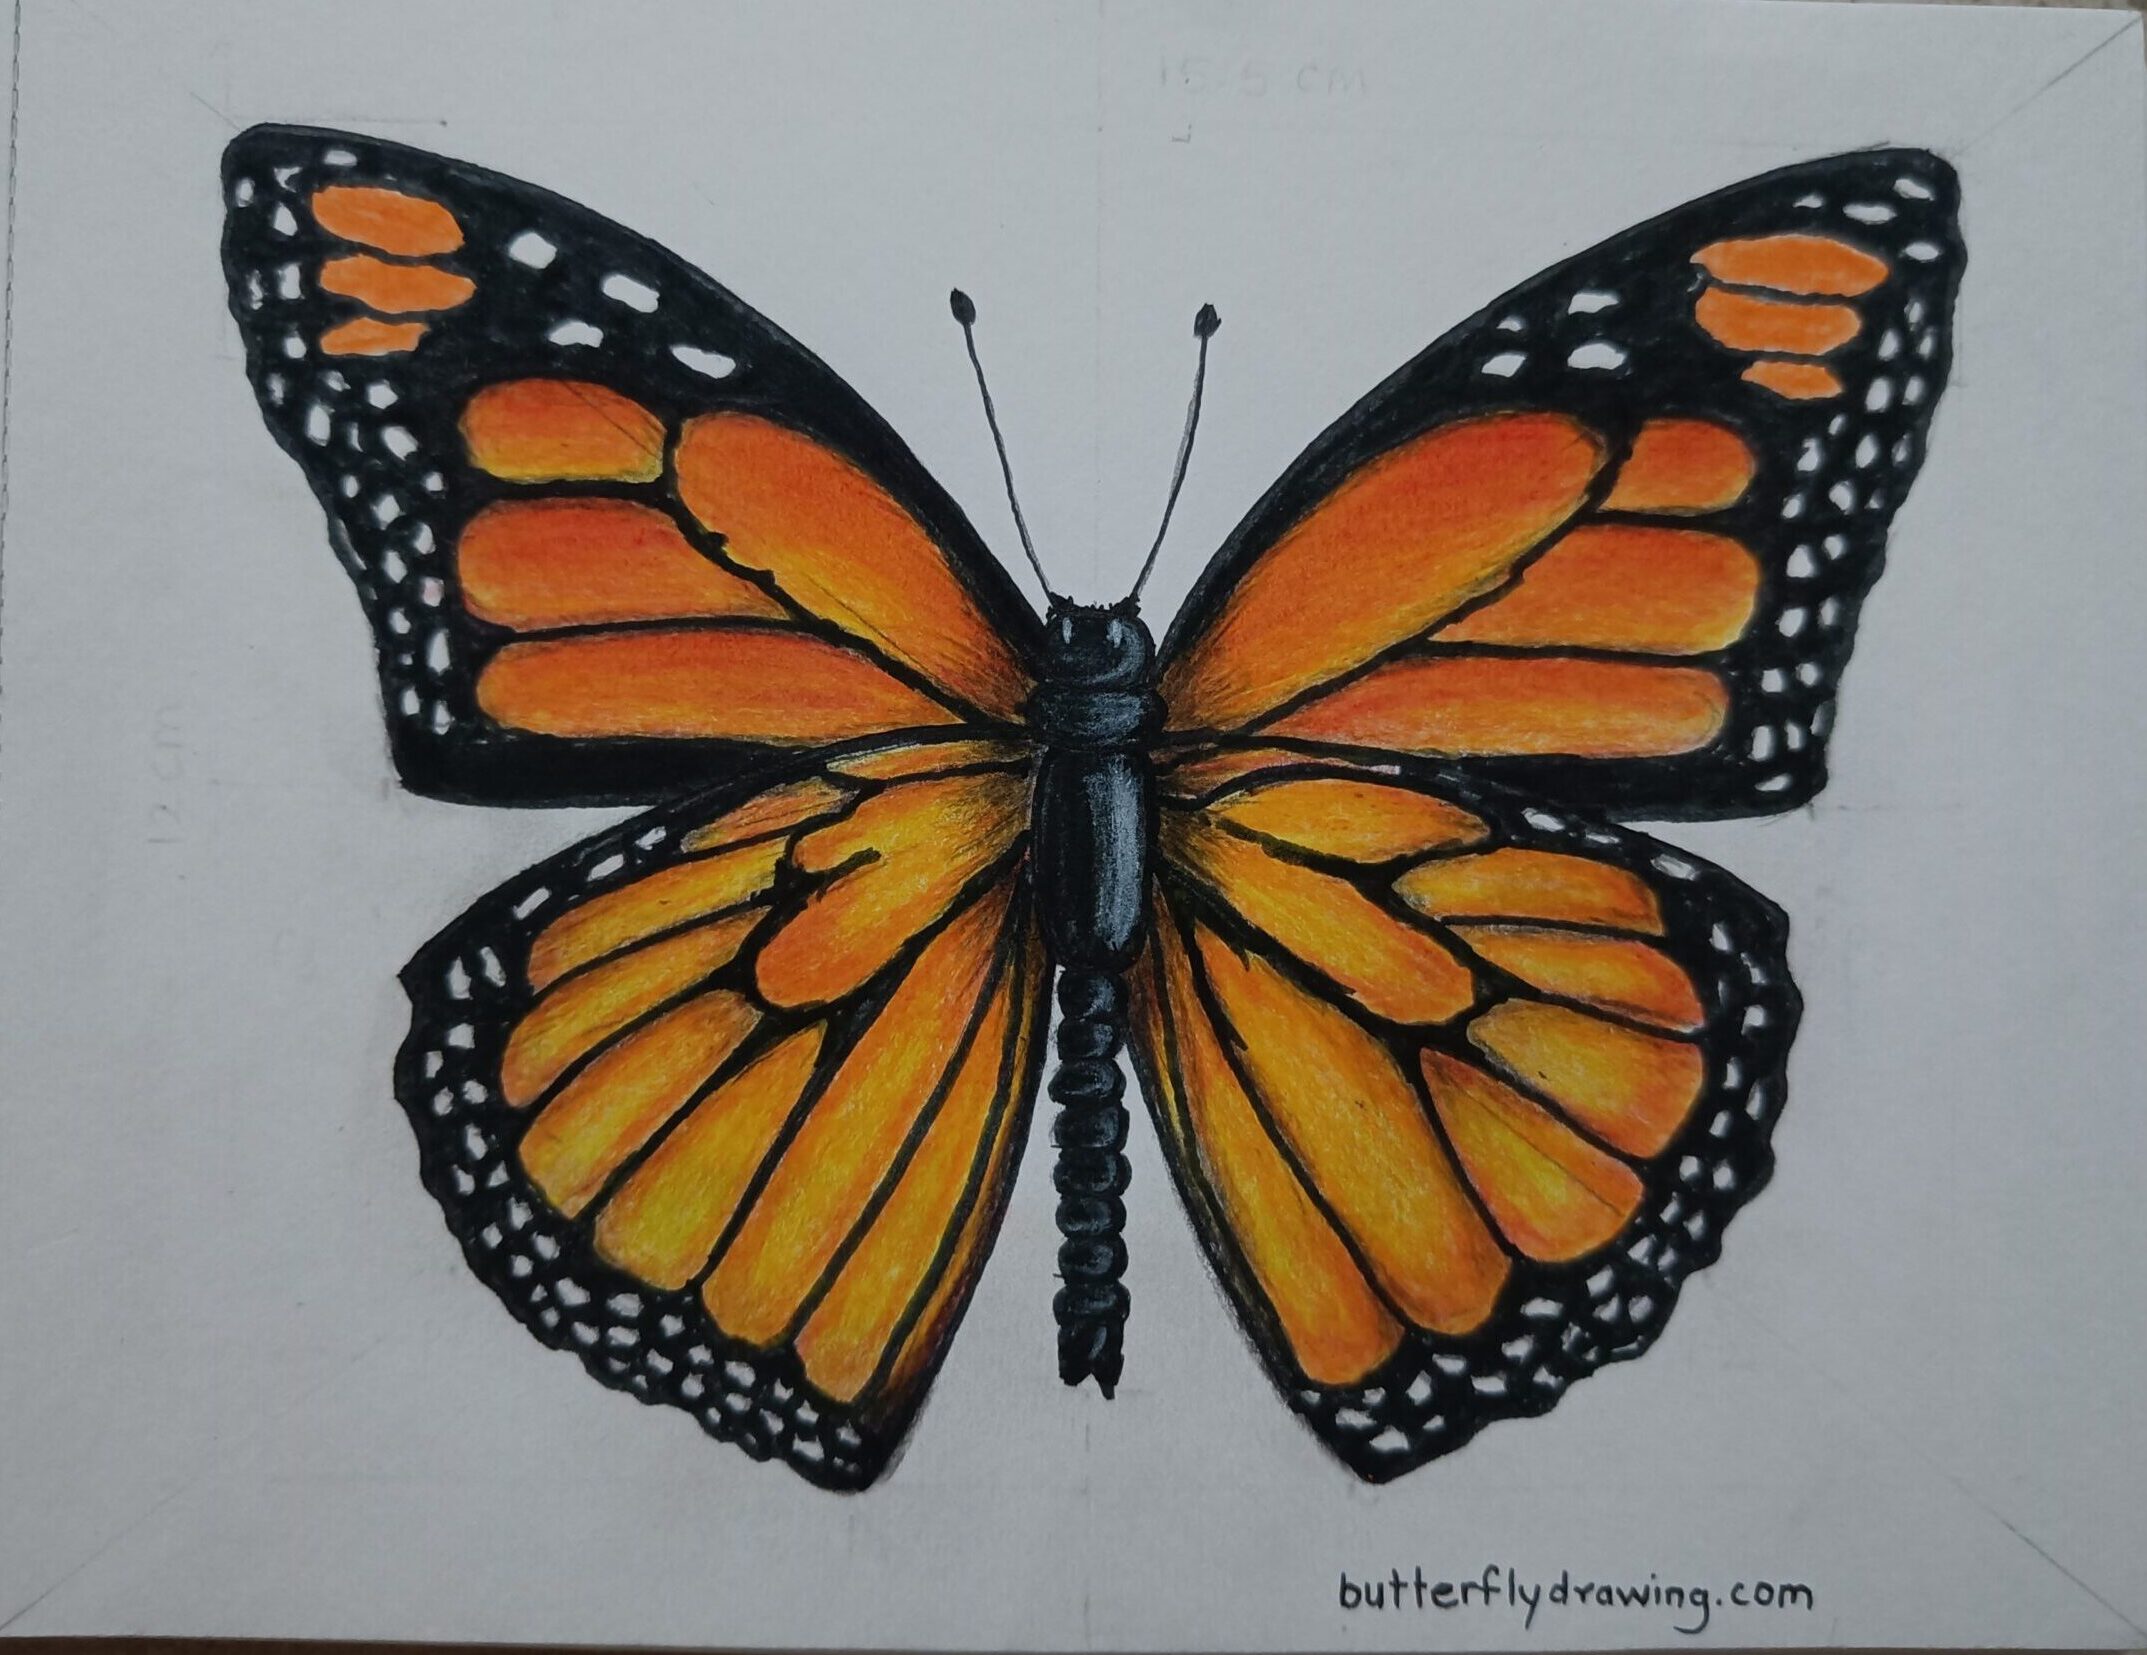
Fill White Glass Pencil Shade to Create 3D Effect
- On stomach, head and thorax use glass white pencil to create 3D effect.
- Use black point pen or pencil and start create black shade from main body of Monarch Butterfly Drawing.
Step 10: Complete Monarch Butterfly Drawing
- To complete Monarch Butterfly Drawing use engineering pointer black pen and fill the details.
- create butterfly antenna as well as create butterfly dot border.
Conclusion:
By using simple techniques and worm colour with perfect shade combination you can create beautiful Monarch Butterfly Drawing. keep in mind use geometrical construction for perfect symmetric position as well as perfect alignment.
Check our post – Butterfly Drawing for Kids
Monarch Butterfly Drawing