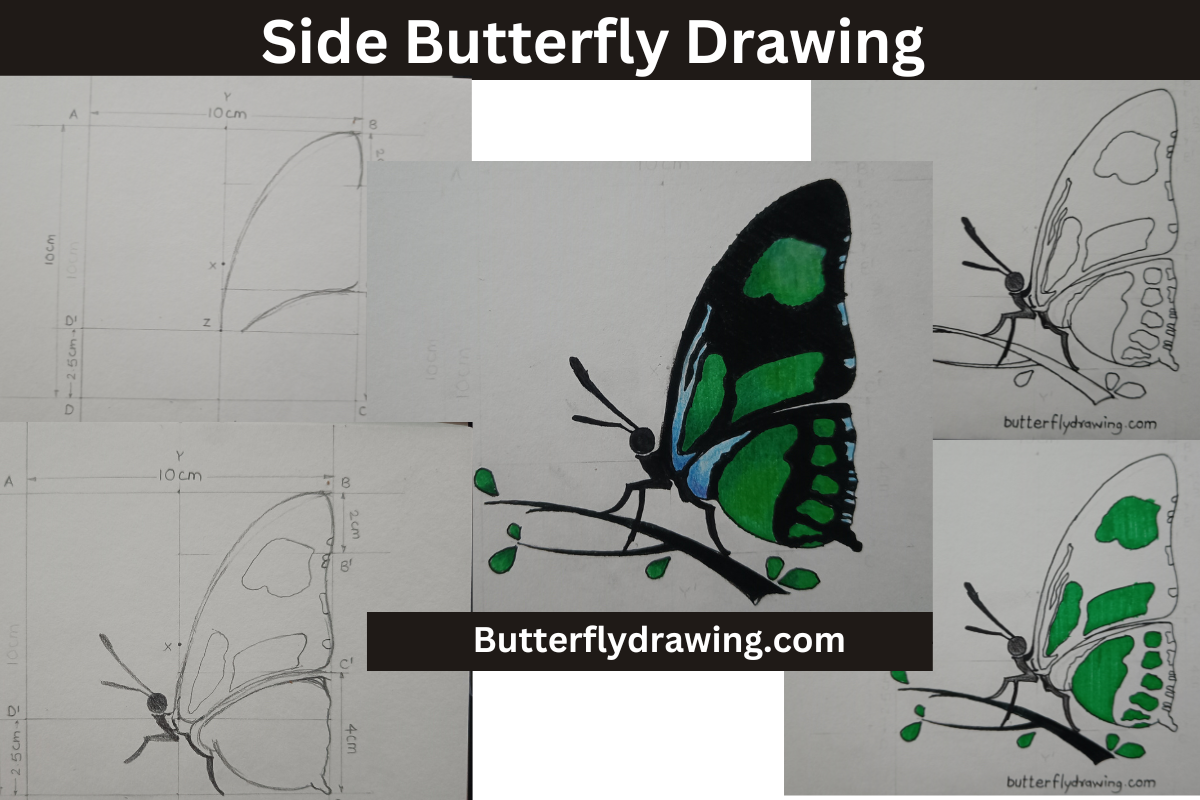
Hello Friends, let’s see pictorial representation of Side Butterfly Drawing with easy step by step process. in this blog we will learn green colour butterfly drawing with quick and easy steps guide. don’t skip any step because we draw all pictures on paper with perfect measurement and representing pictorial representation. with basic stationery like pencils, colour pen (green, black), charcoal base pencil we complete butterfly drawing.
Creating a Side Butterfly Drawing view can be a fun and engaging artistic activity. When drawing a side view butterfly, let your creativity rise. Our presentation gives you an opportunity to explore the beauty of these creatures from a different angle and add your artistic talent to the portrait.
List of Stationery Material:
- Charcoal Pencil
- White Paper
- Green Sketch-pen
- Black Sketch Pen
- Pointer Pen
- Colour Pencils.
Check Our Beautiful Monarch Butterfly Drawing
Step By Step Side Butterfly Drawing
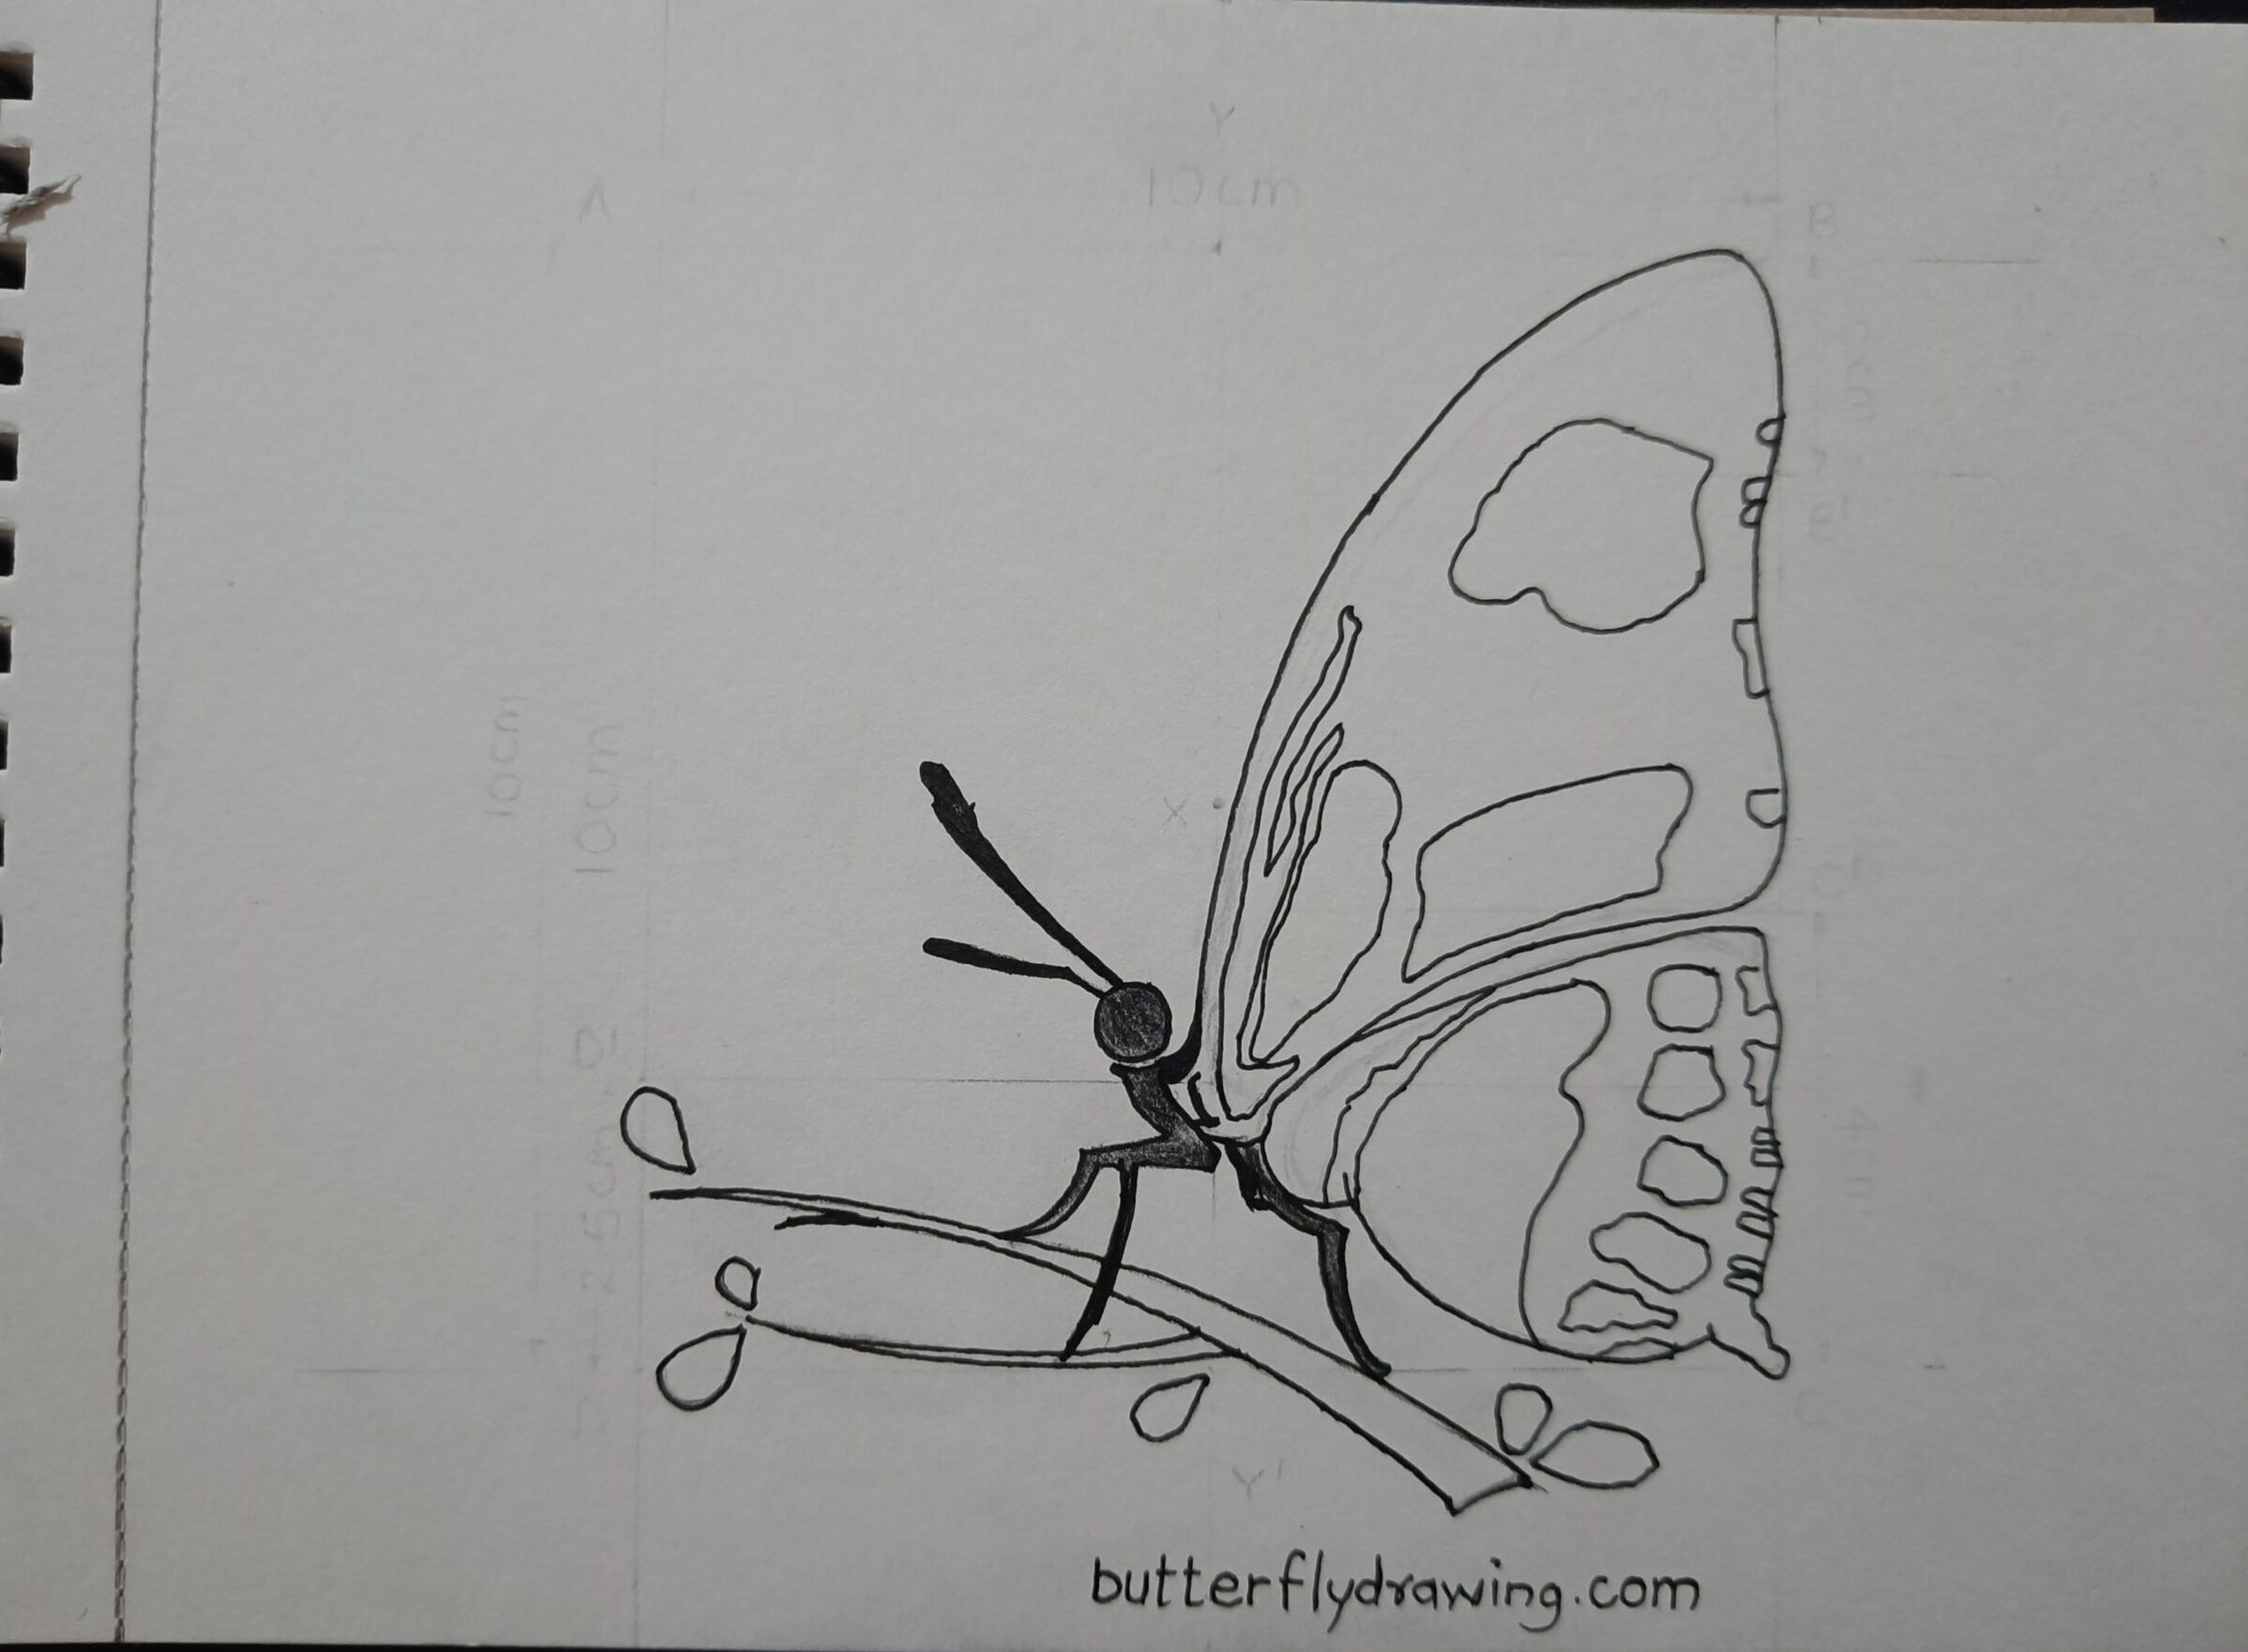
Side Butterfly Drawing exactly looks like a half side of fully opened butterfly. with dark black colour and sharp green colour combination enhance the beauty of butterfly. we provide basic steps with help of geometrical construction. following are the step by step guidance to draw a beautiful Side Butterfly Drawing.

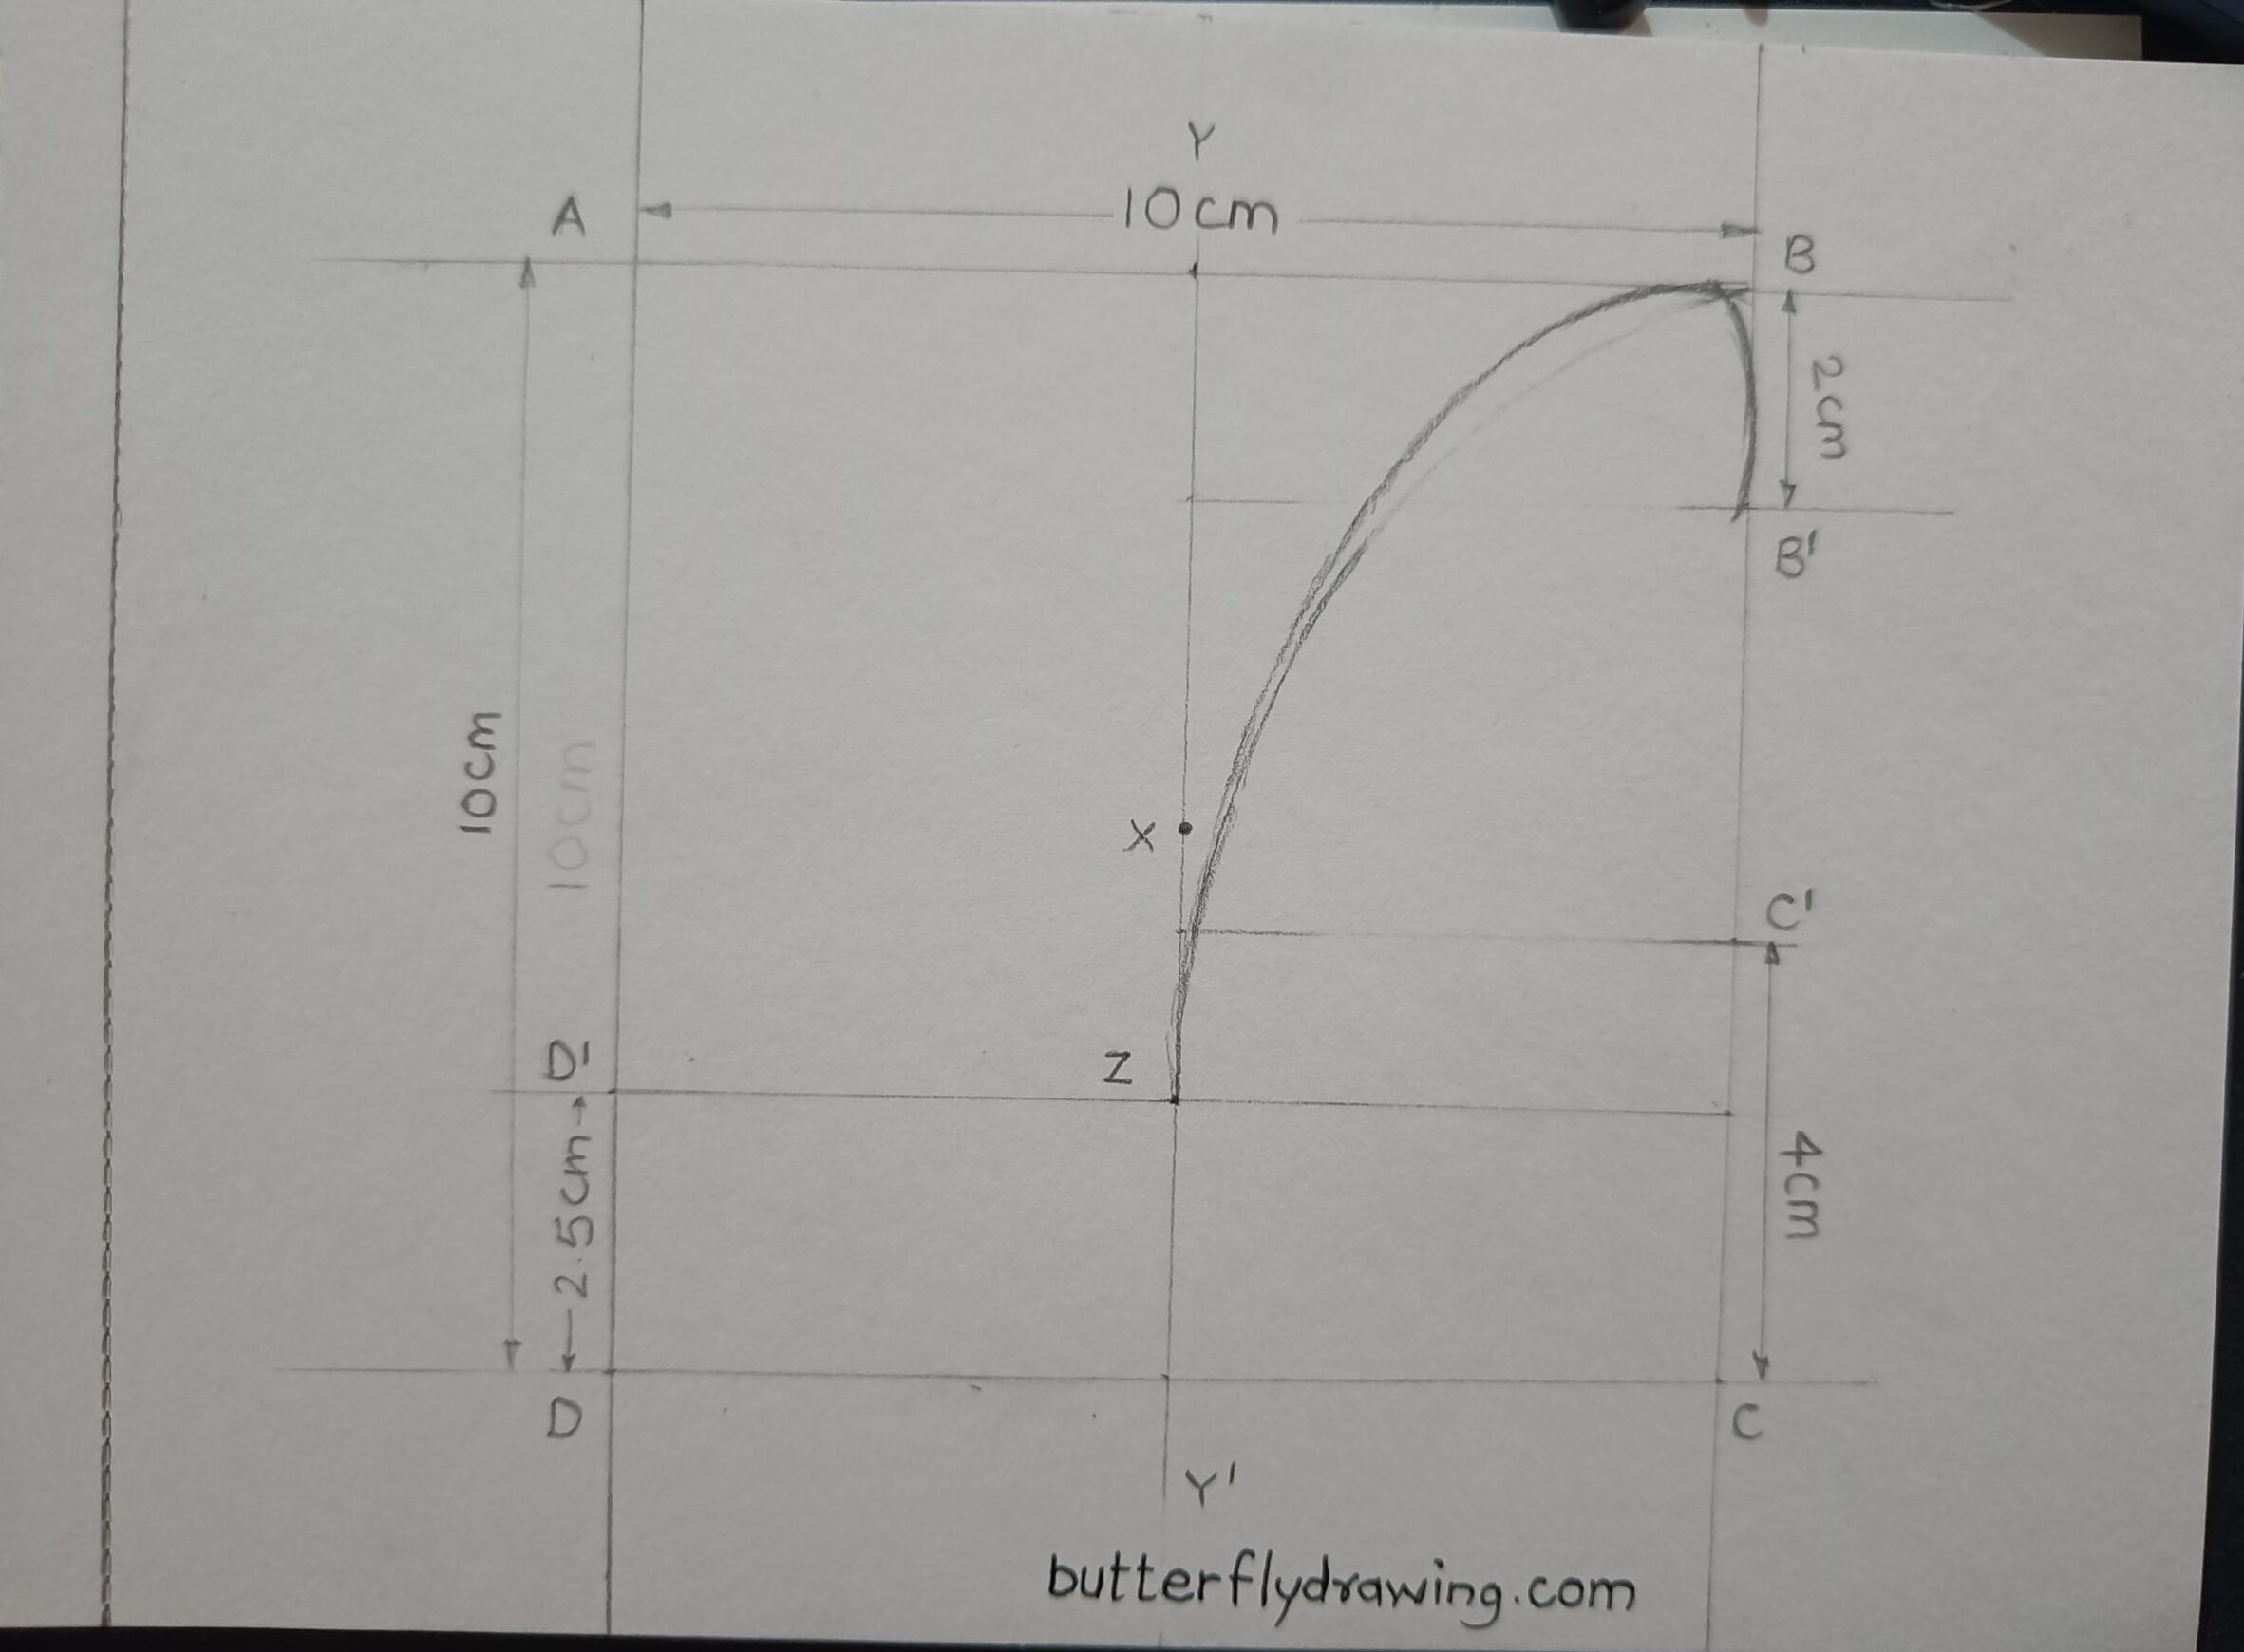
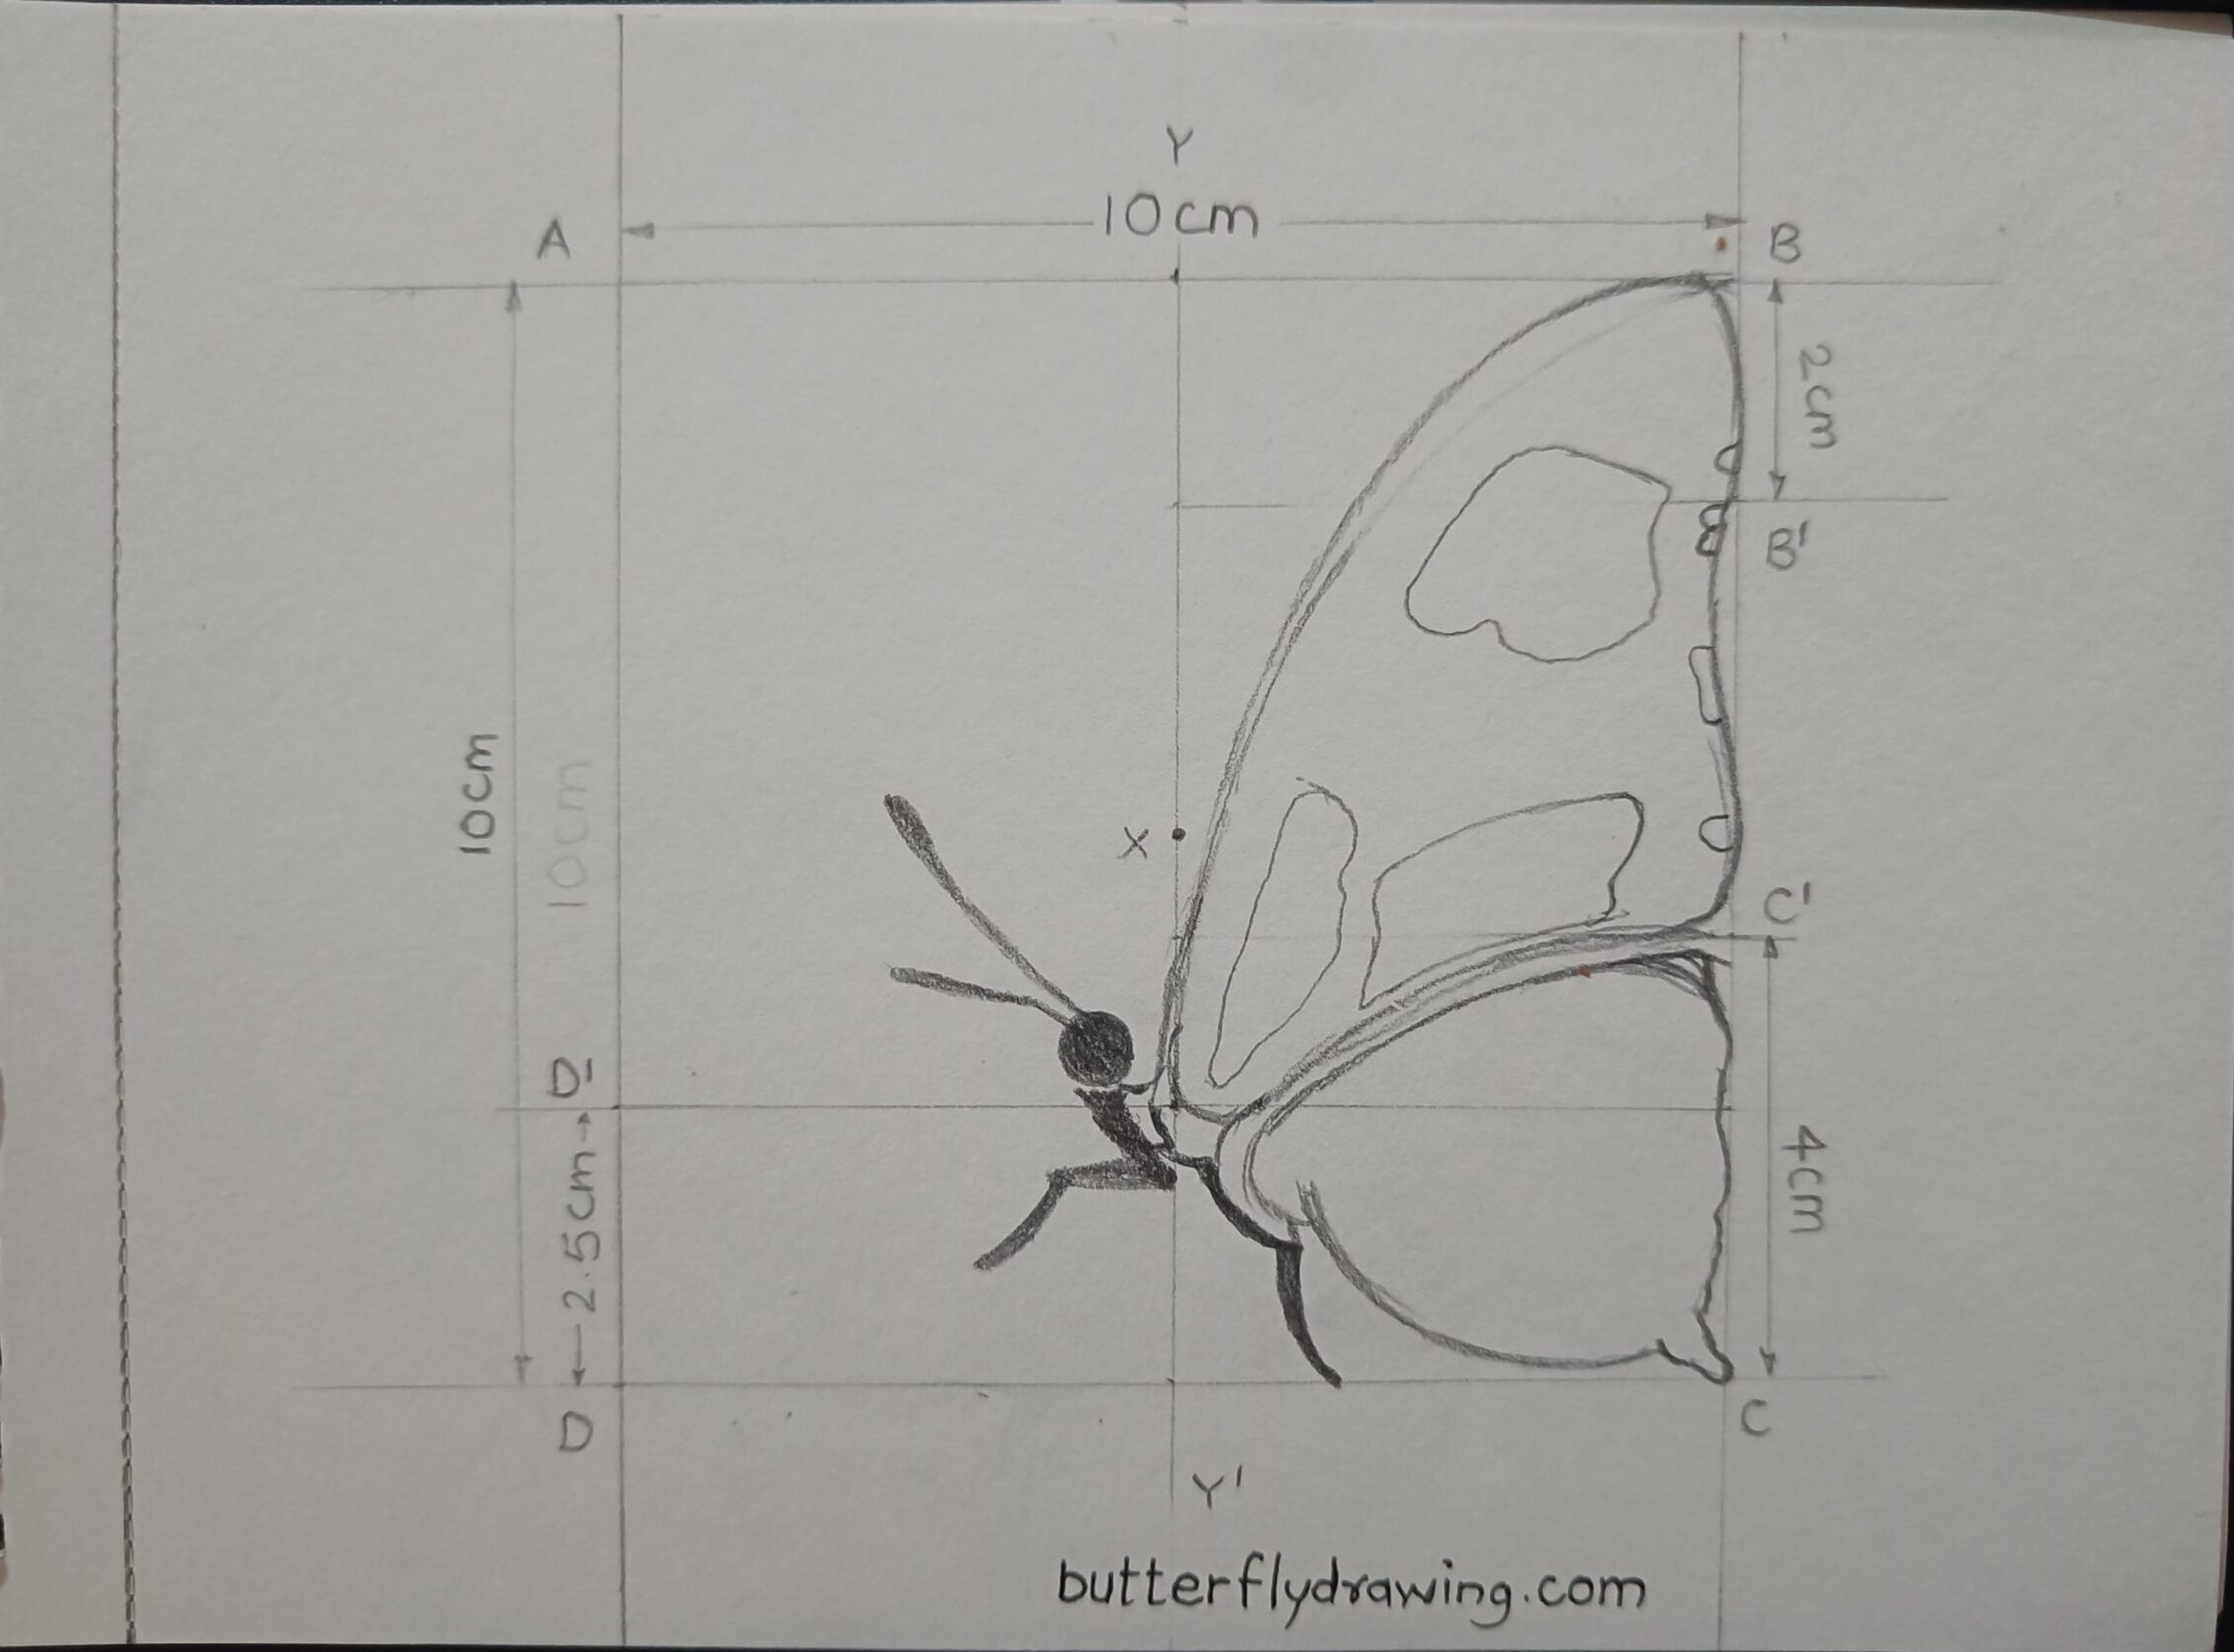
Step 1: Draw Square for Reference
to draw a base of butterfly, first we are starting from to draw basic geometrical construction. this way of drawing help you to keep figure symmetrical.
- Identify centre point of page and mark it.
- with help of centre point draw 10 cm x 10 cm Square.

- Name square point as A,B,C and D respectively. for more understanding refer bellow figure.
- Divide square at centre and drawn a perpendicular line intersects it at its midpoint, creates a right angle or a 90-degree angle. name it Y and Y’.
- construct parallel line with DC line 2.5 cm and name it D’ which intersect to line Y,Y’.
- draw parallel line with Y’C line above 4cm and mark as line C’
- similarly go for line B’ and mark below 2cm from line YB.

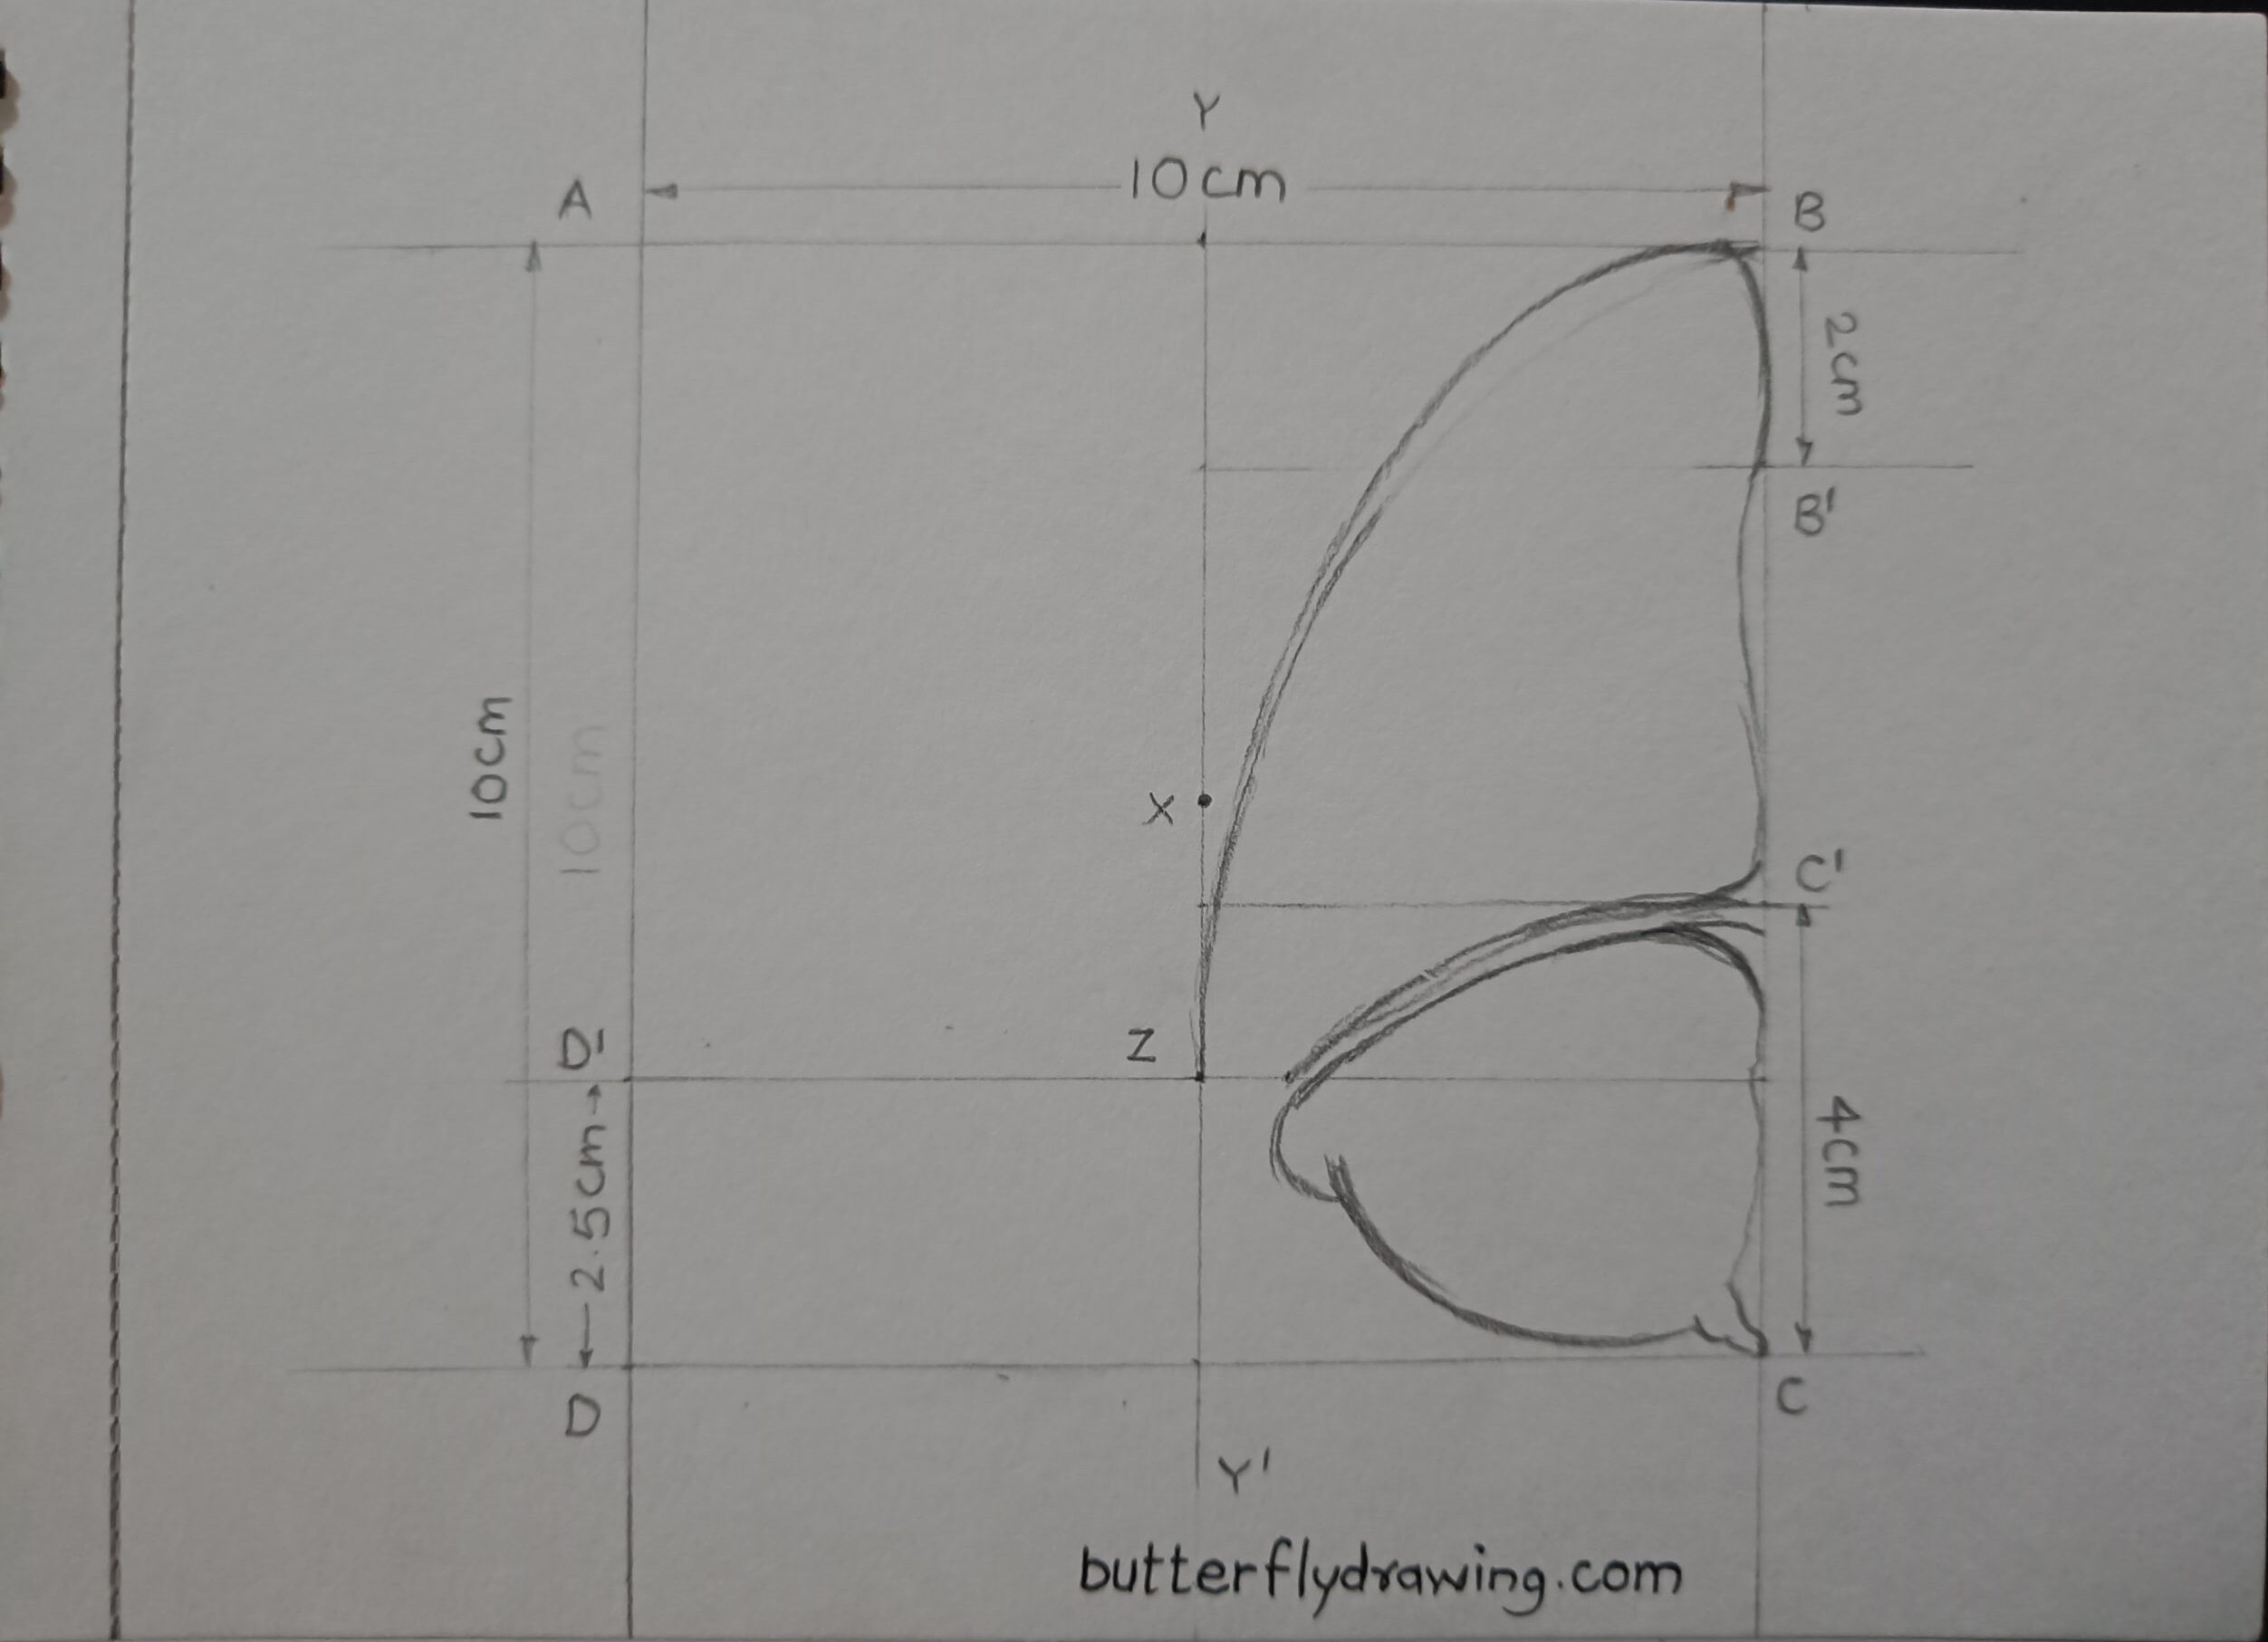
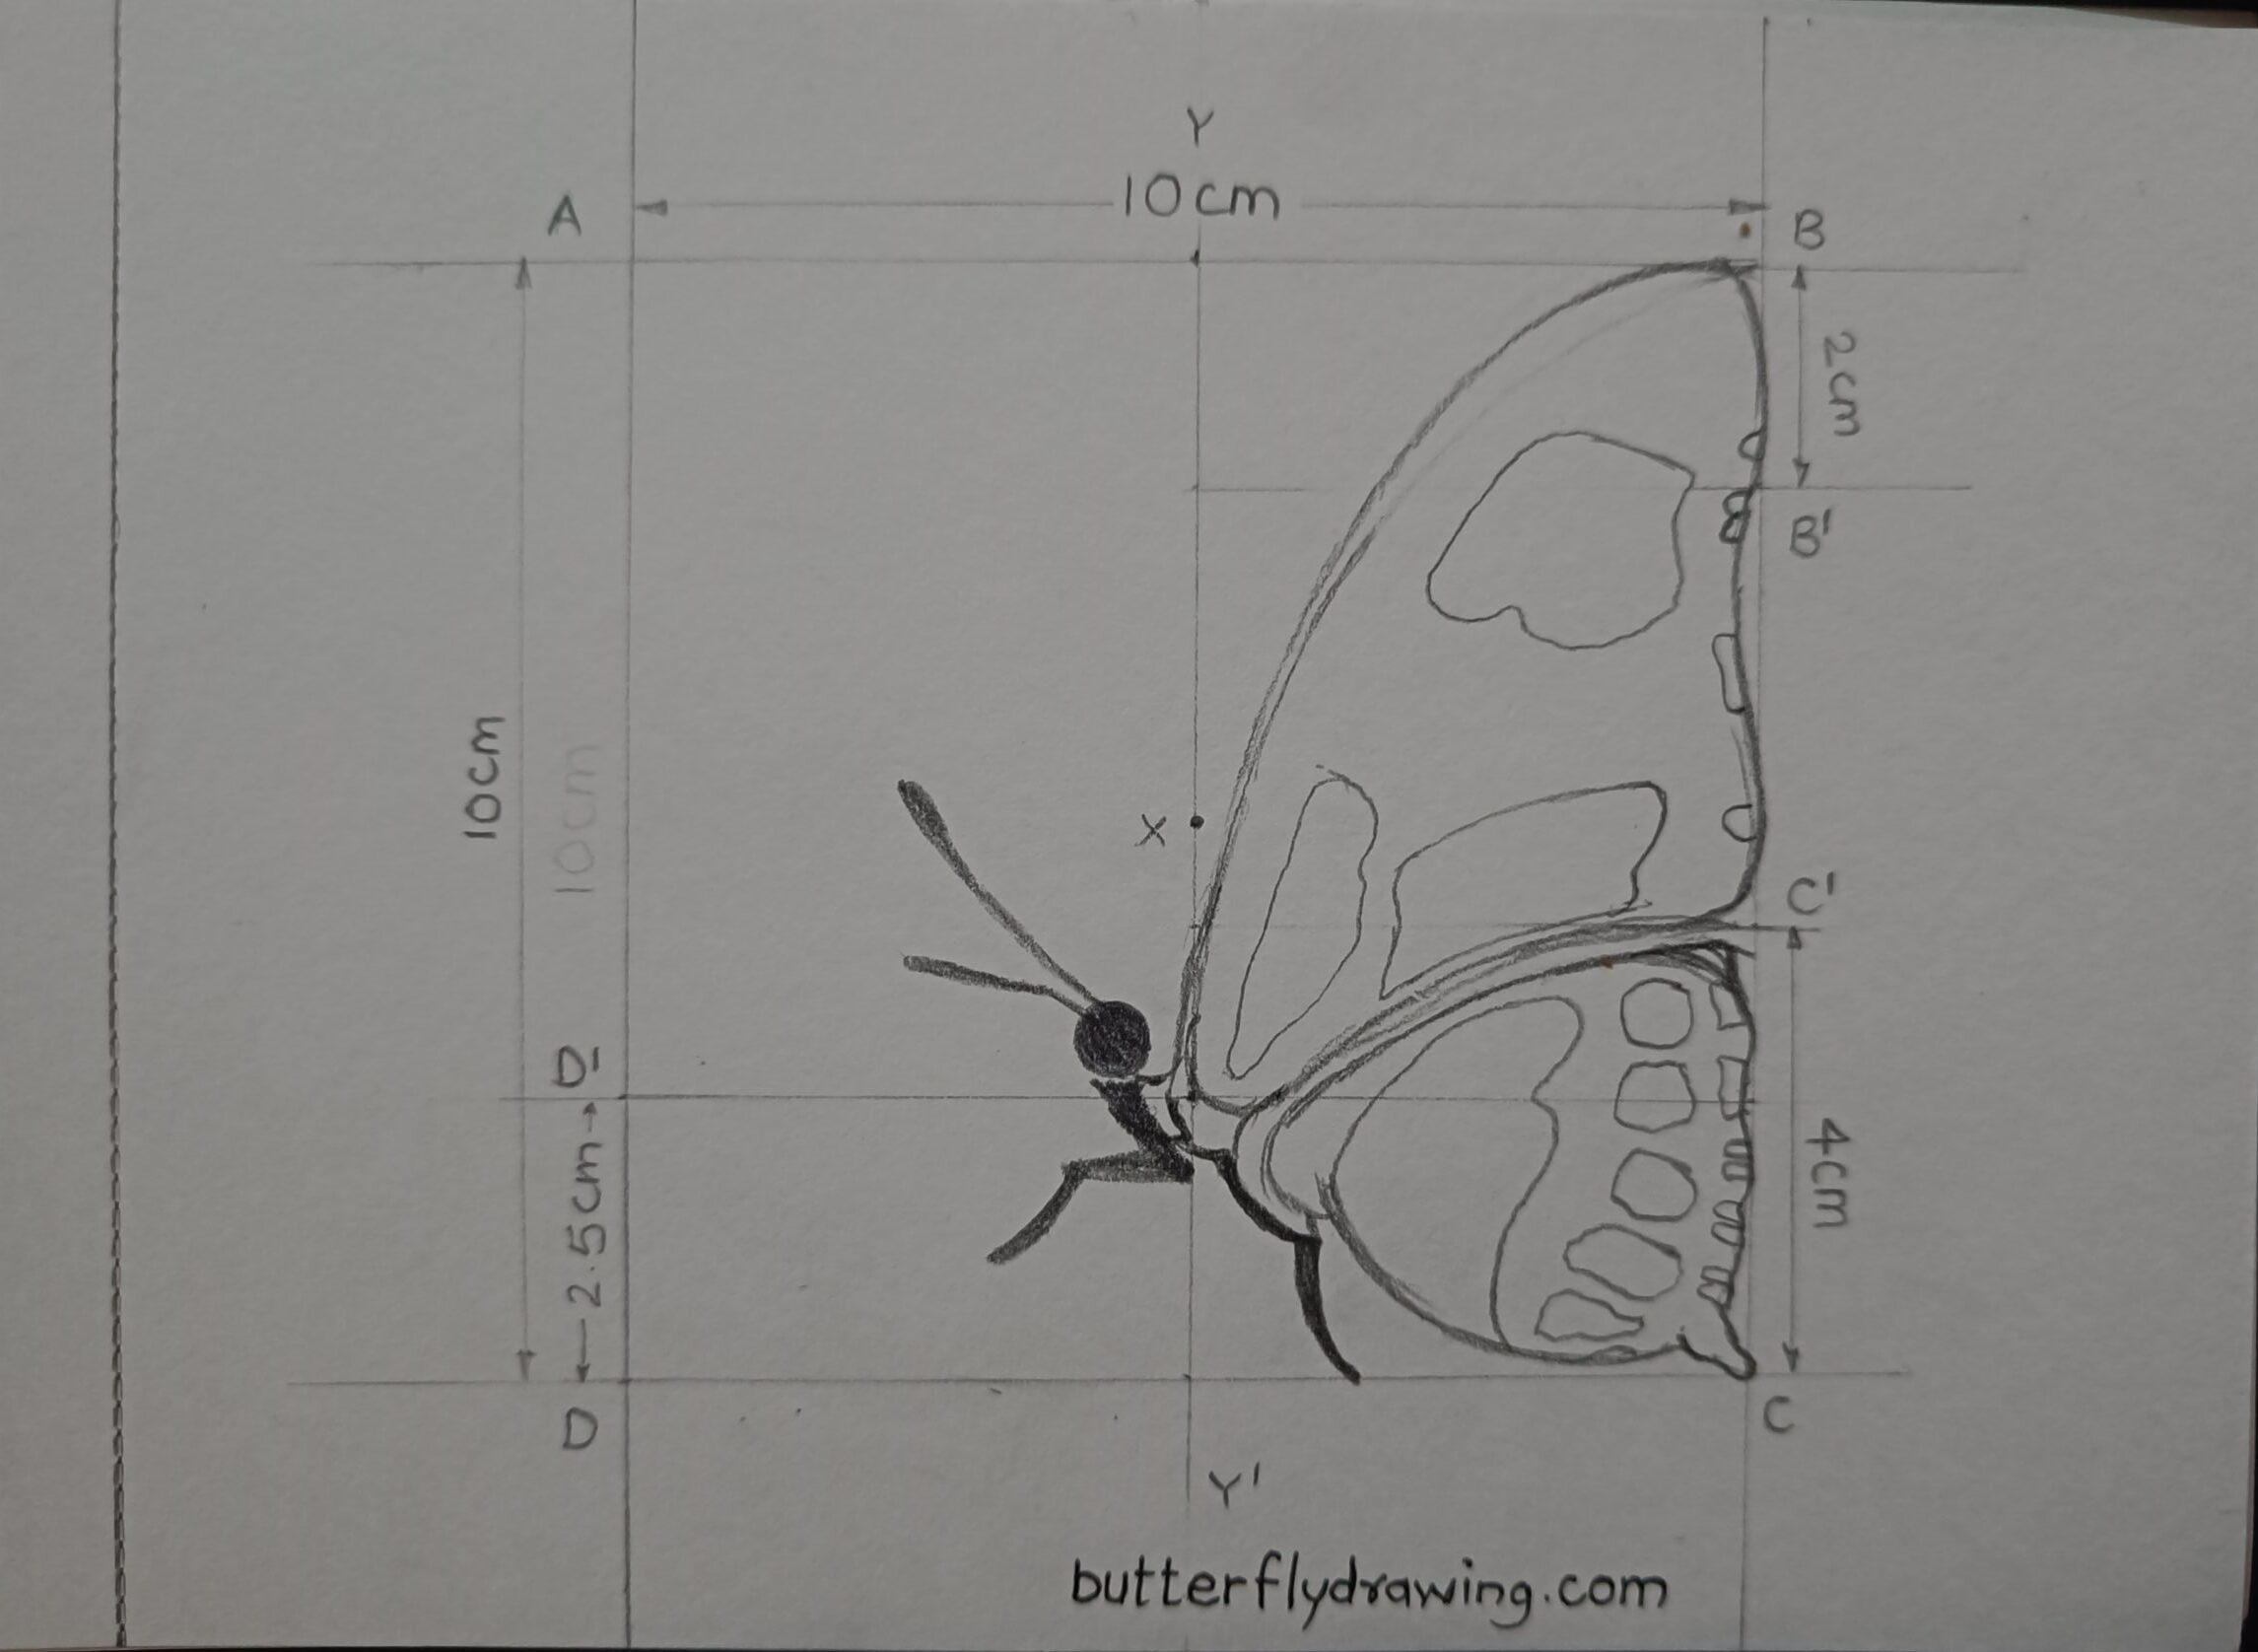
Step 2: Draw Wings
Drawing side view butterfly wings offers an opportunity to explore their elegance and intricate details while showcasing your artistic style and imagination power. Experiment with different techniques to bring life and beauty to your butterfly wing drawings. consider following point which you sketch butterfly wings.
- Shape & Structure
- Wings pattern
- Vein and Structure
- Freedom in art
Lets draw one side view wings of butterfly.
- draw border of wings start it from point Z and end toward the point B.
- similarly for small curve start from point B and end toward point B’.
- Start below outer line from line D’ and end with point C’. for more understanding refer below figure.

- For down side wing use same techniques. use free hand curve and fix below wing in down corner square.
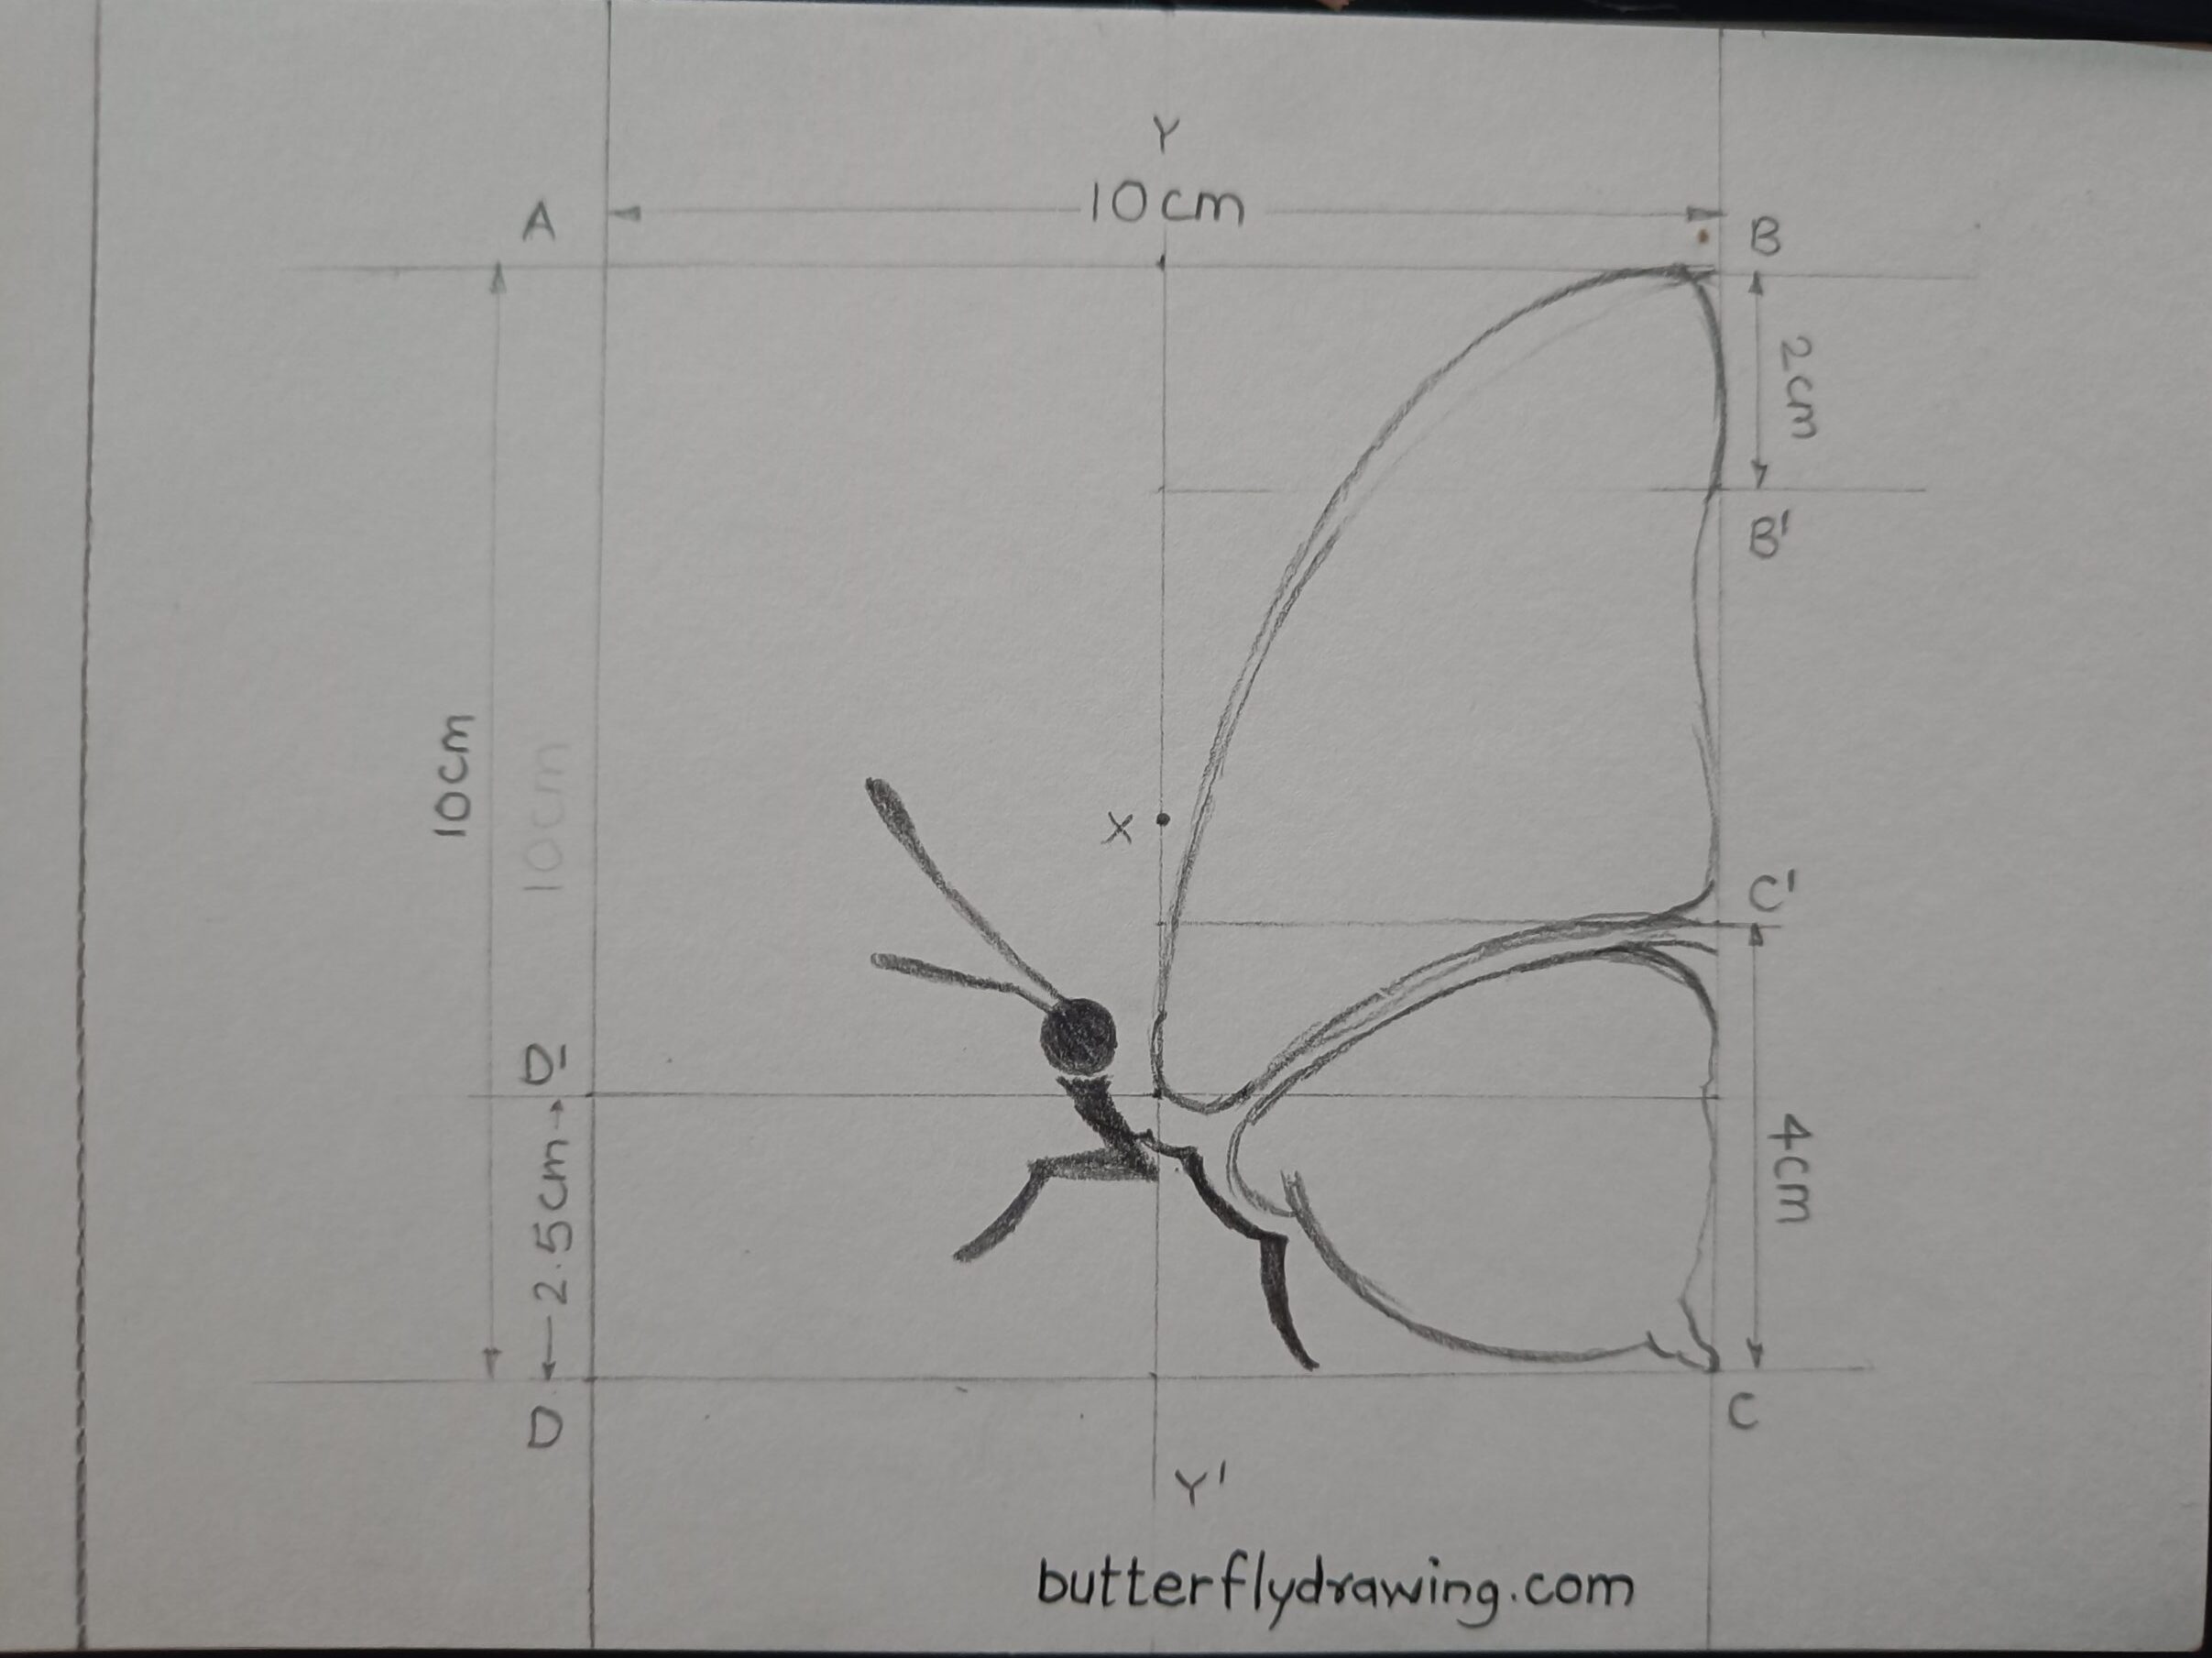
Step 3: Draw Abdomen & Thorax
simply draw shadow effect of butterfly body. make dark circle like a big dot then create bold antenna. construct the legs. if you are expert then draw it by direct using black pointer pen or black pen.
Step 4: Draw Wings Pattern
Create your favourite design on wing. Butterflies showcase a diverse array of wing patterns, each unique to different species. Here are some common types of wing patterns you can draw in butterflies.
- For your best Butterfly Drawing design You can draw Stripes, Long or parallel lines.
- Spots, Circular or oval-shaped
- Bars, Short, horizontal lines on wing
- Eyespots Large circular patterns resembling eyes
for our Side Butterfly Drawing we choose circular or rough oval shape, draw it according to your choice or for more refer below figure.
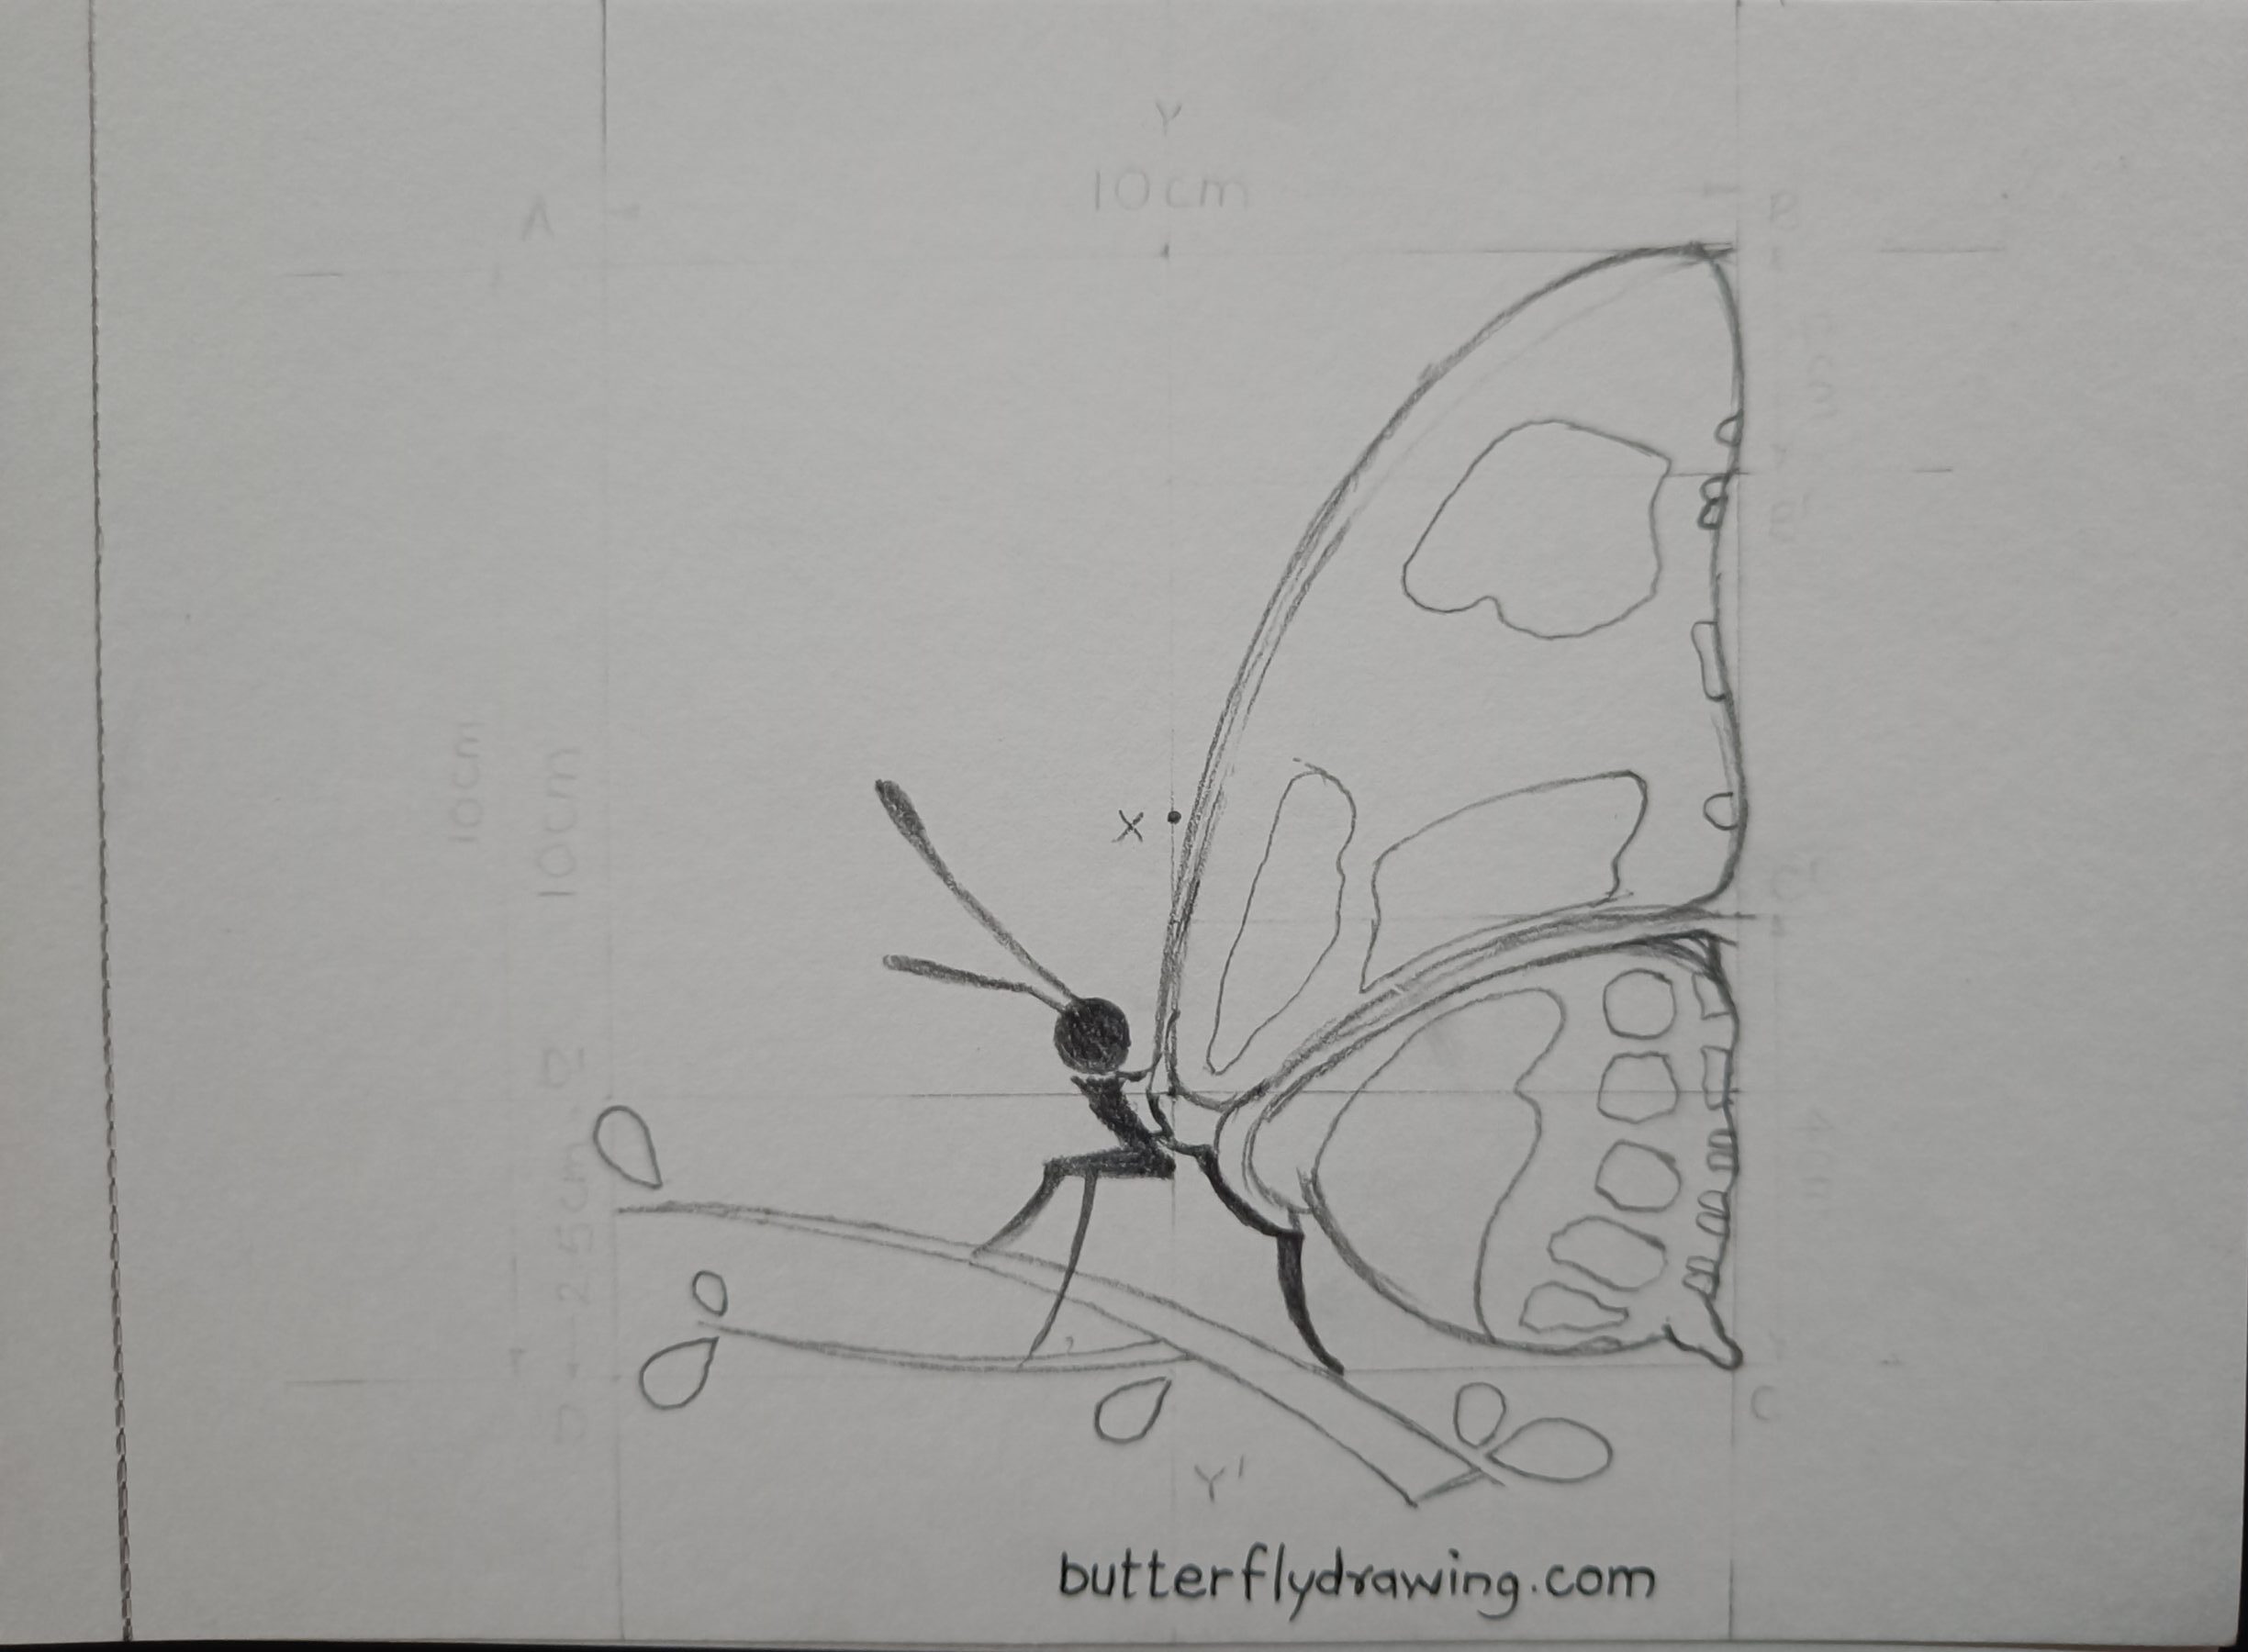
Step 5: Erase All Reference Point and line
erase all line, square, referral point and marking. clean drawing which look like free from referral zone.
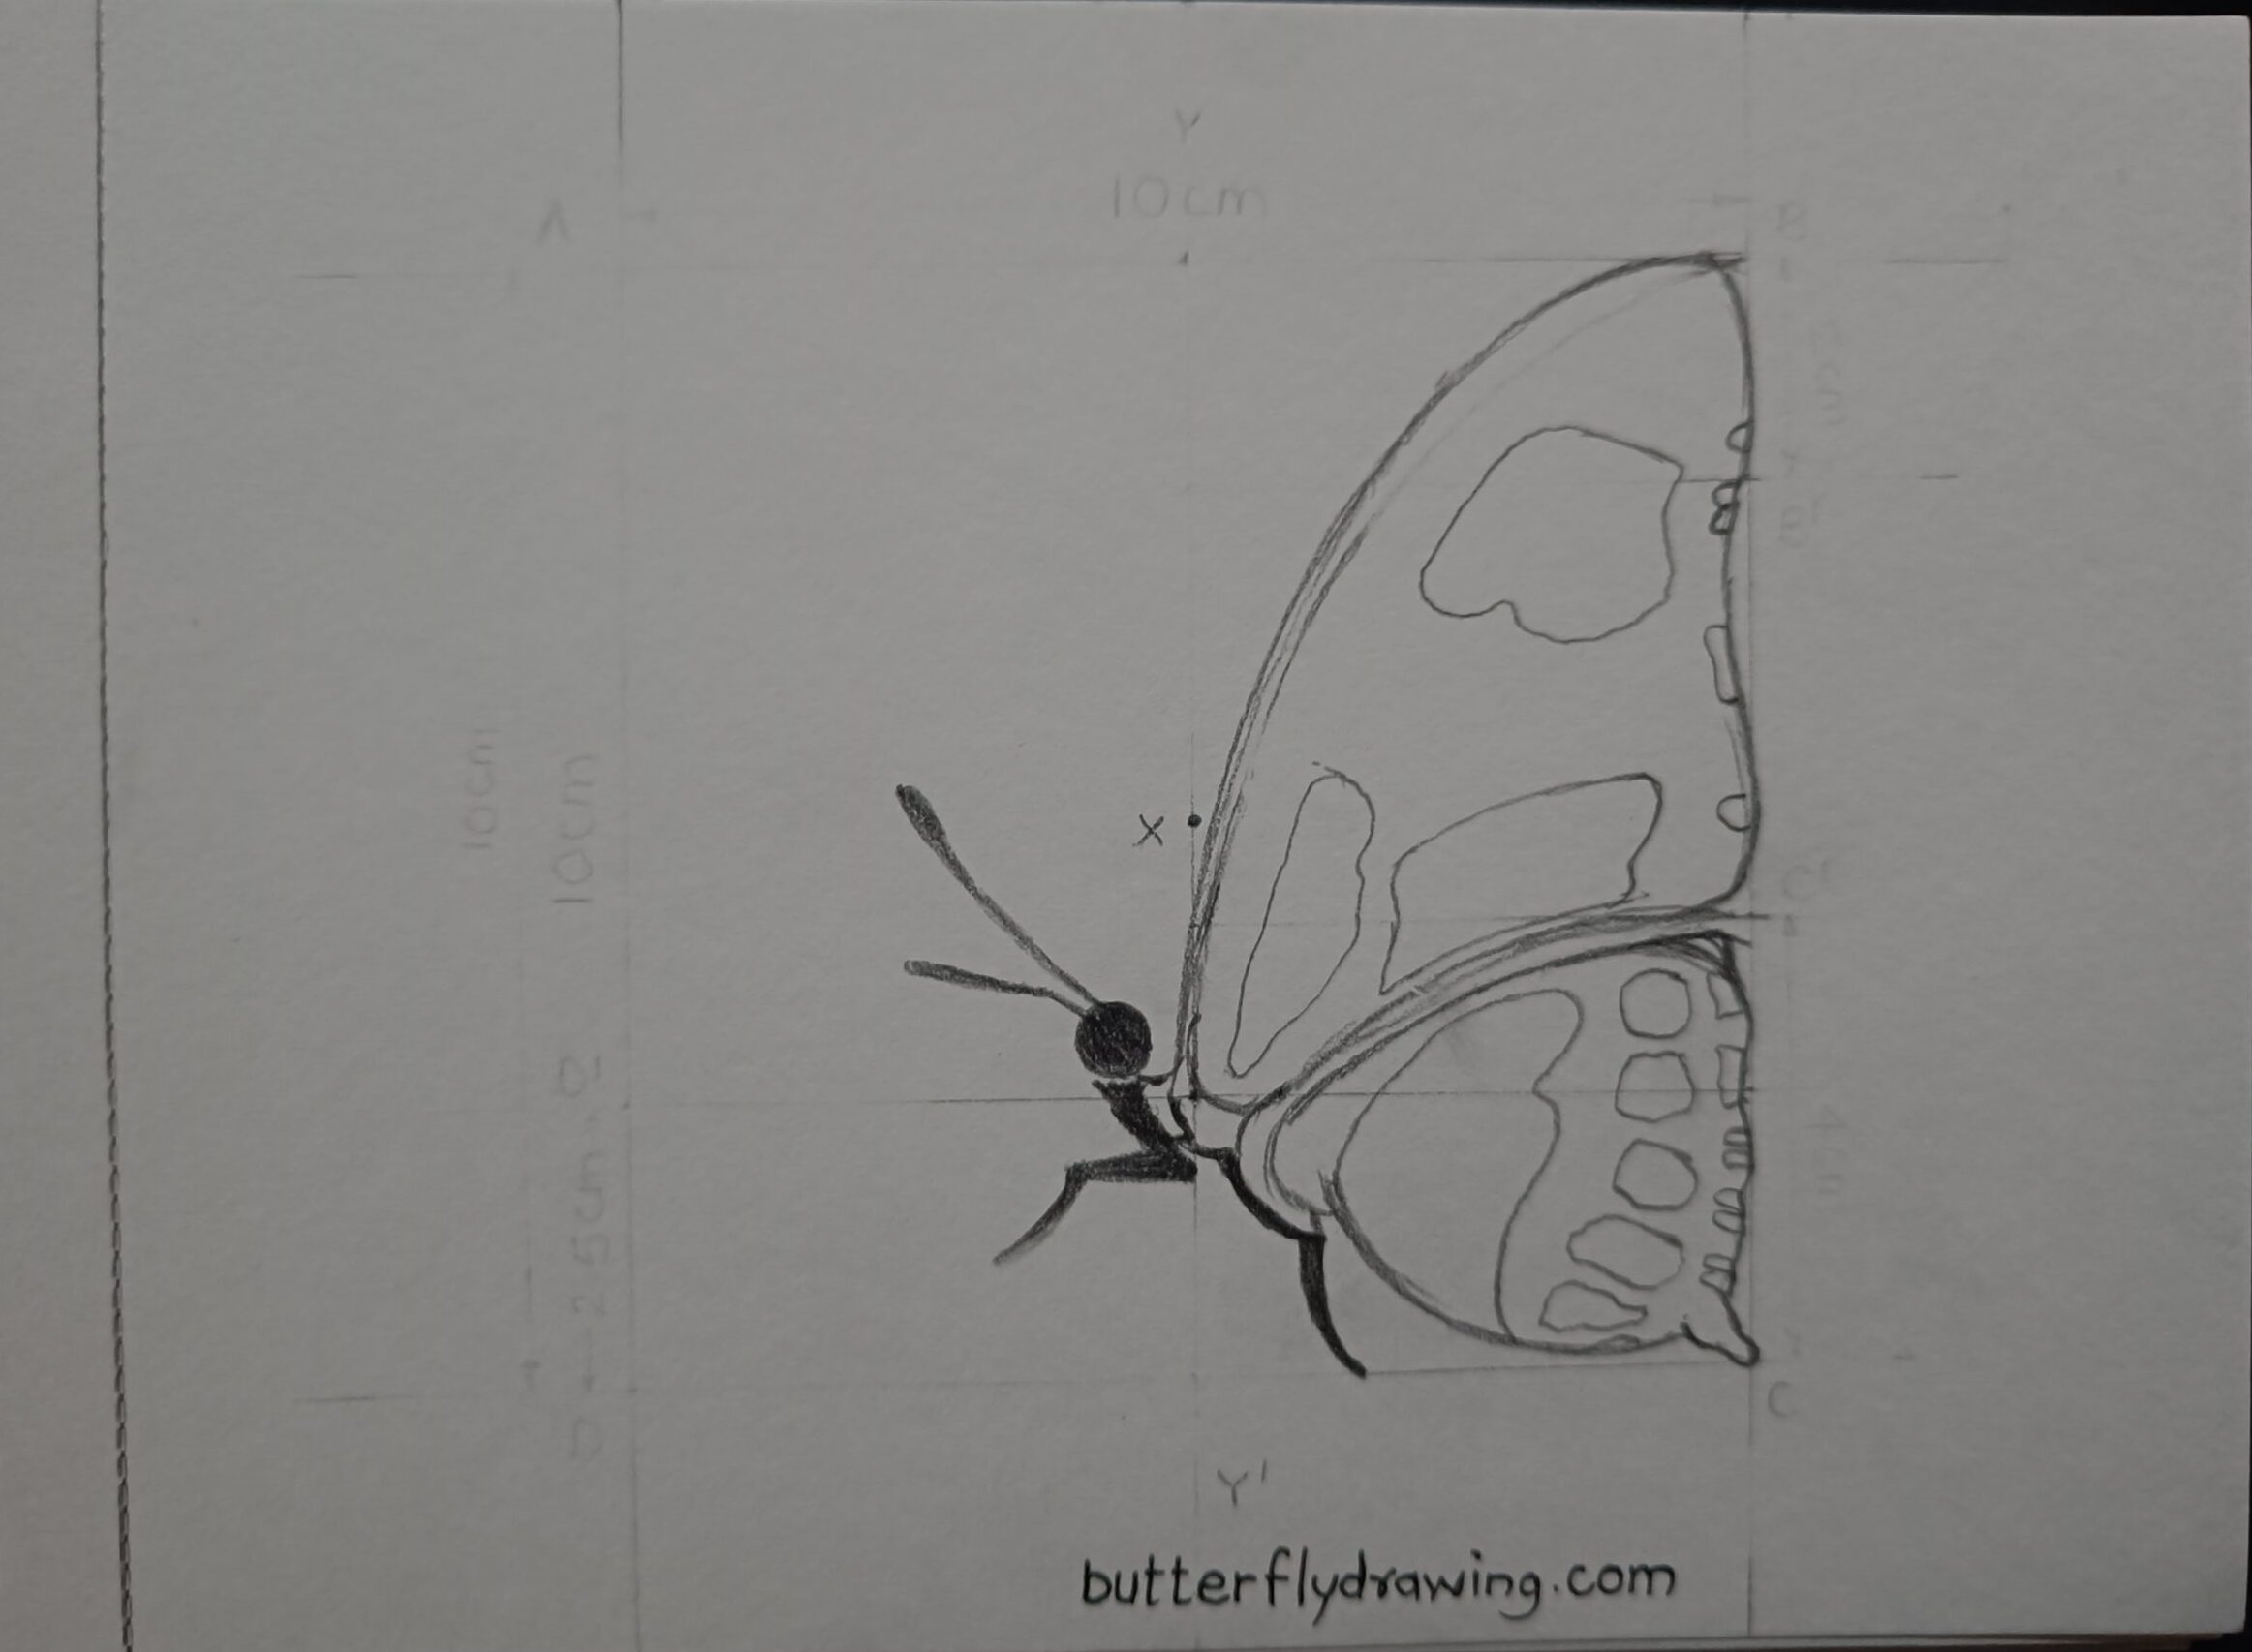
Step 6: Draw Stand or Branch of Tree
Step 7: Border the Drawing
use 0.5 mm pointer black pen are overlap on pencil border. 0.5 mm length gives sharpness to butterfly and make it very clean and visible. after recreating border erase pencil outline.
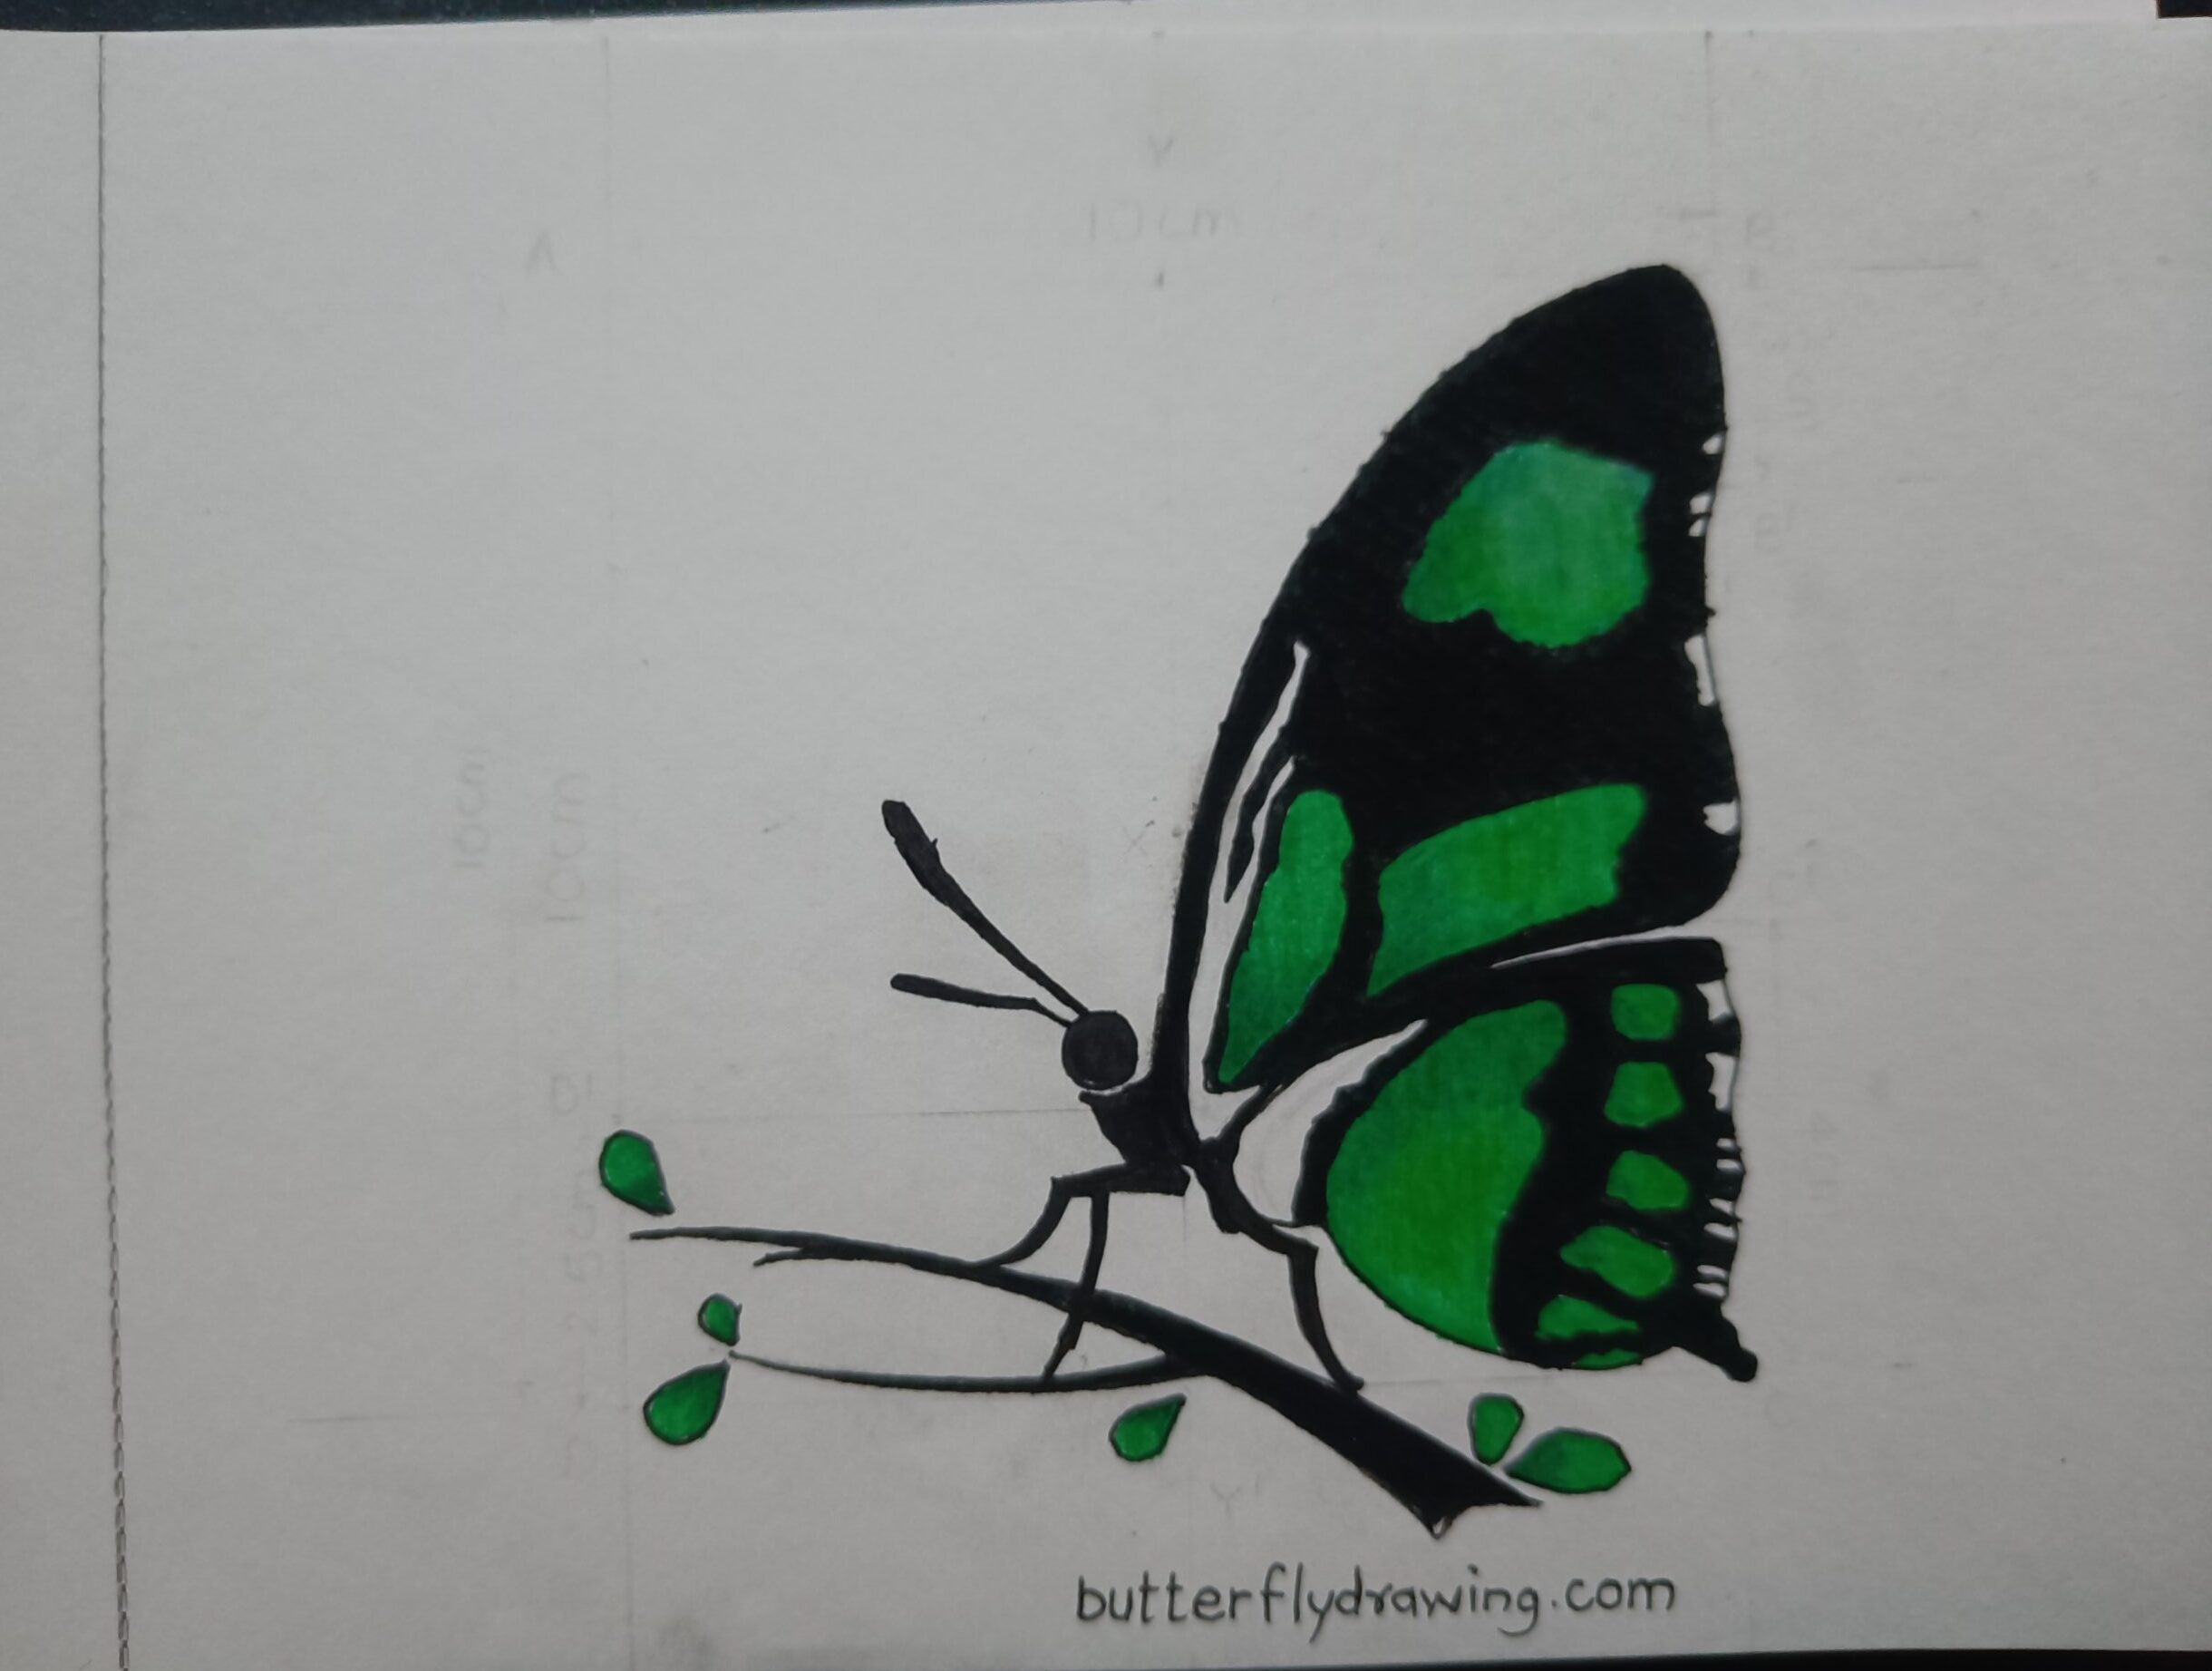
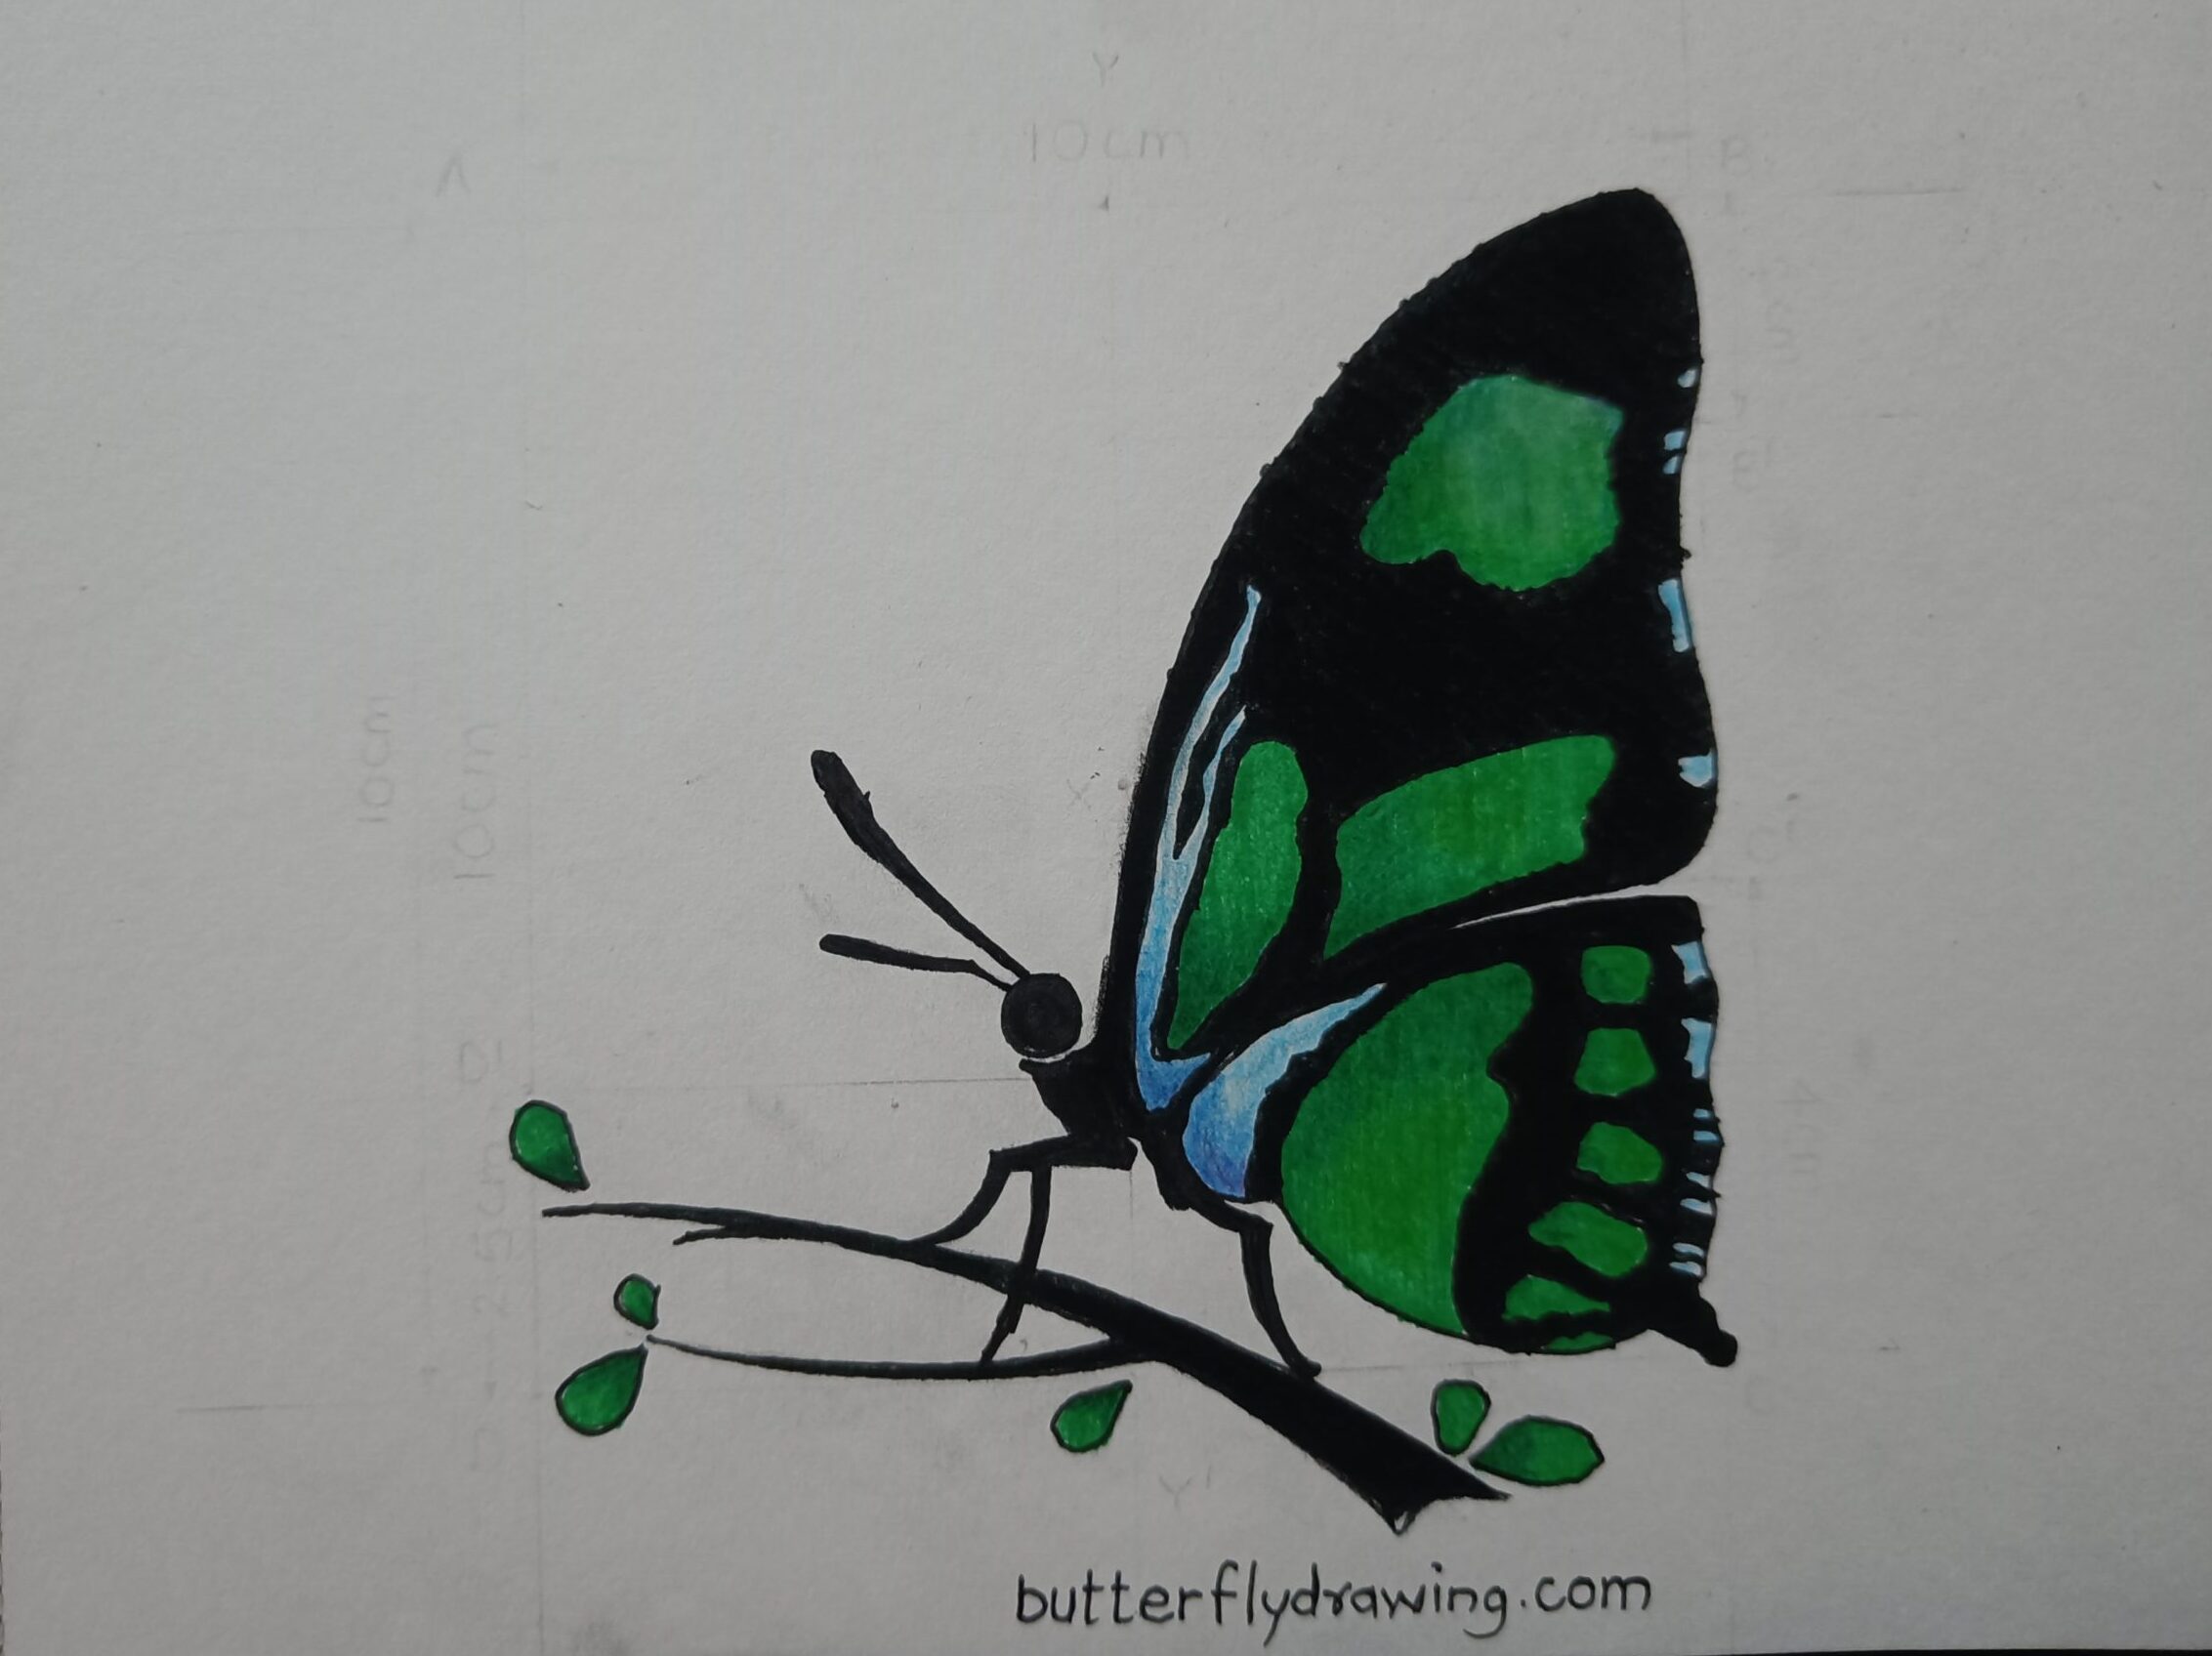
Step 8: Fill Colour
we only use four colour shade including Light Green, Dark Green, Black, Blue and basic colour shading technique.
Scaling or Ruler Technique:
Filling colours using a scale or ruler can help create neat and precise colour patterns in drawings.
- Use the ruler or scale as a guide to create a gradient effect. Start from one side of the area and make parallel lines or stripes with the light green coloured pencil, leaving some space between each line.
- insert light green colour in all rough oval shape.


- similarly use same technique to fill black colour.


- Use another colour that’s slightly darker (use black charcoal pencil colour) than the base colour. Draw lines parallel to the first set, slightly overlapping the previous lines to create a blending effect.
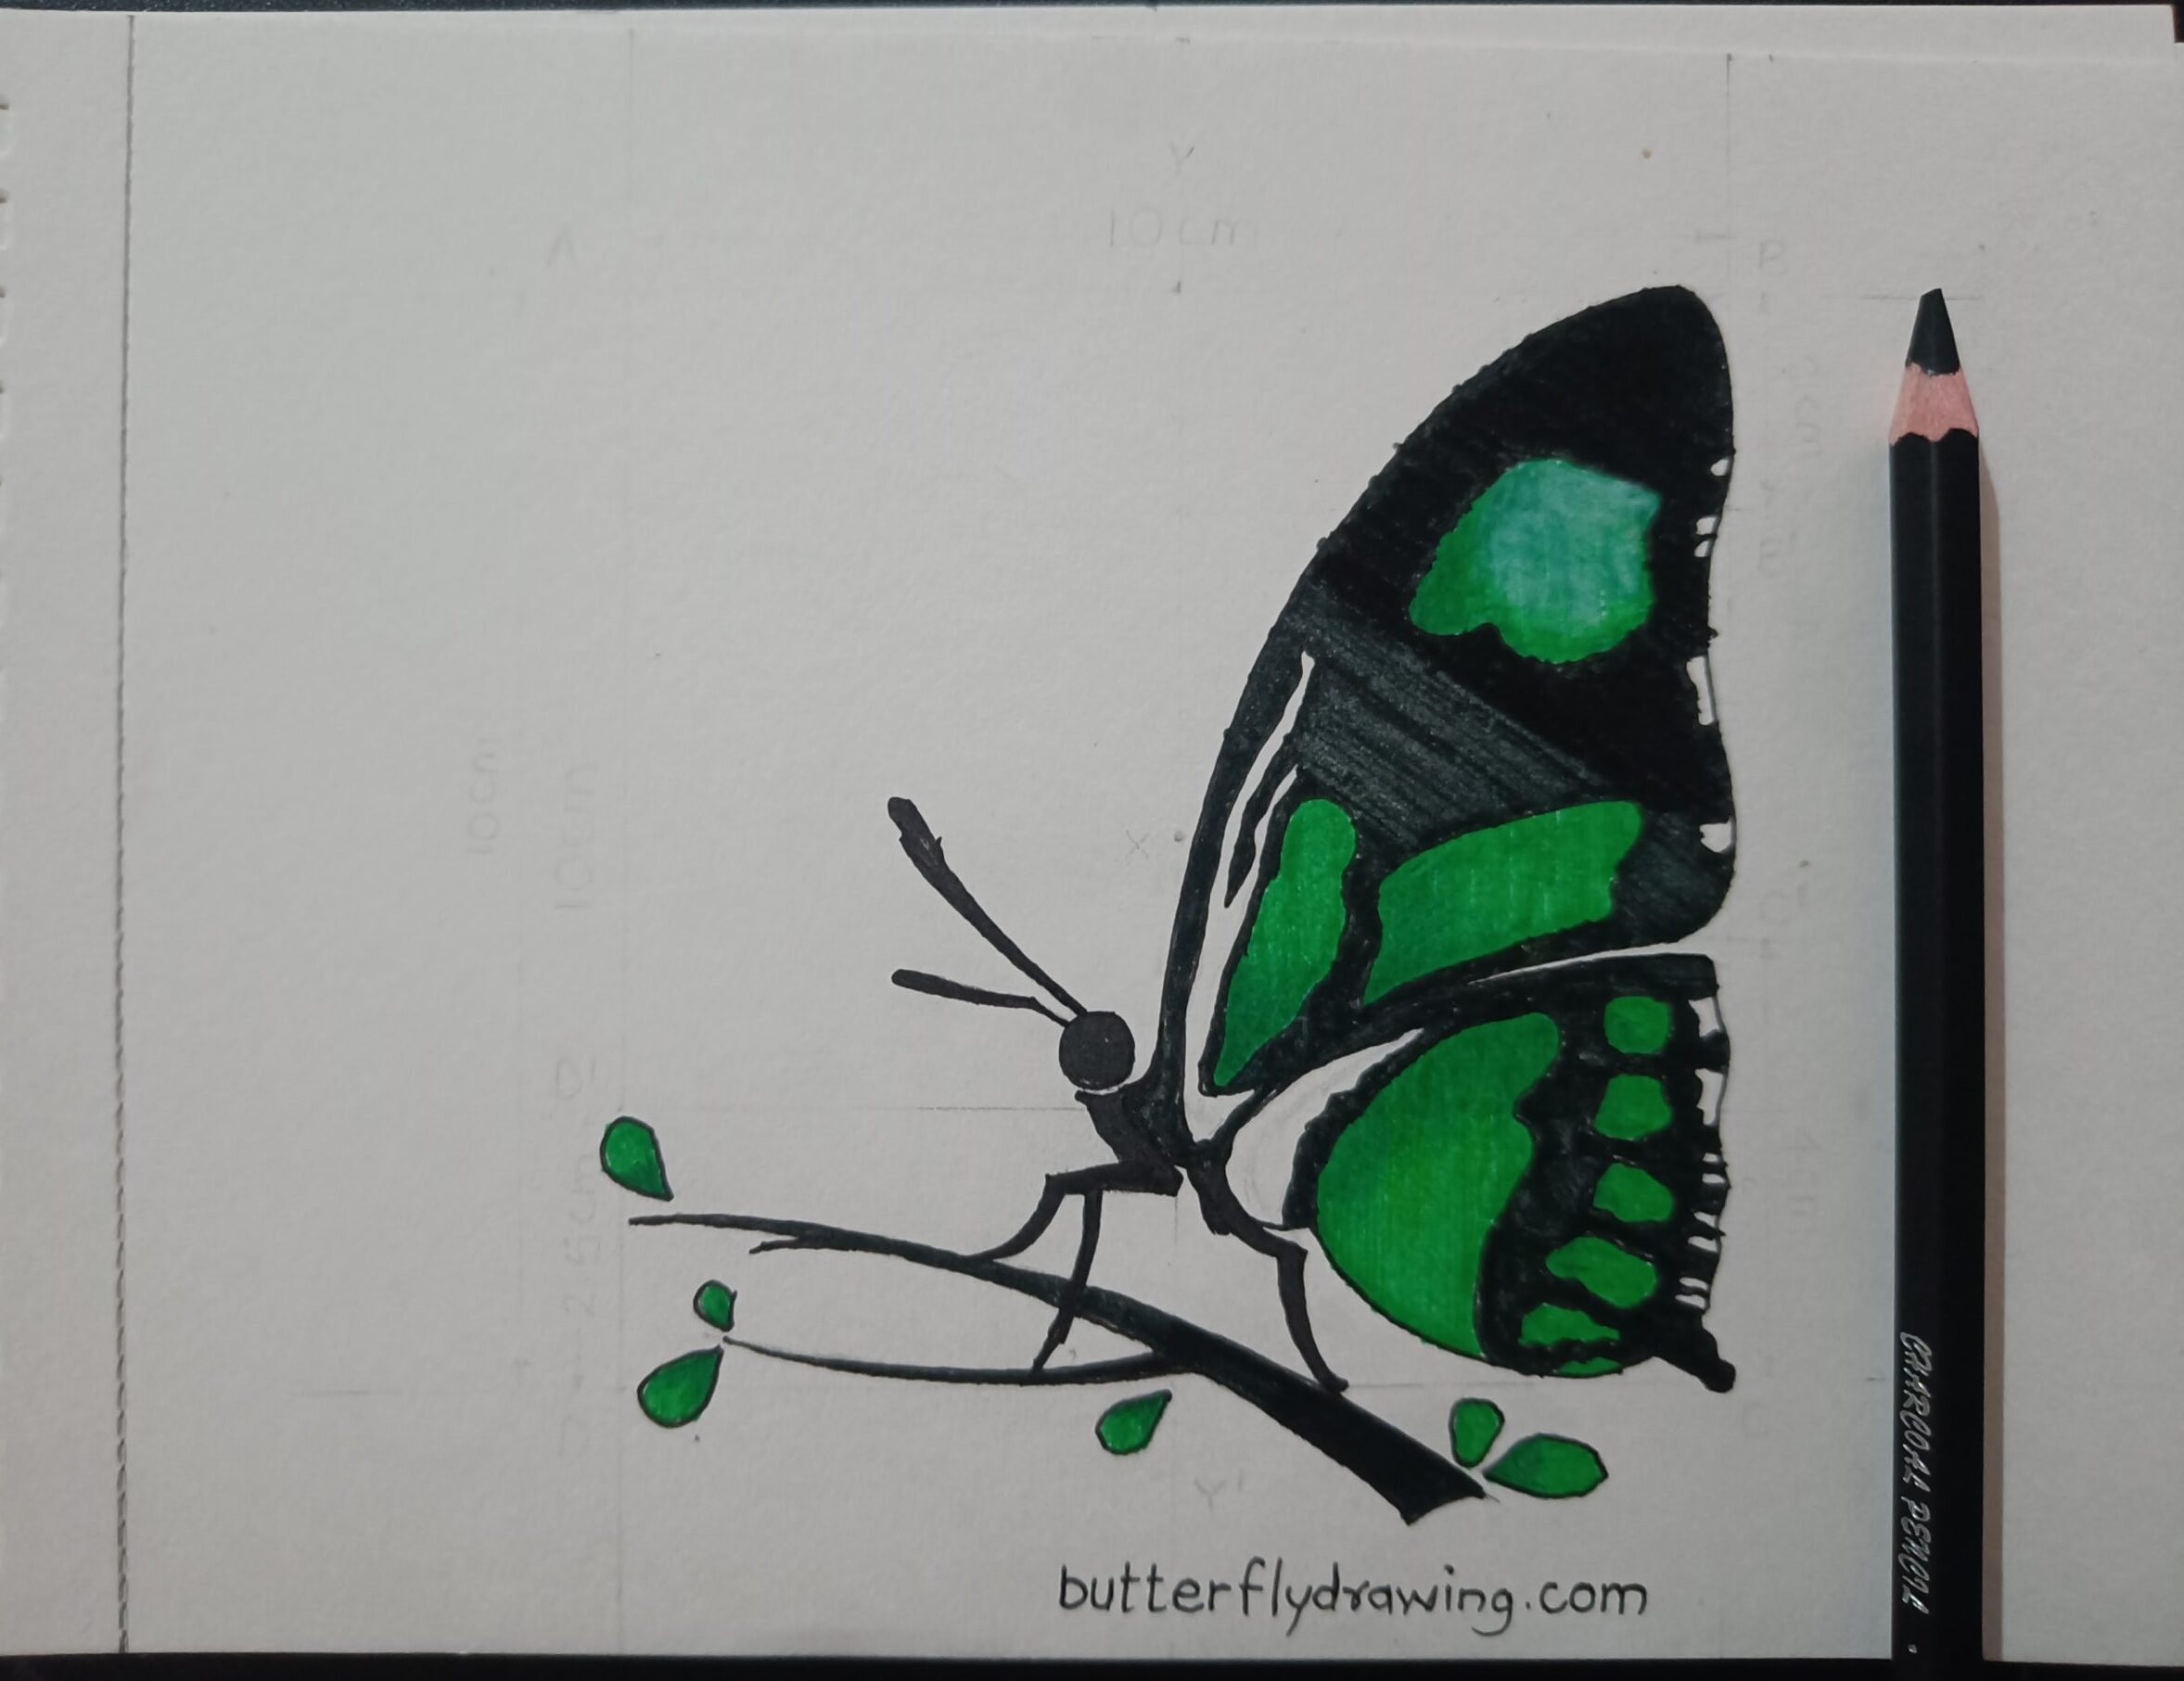
Charcoal base pencil create depth effect in drawing therefore our final drawing look more darker and realistic.
To ad more effectiveness in drawing we use sky blue and dark blue shade and fill it lighting in wings corner. the combination of blue, green and black are amazing.

Step 9: Final
Charcoal can easily transfer to your hands, so periodically clean your hands to avoid smudging your drawing unintentionally. similarly it has chance to spread on paper so erase all black spot on paper and clean it for final view.
Conclusion:
In all drawing colour step we are using a ruler or scale to fill the colour helps maintain straight lines and create a gradient effect when filling colours, allowing for a more accurate and controlled colouring process in your drawings. keep in mind, Adjust the pressure on the pencil for variations in colour intensity if there is any need then. for more result Experimenting with different techniques will help refine your colouring skills further.
Check easy Butterfly Drawing for Kids

Thanks for sharing. I read many of your blog posts, cool, your blog is very good.
Thank you!!
My brother suggested I would possibly like this web site. He was once entirely right. This put up truly made my day. You can not imagine simply how a lot time I had spent for this info! Thank you!
Thank you so much!! Keep Supporting